> For the complete documentation index, see [llms.txt](https://docs.archisketch.com/llms.txt). Markdown versions of documentation pages are available by appending `.md` to page URLs; this page is available as [Markdown](https://docs.archisketch.com/guide/user-jp/rendershot/rendering-guide.md).
# Archisketchレンダリング入門書
Archisketchでレンダーショットを上手に撮る方法

## Archisketchのレンダーショットをうまく撮る方法!
レンダースタジオの設定が複雑に感じますか?
心配しないでください!みなさんもインテリアデザイナーのように素敵なレンダーショットを撮れます。\
インテリアの特集写真のようにそれらしい成果物、私たちも作れます!\
さあ、気軽にやってみましょう?
## とりあえず撮ってみて感覚をつかむ
下の設定だけそのまま真似しても、基本的なクオリティは保証されます。\
あまり悩まず、まずは撮ってみてください!\
感覚をつかんでから細部を調整すると、ずっと楽です。
#### 1. 視野角
* まずはデフォルト値で撮ってみてください。(デフォルト:60)

#### 壁や手前の家具に隠れてよく見えないなら?
{% hint style="info" %}
空間全体を一目で収めたいからと視野角を上げすぎると、歪みがひどくなります!カメラクリップを使って隠れる部分を切り取ってみましょう!
{% endhint %}


#### 2. カメラの角度/高さ
* カメラの角度は必ず0度に設定してください!
* 900〜1200mmの間に設定してください。(この高さがインテリアショットを撮るのに最も適した高さ!)

うまくついてきていただければ、下のようなBefore & Afterをご覧いただけます🌝


構図がずっと安定して見えませんか?🤩
{% hint style="info" %}
カメラ角度設定のTip!要約
**視野角60** 超えないように!
カメラ **角度は0度**
カメラ **高さ900〜1200mm** の間に設定
{% endhint %}
***
## 明るさの問題を解決する️
設定は全部したのに、明るさがどうも気に入らないですか?\
心配しないでください!\
照明と背景設定を少し調整すれば、ずっと自然で素敵な成果物が得られます。
#### 明るすぎてまぶしいなら?
* **背景画像**を変更してみてください。
* デフォルト設定(NONE)は白い背景なので、最も明るいです。
* 背景画像を選んで、リアルな雰囲気を加えてみましょう。


* **環境設定の強度**を下げてください。
* 背景画像の明るさを下げると、室内の明るさも一緒に下がります。

#### 暗すぎて雰囲気が不気味なら?
* **追加の照明強度を上げてみてください。**
* 実はレンダースタジオには見えない照明が隠れています! (デフォルト強度:20)
* もっと明るさが欲しいなら? 強度をぐっと上げてテストしてみましょう!

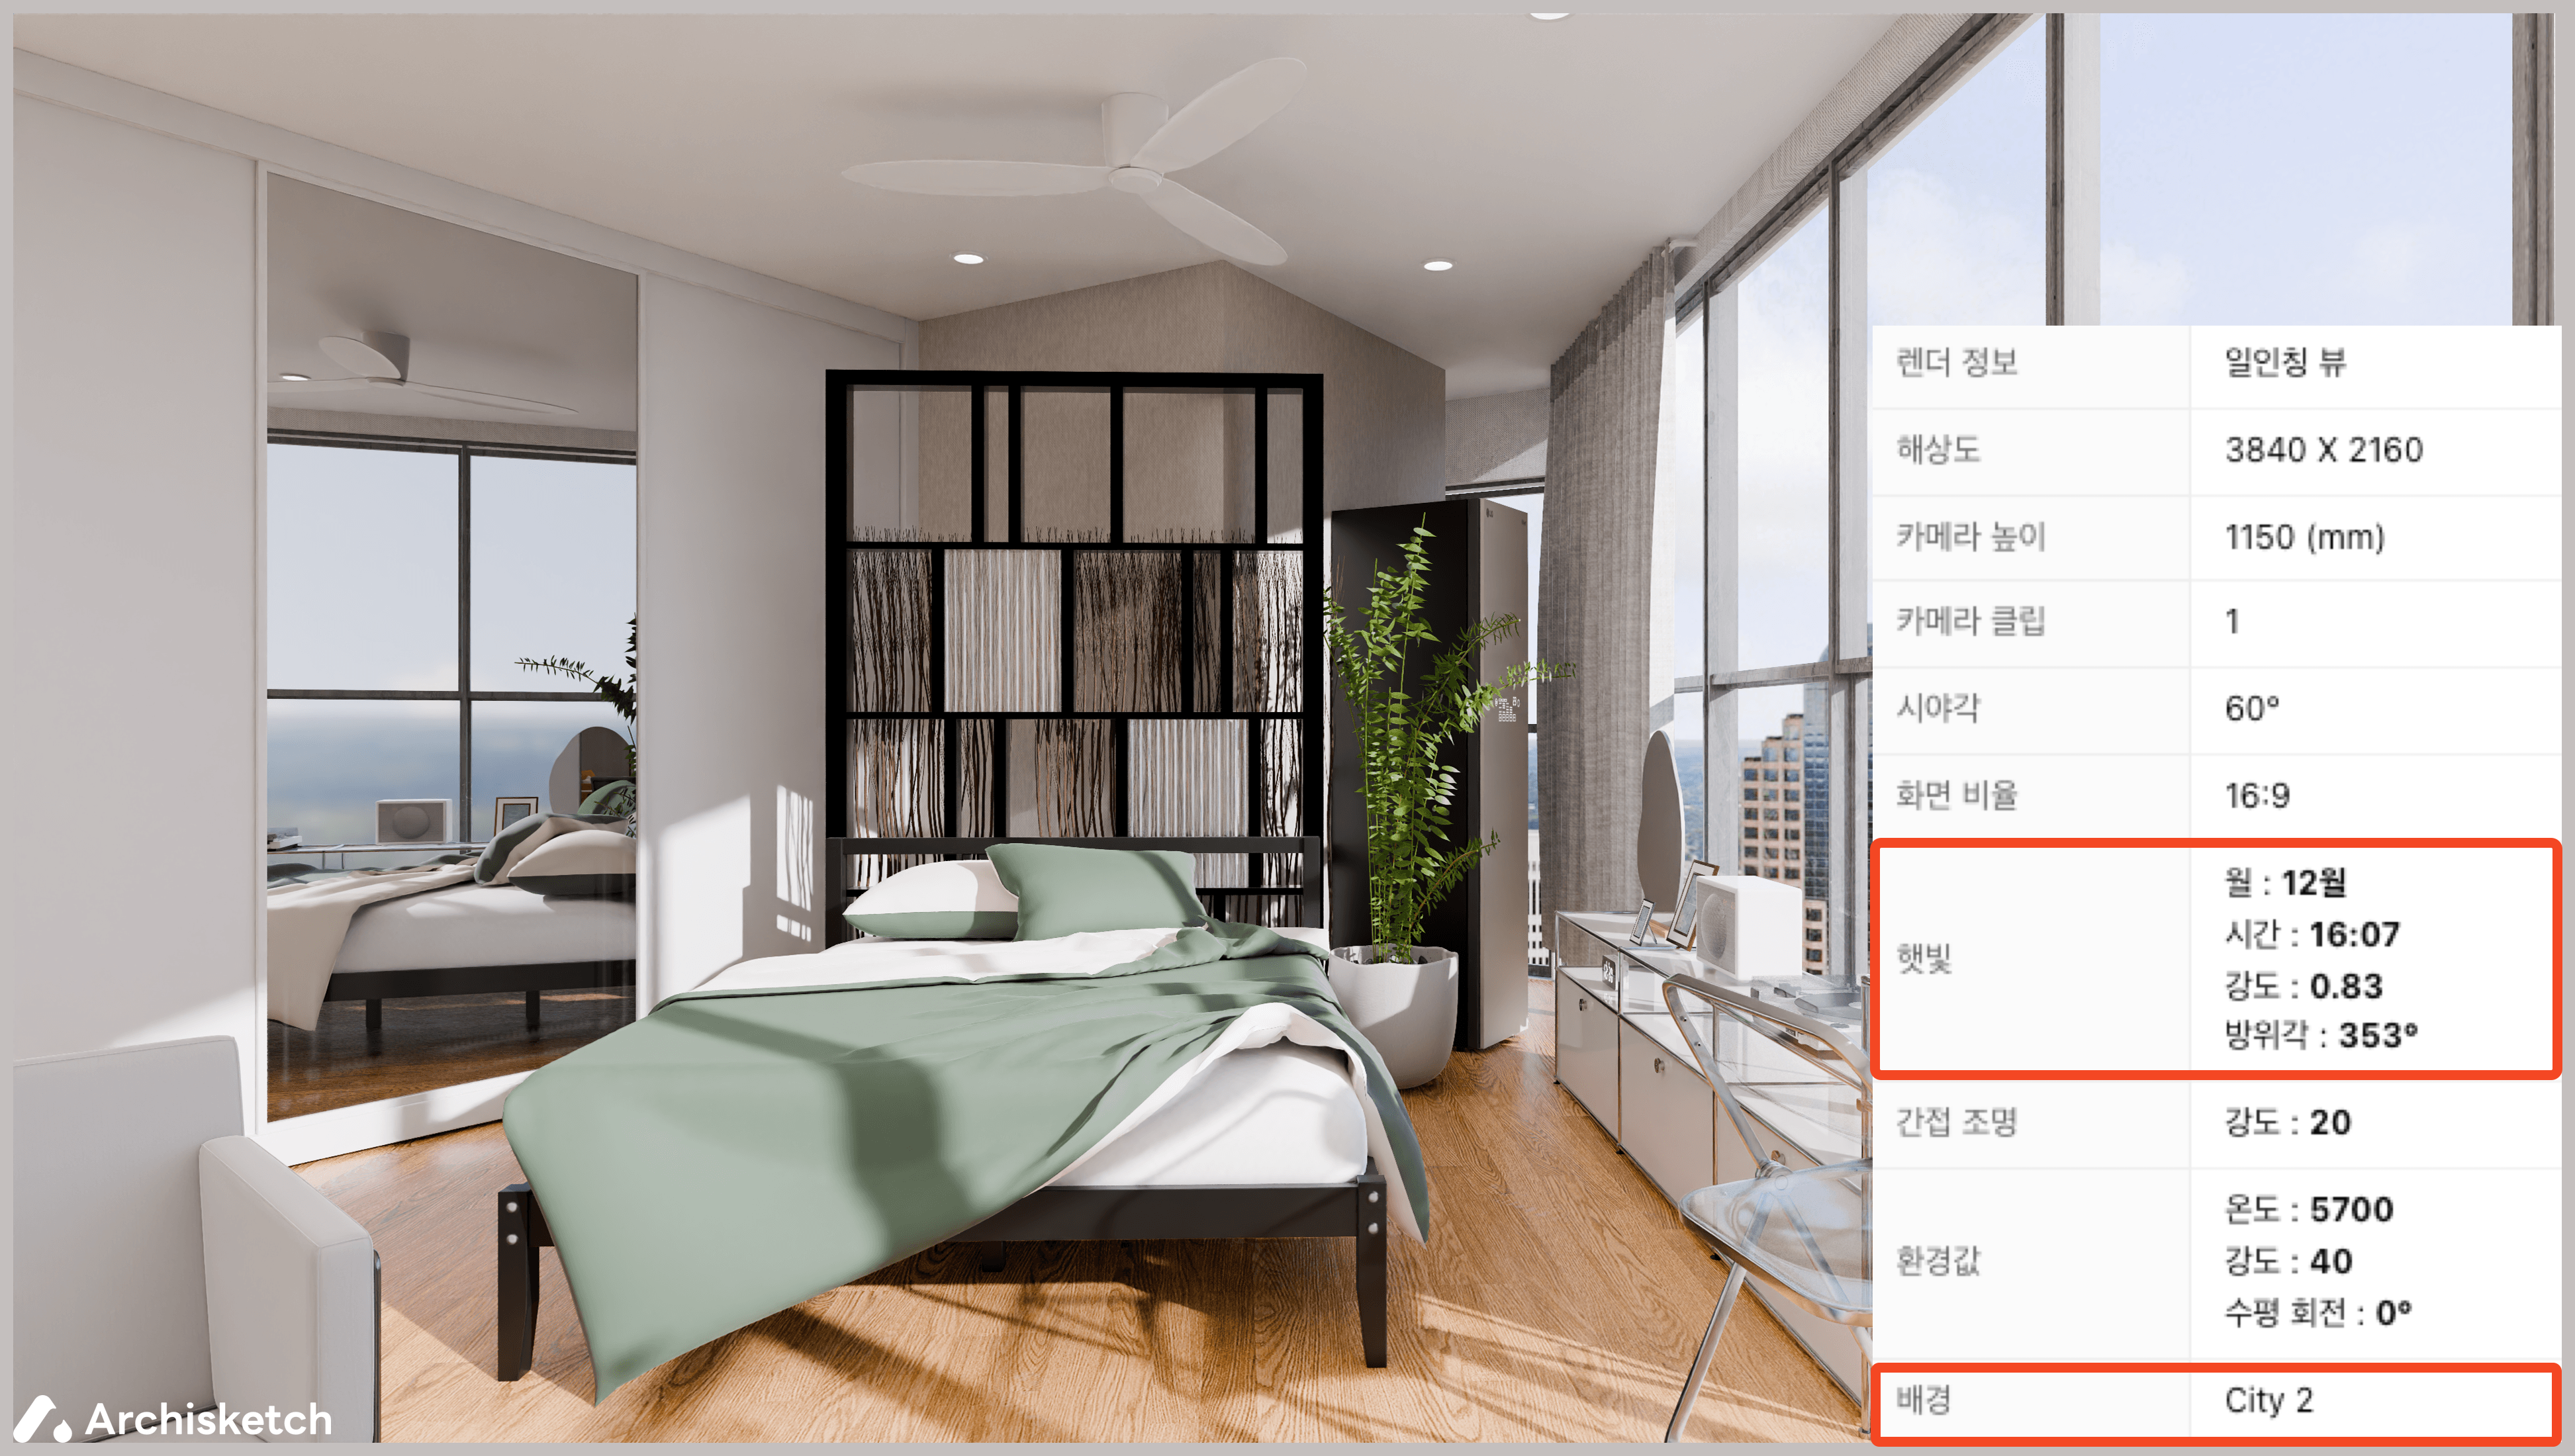
* **太陽光を室内に取り込みましょう。**
* 窓から日差しが入ると、室内が明るくなります。
* ヒント:12月または1月に月を変更した後、太陽光の角度を調整すると、日差しが家の中によりよく入ります。
* 推奨強度:0.3〜1.0(強すぎると明るくなりすぎることがあるので、適切な強度を見つけてください。)
太陽光強度:0.83
{% hint style="info" %}
レンダリングTip!
**明るすぎるとき**
背景画像を入れる
環境設定の強度を下げる
**暗いとき**
追加の照明強度を上げる
太陽光を入れる
鏡や反射面に映った家具は **4K以上の解像度**でレンダリングすると確認できます。
{% endhint %}
さあ、これでみなさんもプロのように素敵なレンダーショットを撮れます!
とりあえず撮って、修正しながら最適な結果を探してみてください。レンダリングは練習あるのみです!
---
# Agent Instructions
This documentation is published with GitBook. GitBook is the documentation platform designed so that both humans and AI agents can read, navigate, and reason over technical content effectively. Learn more at gitbook.com.
## Querying This Documentation
If you need additional information that is not directly available in this page, you can query the documentation by asking a question.
Perform an HTTP GET request on the following URL with the `ask` and `goal` query parameters:
```
GET https://docs.archisketch.com/guide/user-jp/rendershot/rendering-guide.md?ask=&goal=
```
`ask` is the immediate question: it should be specific, self-contained, and written in natural language.
`goal` is what the user is ultimately trying to achieve, the reason they need the answer. Sharing it helps GitBook give you a better, more relevant answer. A goal is most helpful when it describes the outcome the user wants rather than restating the question. For example, with `ask=how do I create an API token`, a goal like `automate deployments from our CI pipeline` lets GitBook tailor the answer to that use case.
The response will contain a direct answer to the question and relevant excerpts and sources from the documentation.
Use this mechanism when the answer is not explicitly present in the current page, you need clarification or additional context, or you want to retrieve related documentation sections.