> For the complete documentation index, see [llms.txt](https://docs.archisketch.com/llms.txt). Markdown versions of documentation pages are available by appending `.md` to page URLs; this page is available as [Markdown](https://docs.archisketch.com/guide/user-jp/expert-feature/cad-upload.md).
# CADアップロード
ArchisketchはCAD図面のアップロード機能に対応しています。ただし、アップロード前に、図面のLayerがArchisketchの要件に合わせて整理されている必要があります。Layerが整理されていないとエラーが
Archisketch は CAD 図面のアップロード機能をサポートしています。\
ただし、アップロード前に、図面のレイヤーが Archisketch の要件に合うよう整理されている必要があります。\
レイヤーの整理ができていないとエラーが発生する可能性があるため、必ず下記の案内を参考に整理してからアップロードしてください。
{% hint style="warning" %}
この機能はArchisketchの有料顧客向けに提供されています。
{% endhint %}
## 例
## アップロード可能なファイル形式(DXF)
* ファイル形式: DXF
* 最大ファイルサイズ: 10MB
## CADでレイヤーを整理する
Archisketch は合計4つのレイヤーのみ認識できます。\
図面をアップロードする前に、CADで下記のようにレイヤー名を設定してください。(大文字・小文字を区別せずに設定可能)
| 種類 | レイヤー名 |
| -- | --------------------------- |
| 壁 | **`wall`** |
| ドア | **`door`** |
| 窓 | **`window`** |
| 柱 | **`line`** または **`column`** |
### 壁
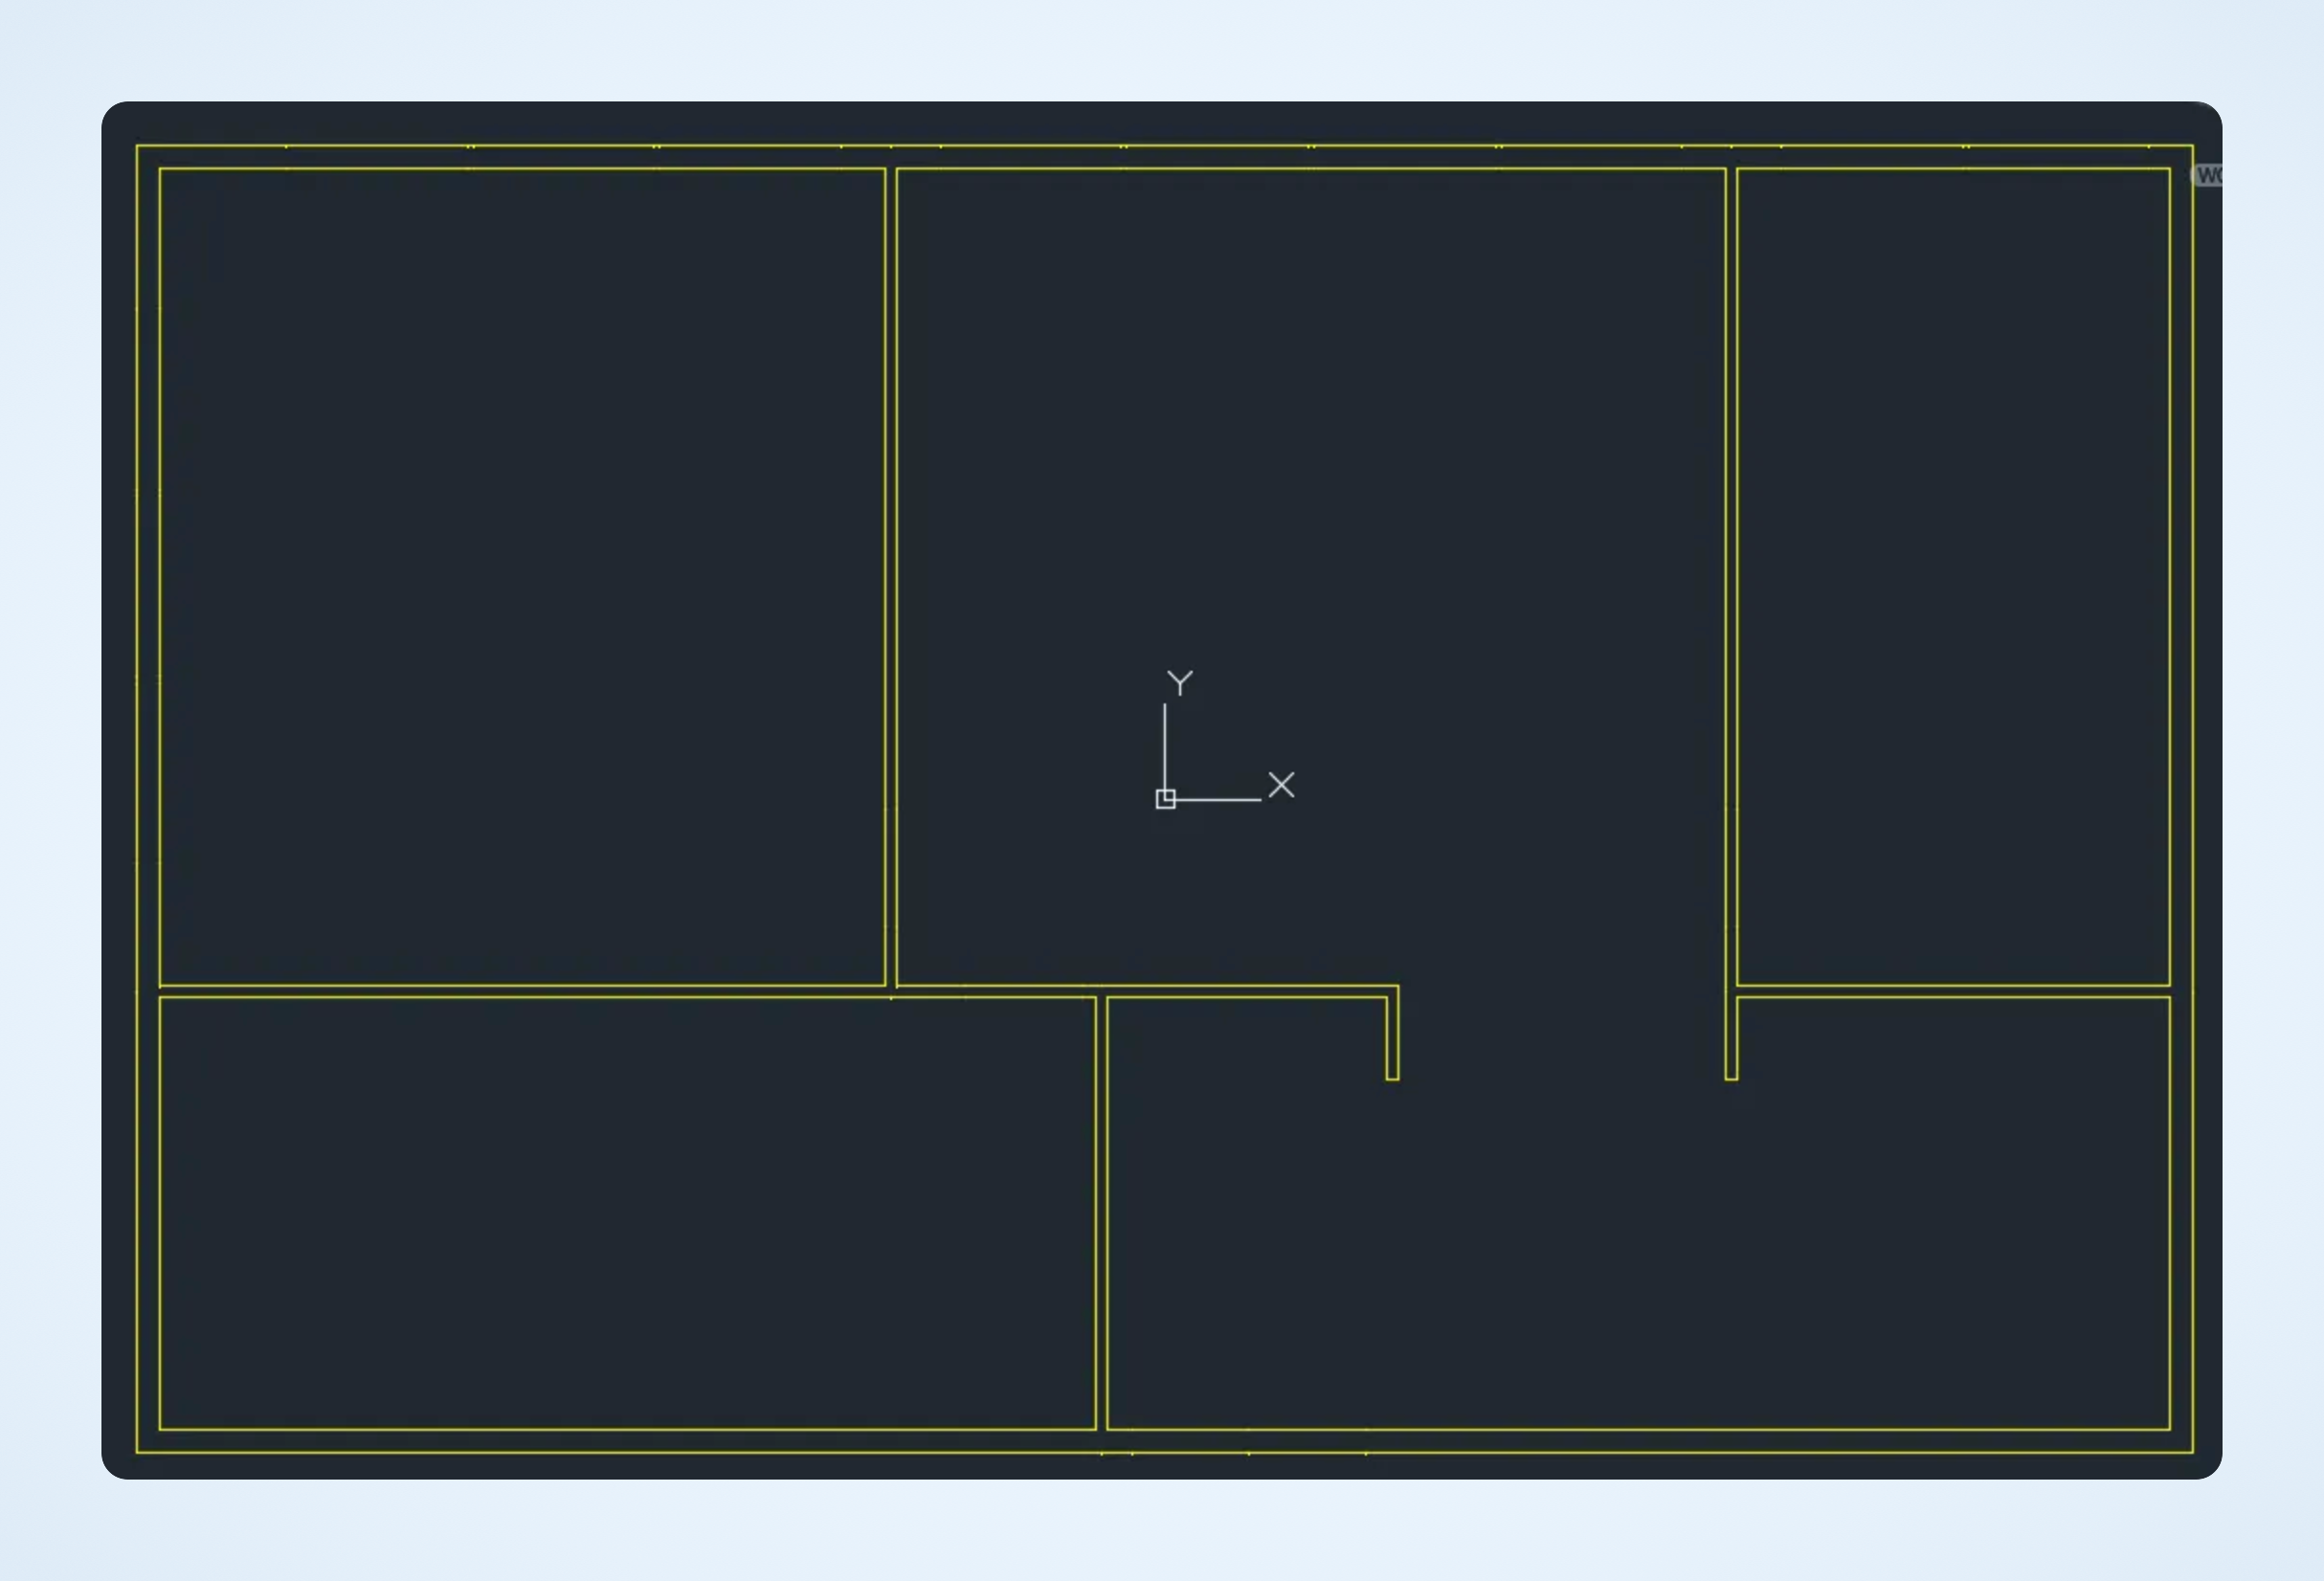
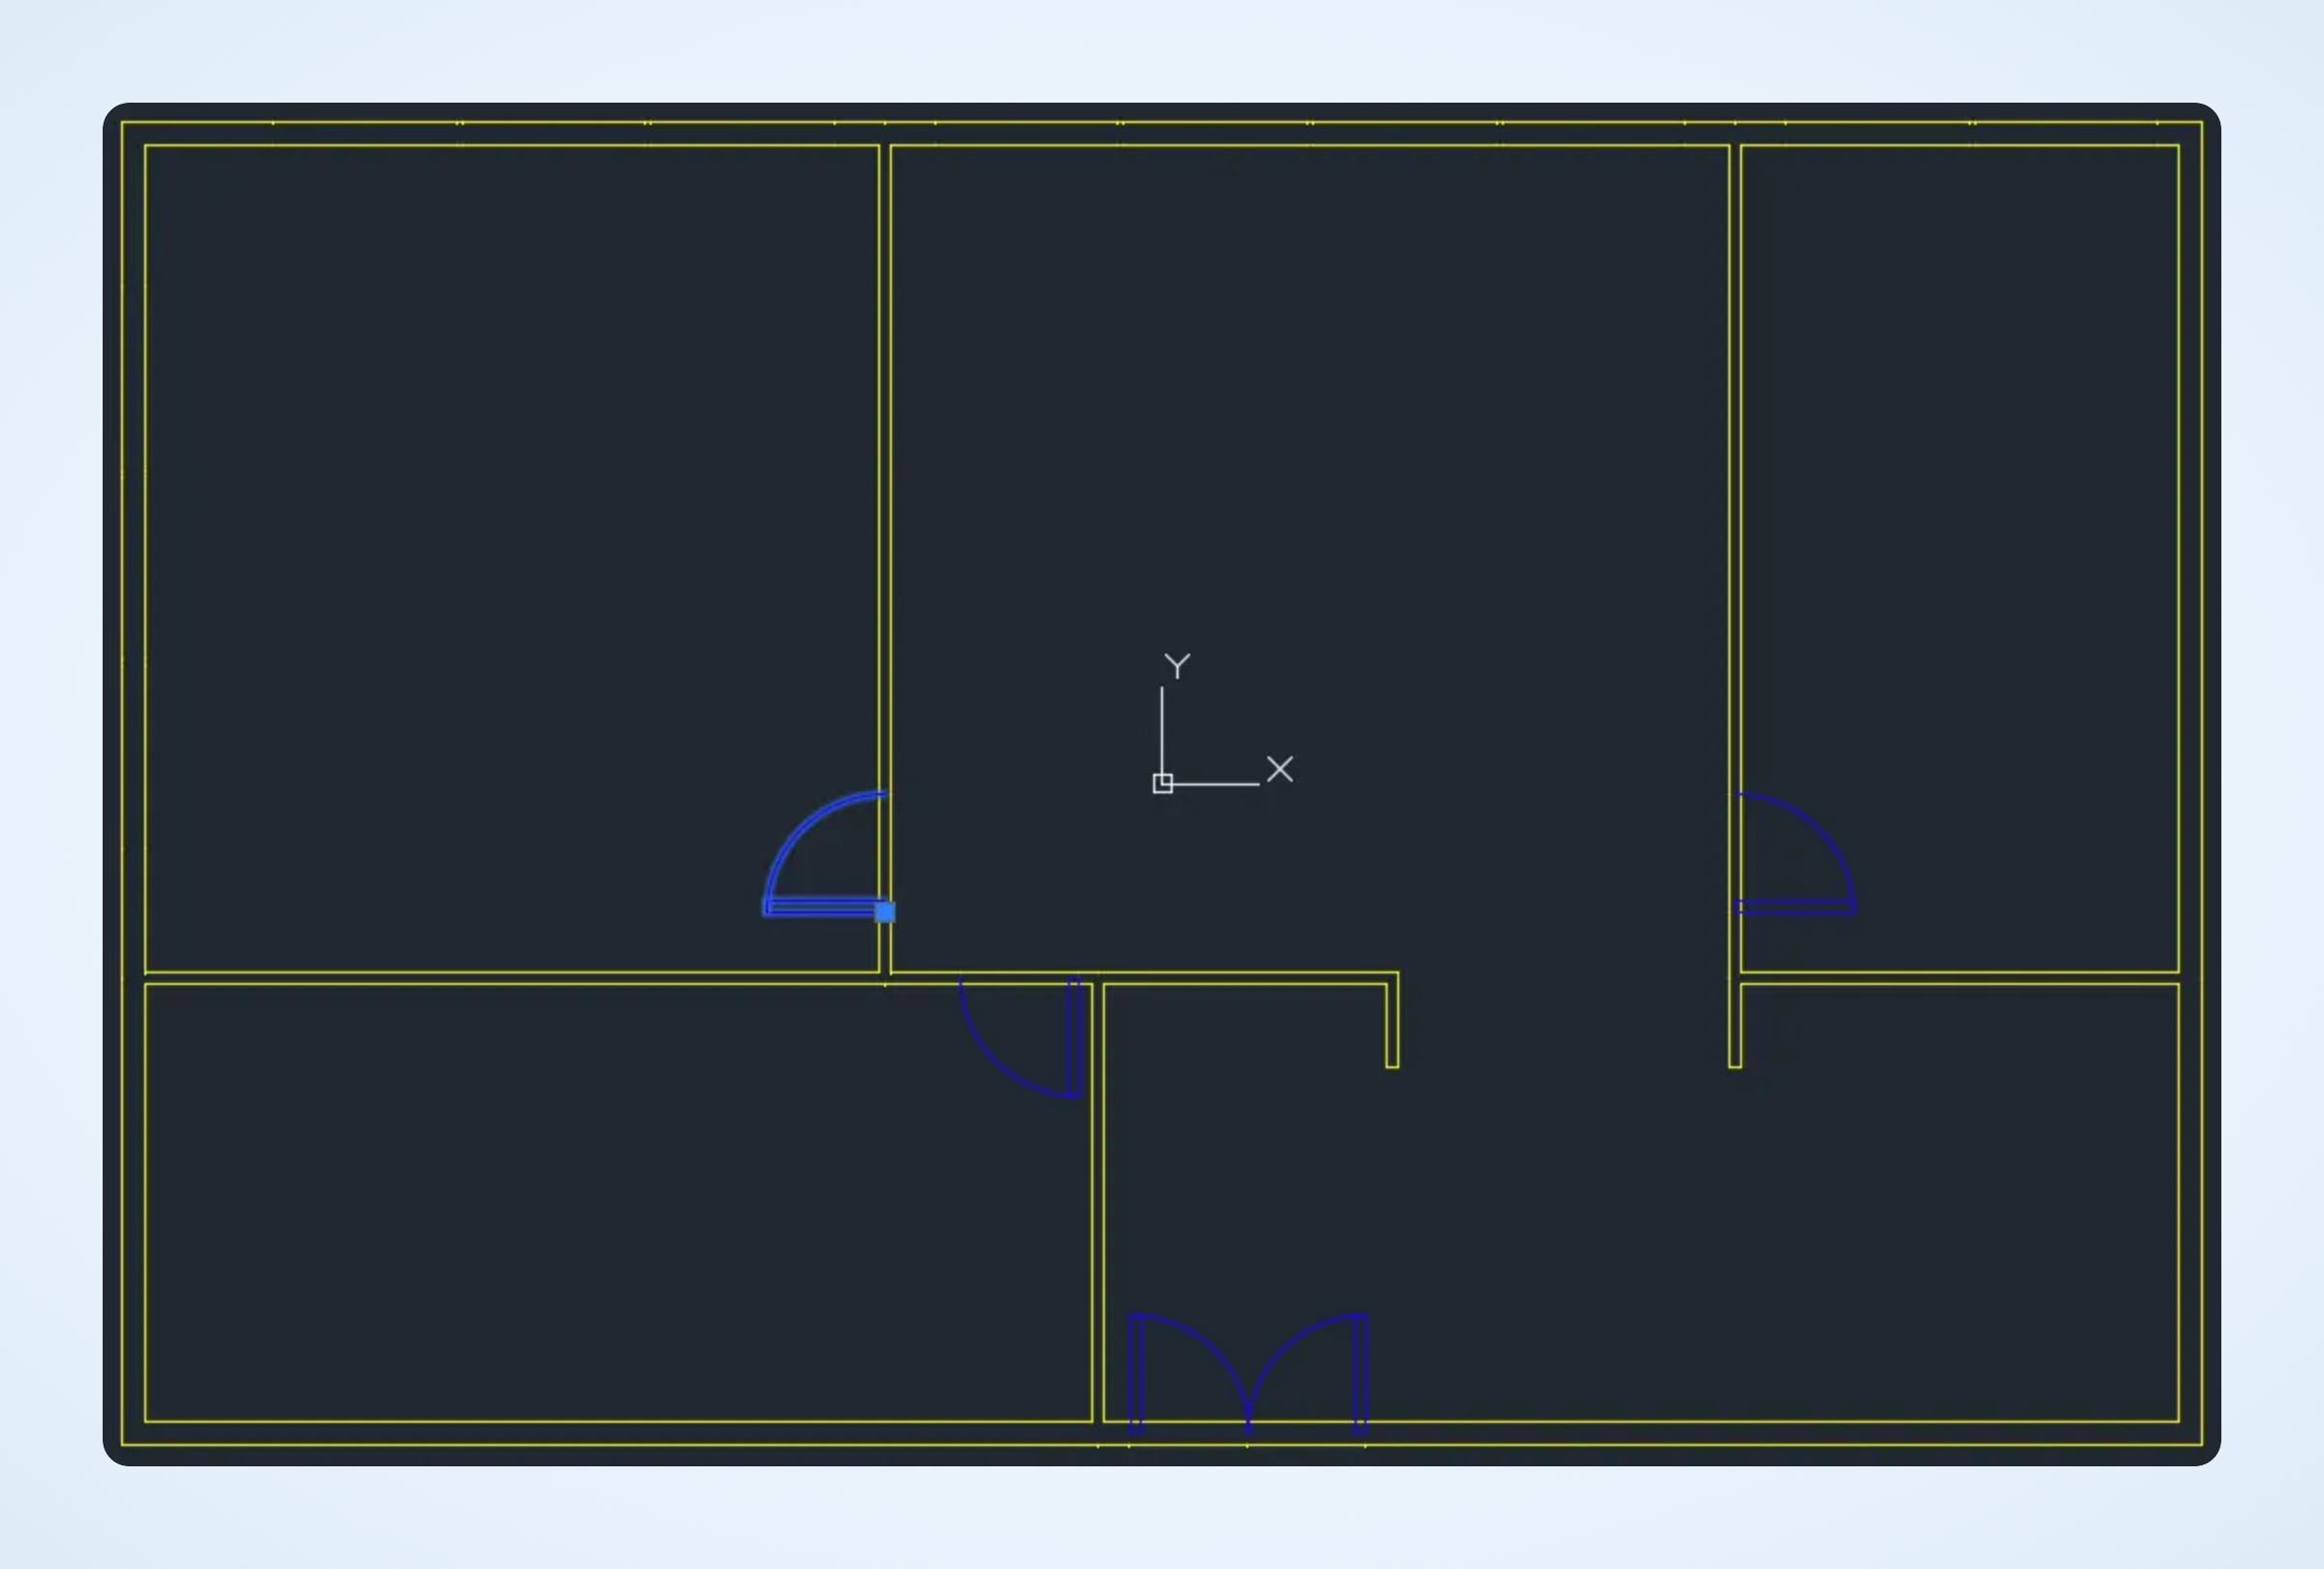
レイヤー名を wall に指定し、下記のように壁を描きます。
{% hint style="warning" %}
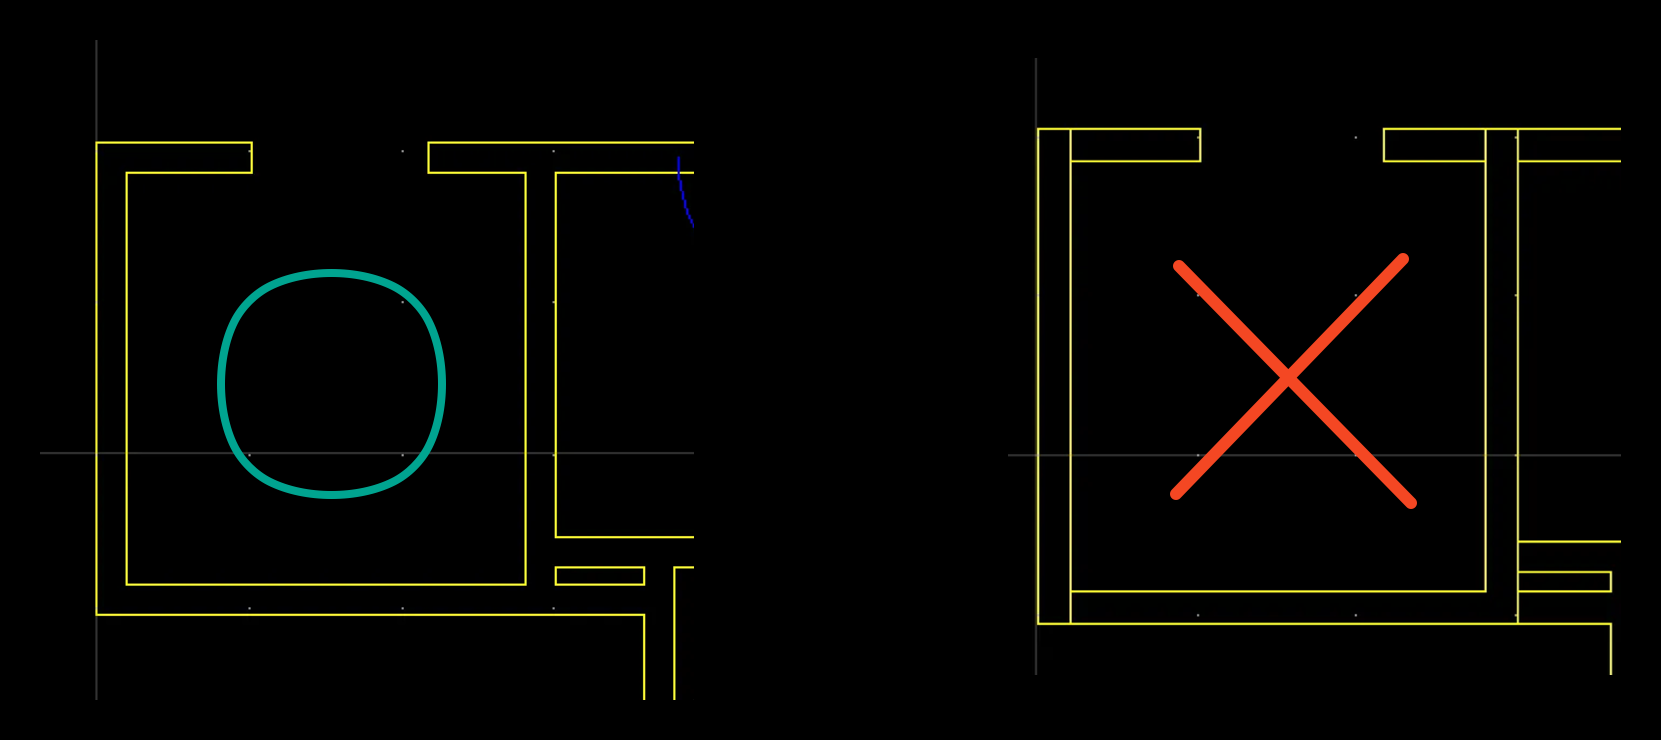
注意)壁の線と線は必ずぴったり接している必要があります。そうでないと壁の検出が正しく行われません。
注意)壁と壁の間は閉じていない状態である必要があります。
注意)曲線の壁はサポートされていません。
{% endhint %}
{% hint style="info" %}
壁が切れているか確認しにくいときは、Hatch を適用してみてください!
1つの Hatch がきれいに適用されれば、壁ラインの整理が完了したといえます!
{% endhint %}
**追加機能**
* CADであらかじめ壁の高さを指定できます!\
レイヤー名を wall\_2800 のように設定すると、Archisketch エディターで壁体の高さが自動的に 2800mm に適用されます。
### ドア
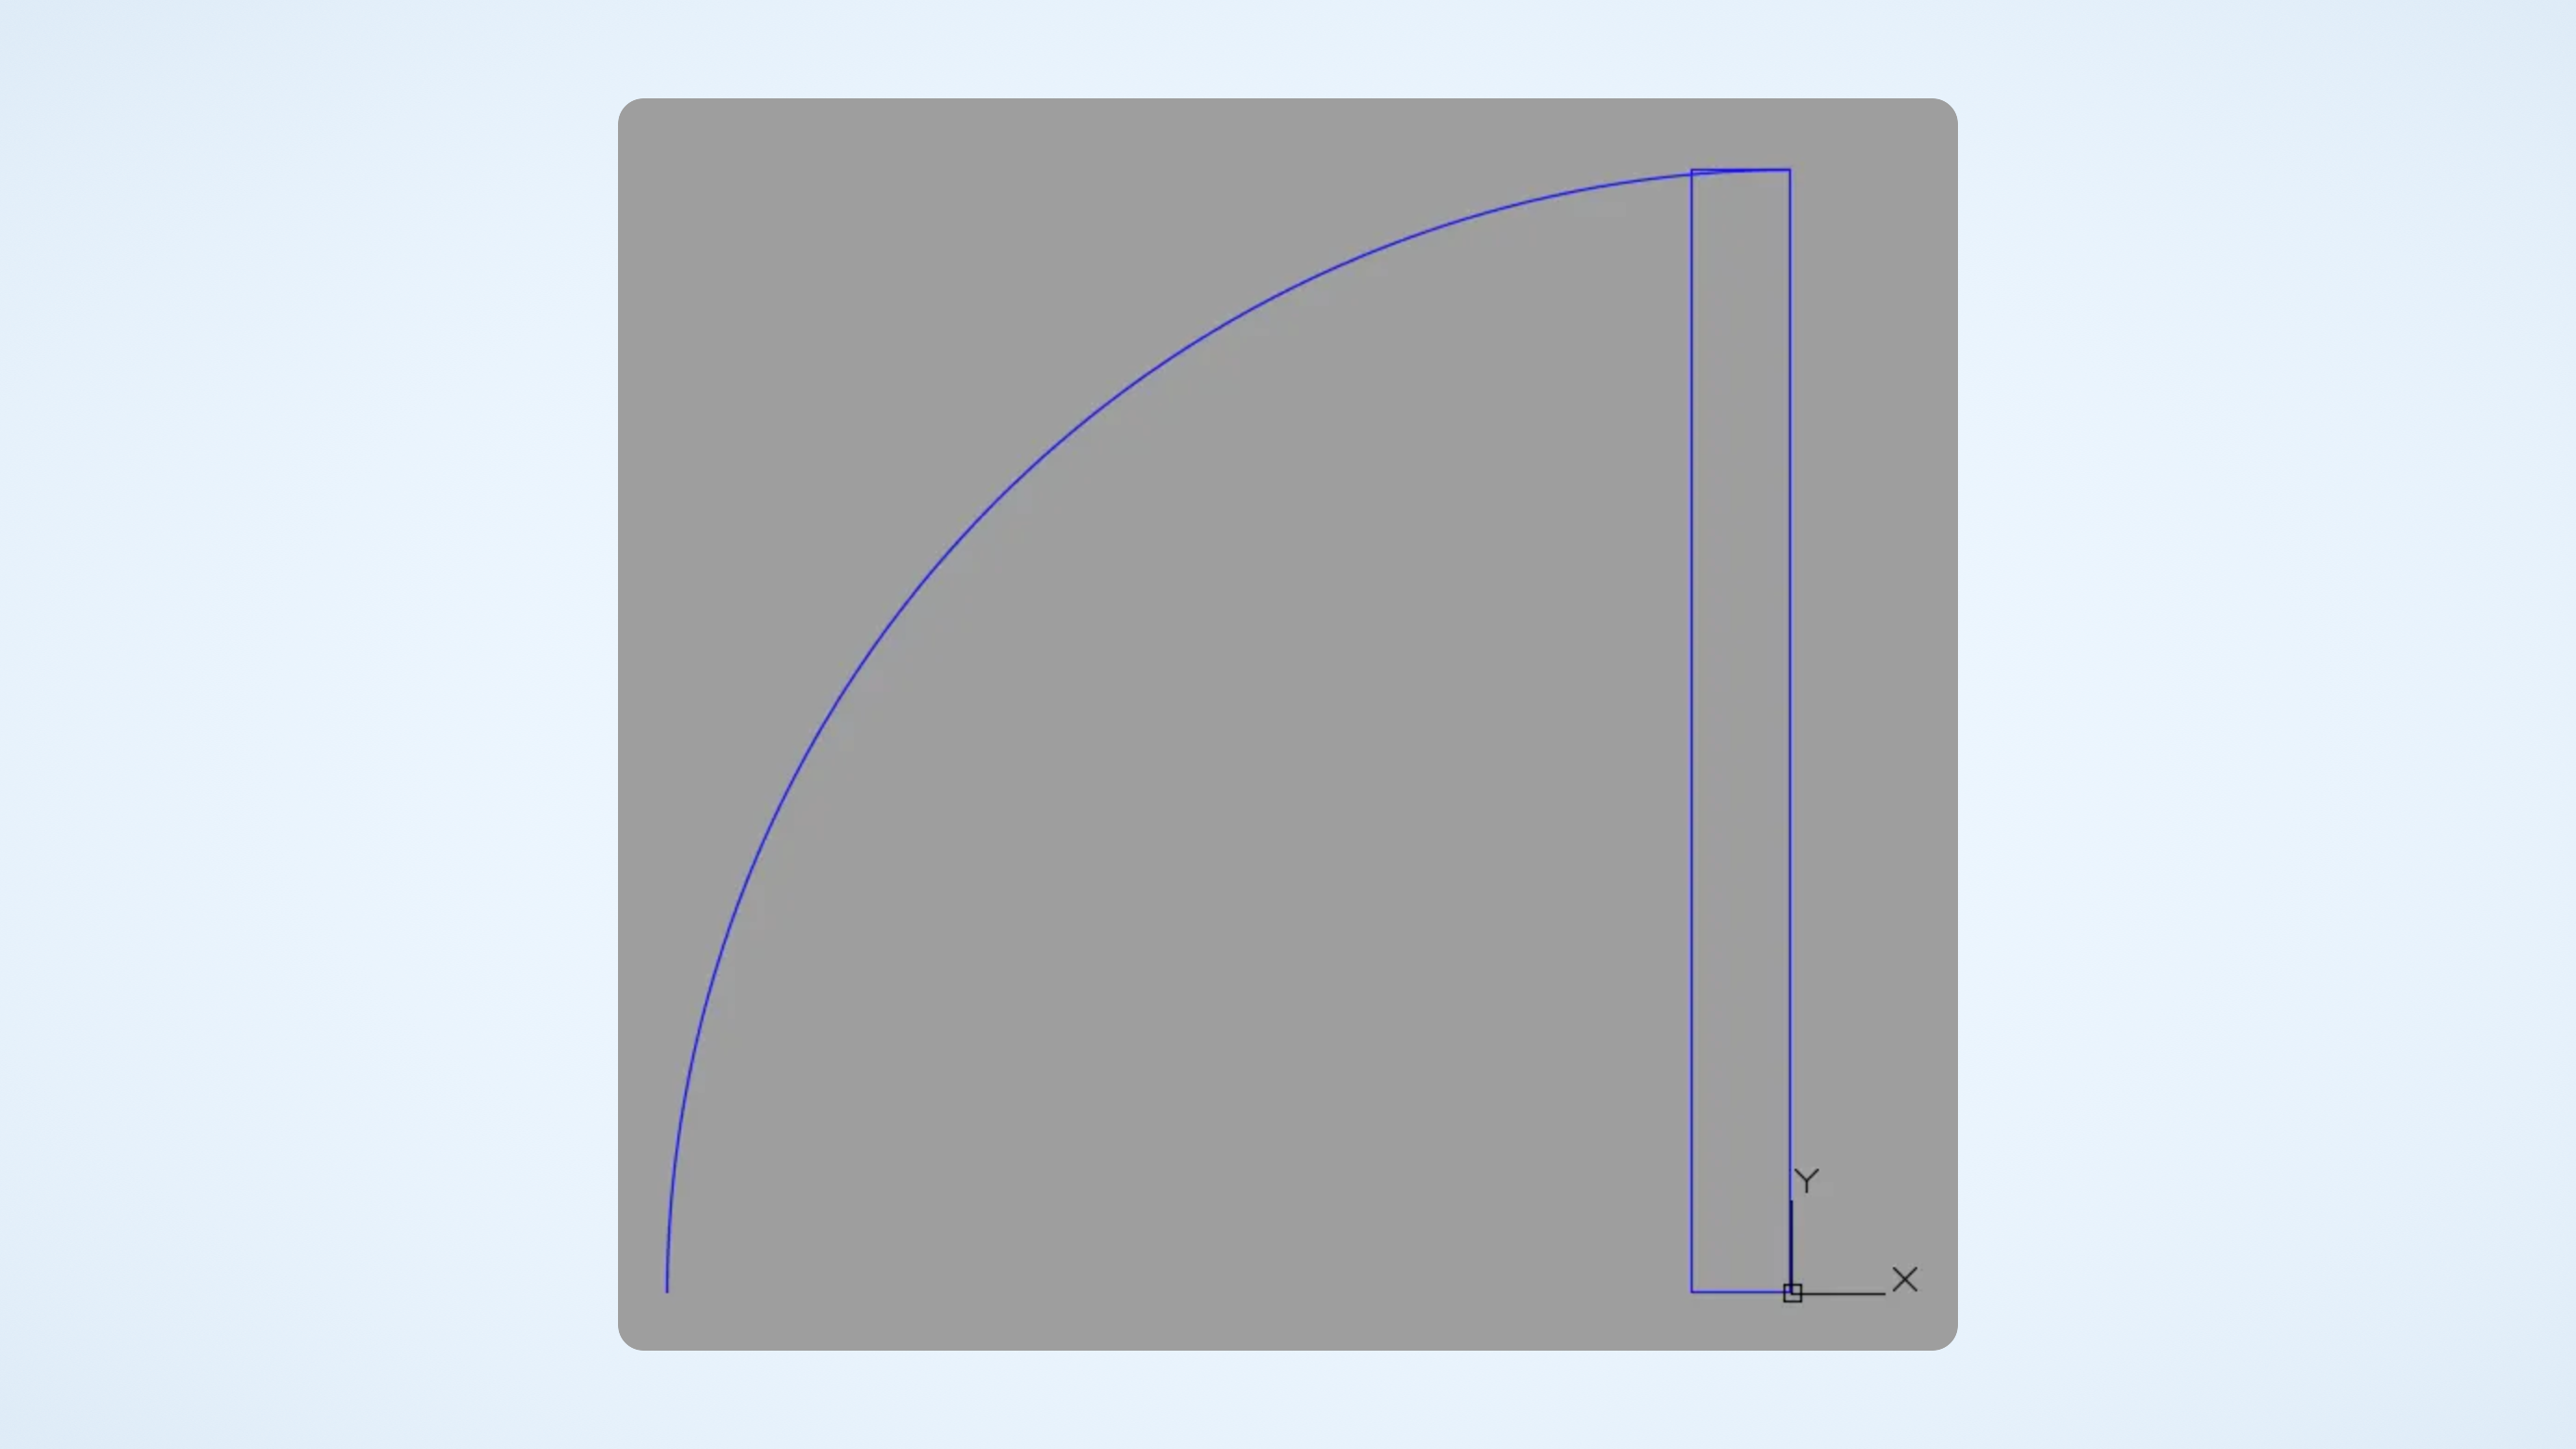
* ドアを下記のようにブロックで作成します。
* レイヤー名を door に指定し、ブロックをドアの位置に配置します。
### 窓
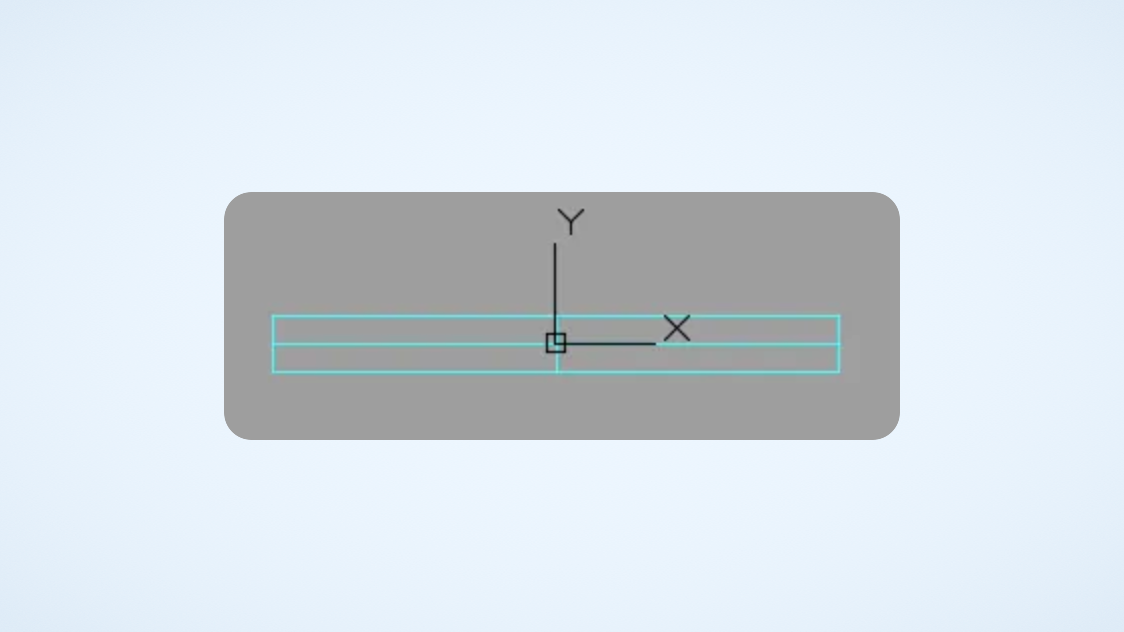
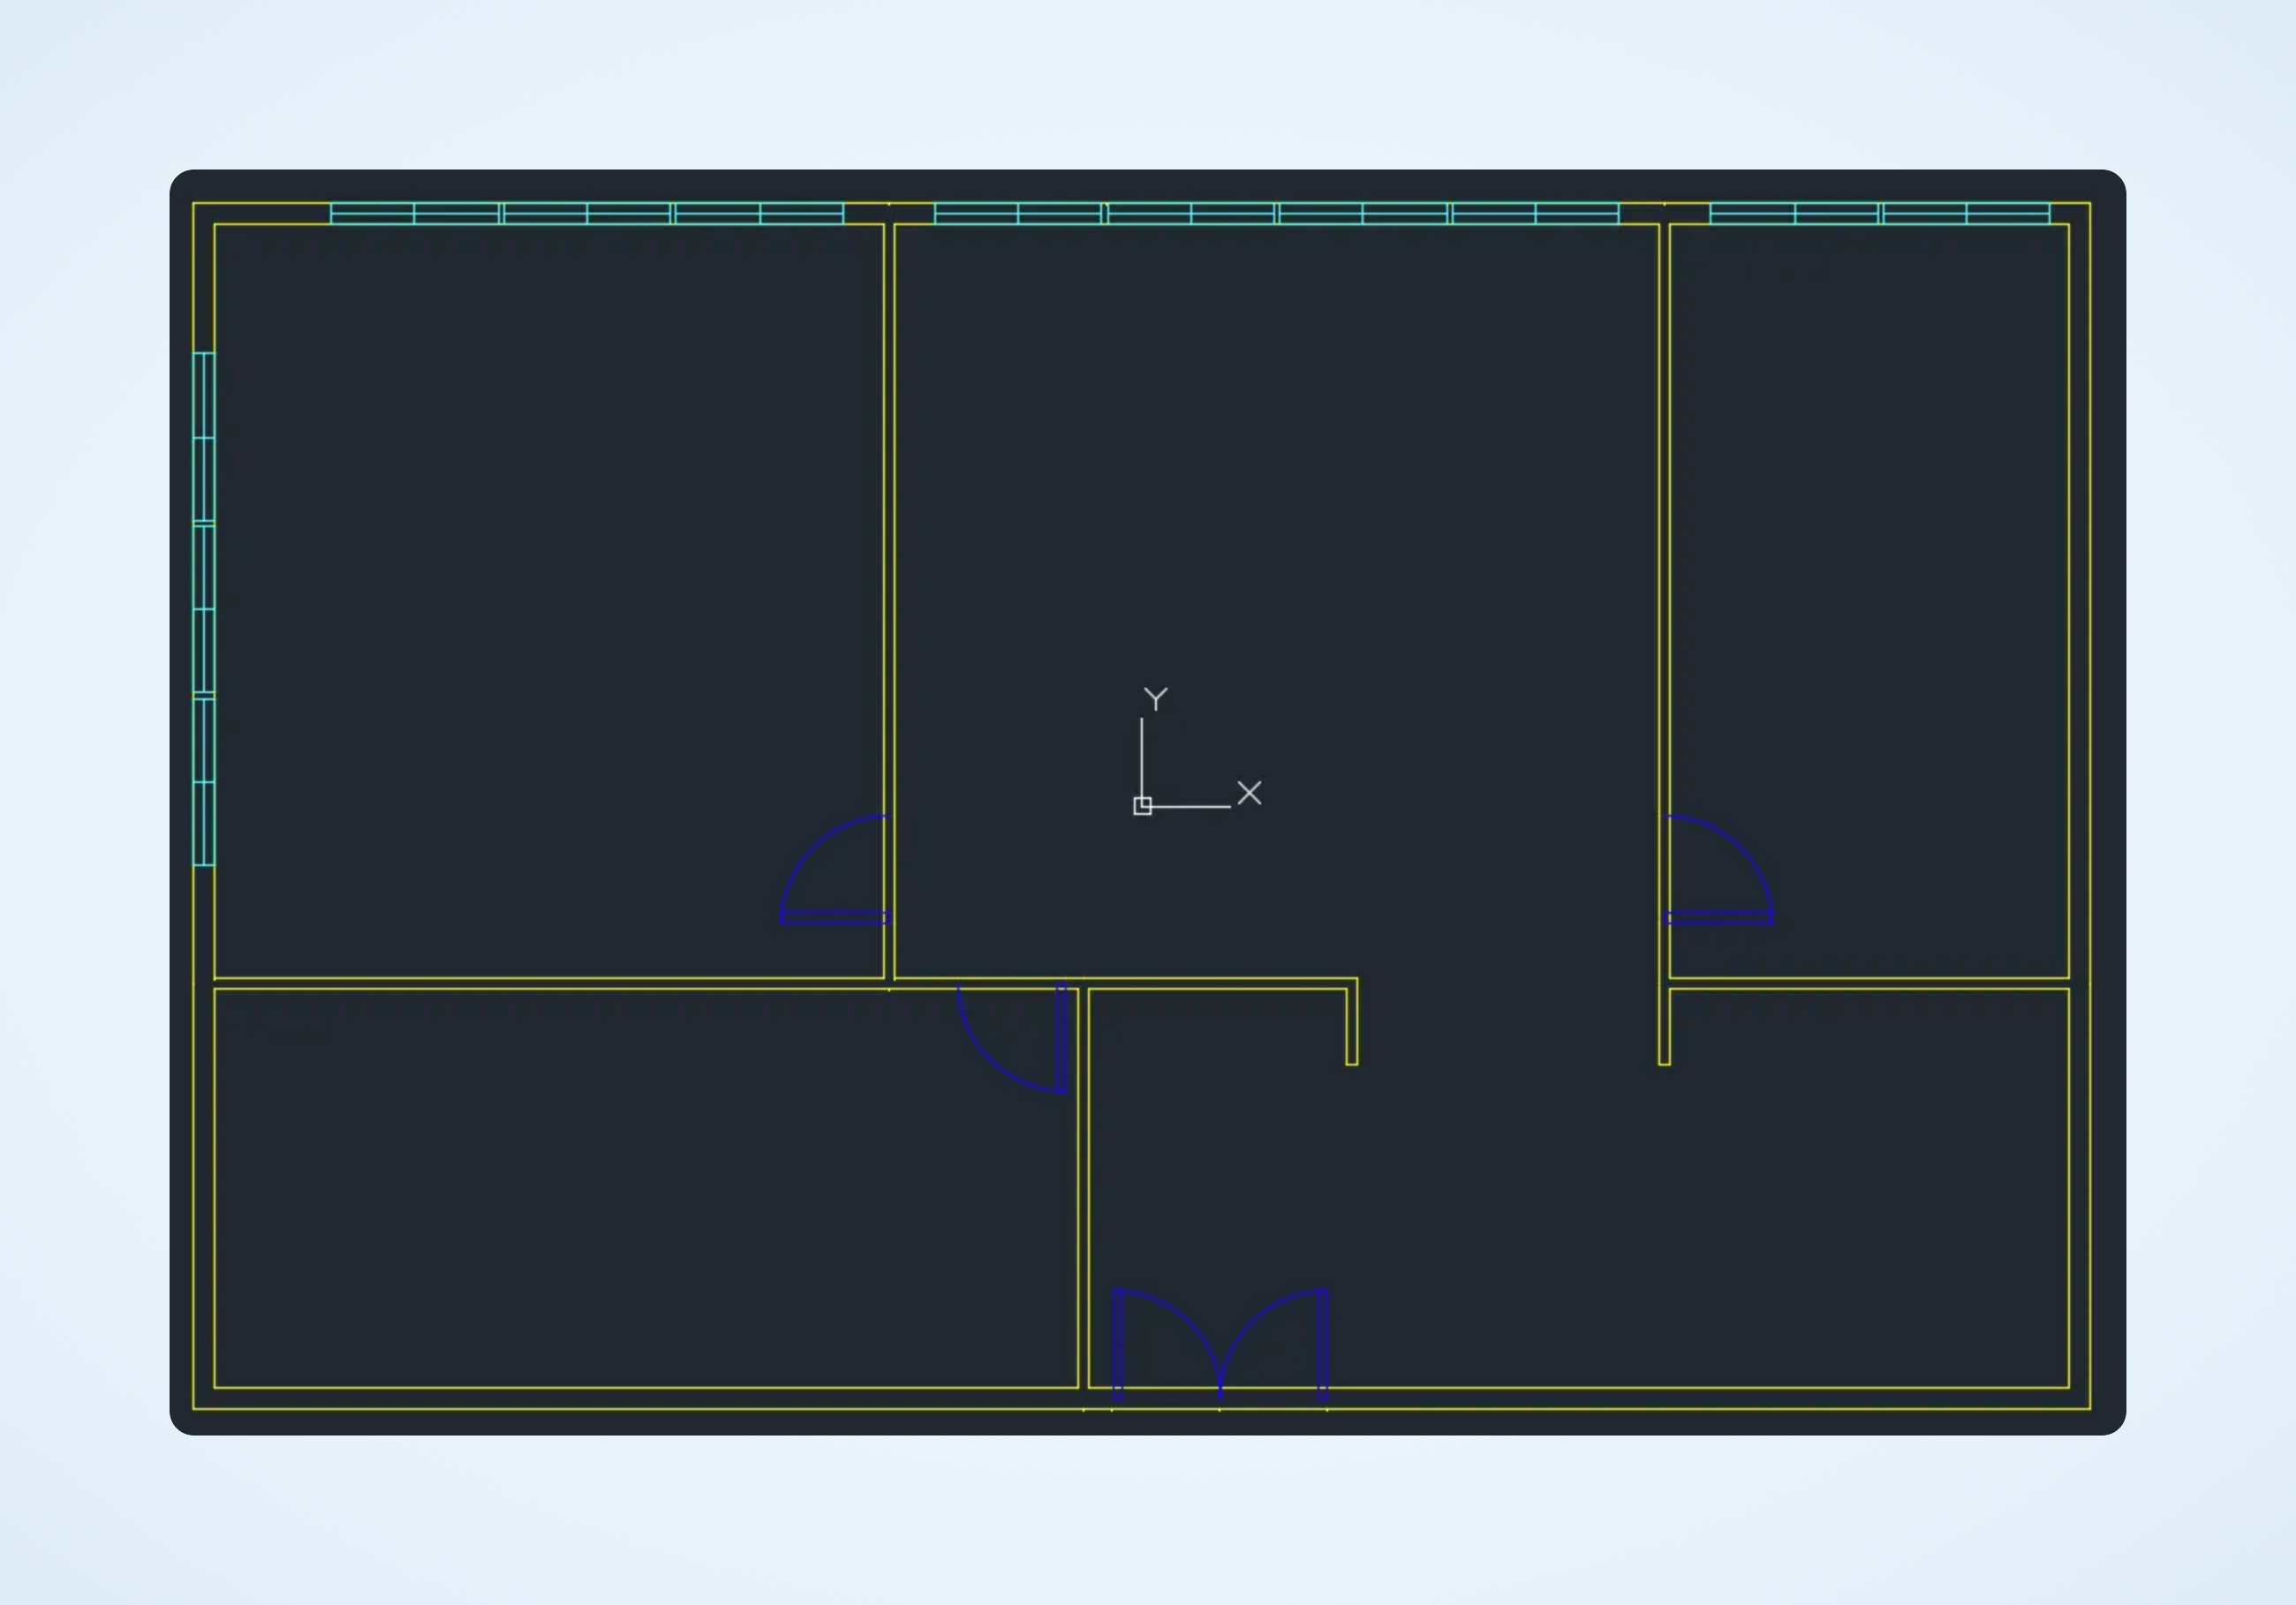
* 窓を下記のようにブロックで作成します。
* レイヤー名を window に指定した後、下記のように希望の位置に挿入します。
{% hint style="warning" %}
注意)ブロック化されていない窓は Archisketch エディターで読み込めません。
{% endhint %}
### 柱
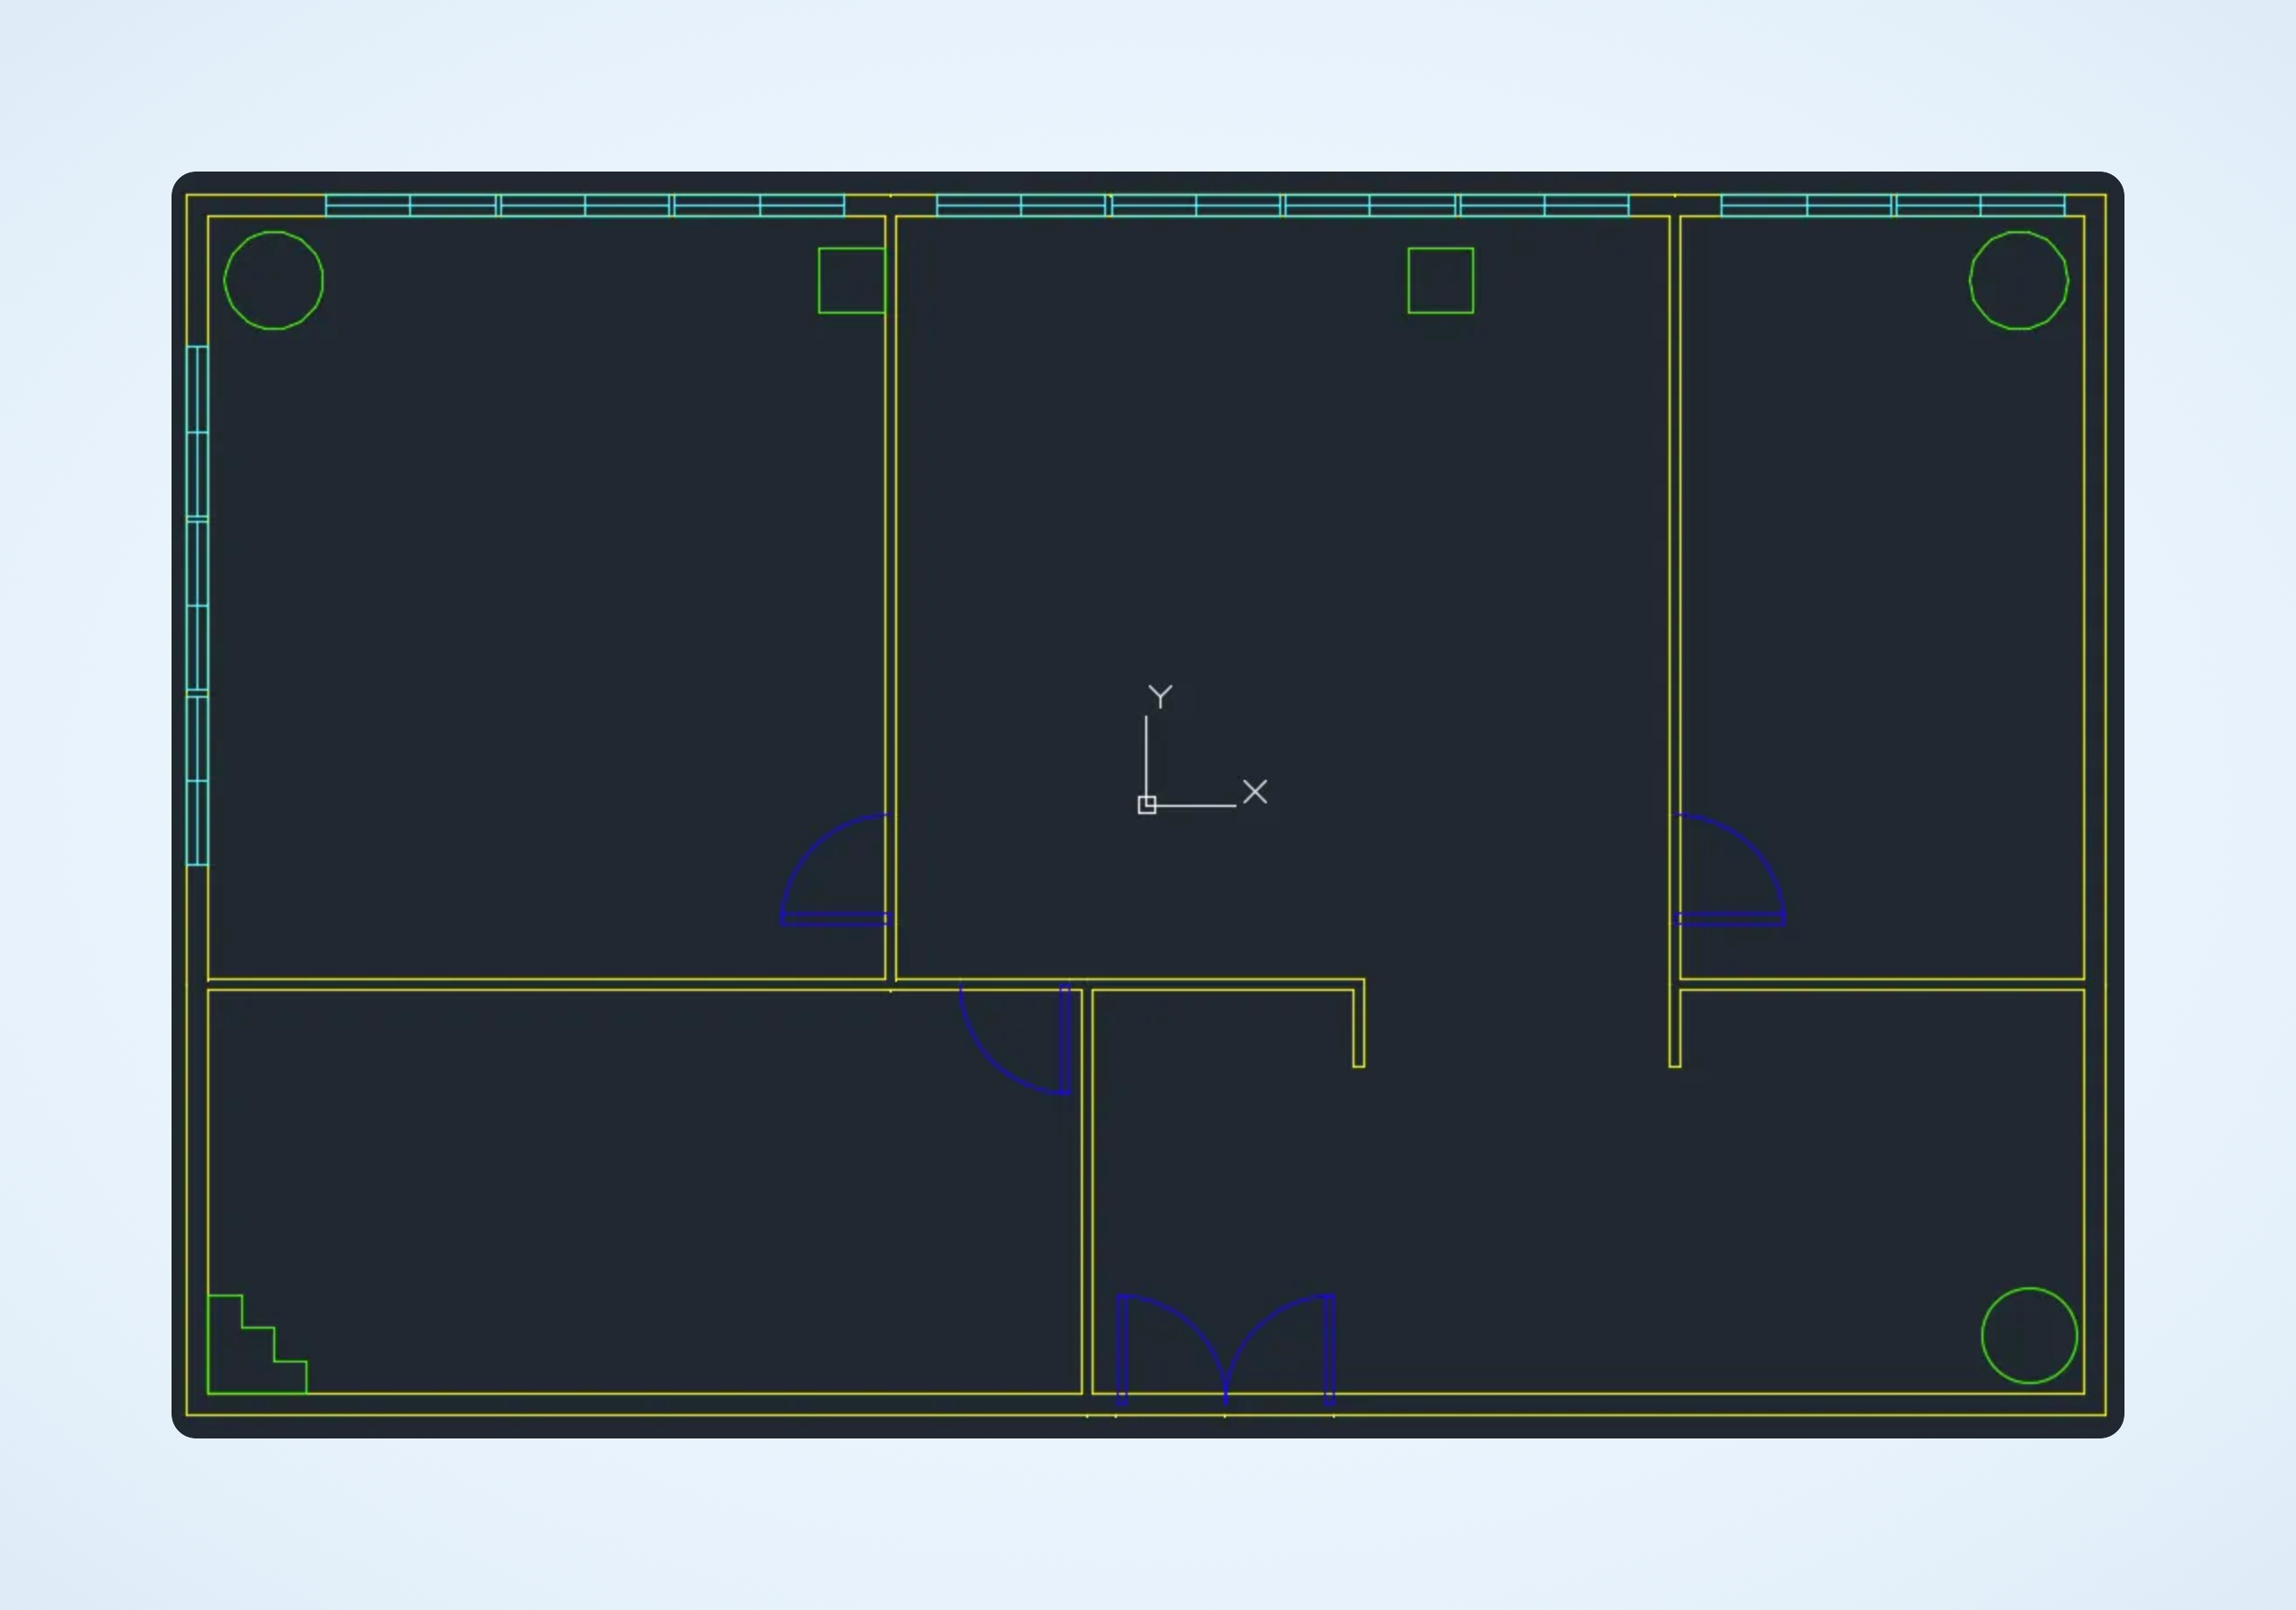
レイヤー名を line または column に指定して多角形を描きます。
{% hint style="warning" %}
注意)多角形は直線または円で構成され、始点と終点がつながった図形である必要があります。
{% endhint %}
柱の作成条件
* 円柱
* 頂点数が20個以上の多角形の場合
* \[円柱] に変換されます
* 角柱
* 頂点数が4個で長方形の場合
* \[角柱] に変換されます

* その他の形状
* 5~19個の頂点を持つ多角形の場合
* \[設計型ライブラリ > 建築/資材エディター] に変換されます
注意事項
レイヤー内に要件に合わない図形が含まれている場合、正常にアップロードされません。

### ファイルを保存する
* ファイル形式は必ず dxf で保存してください。その他の形式はアップロード機能に対応していません。
## Archisketch でアップロードする
図面アップロード方法
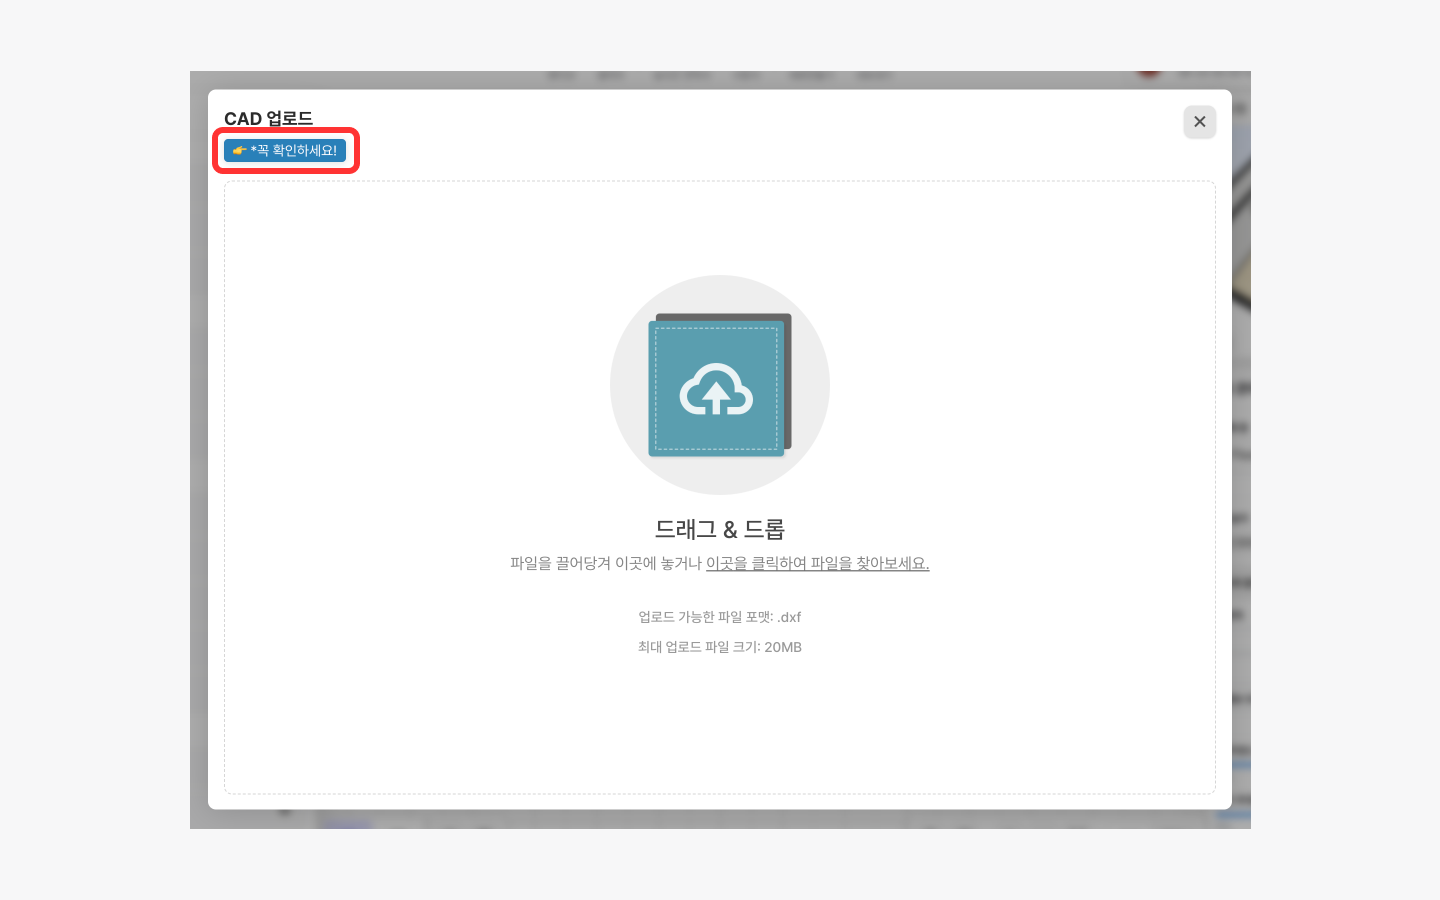
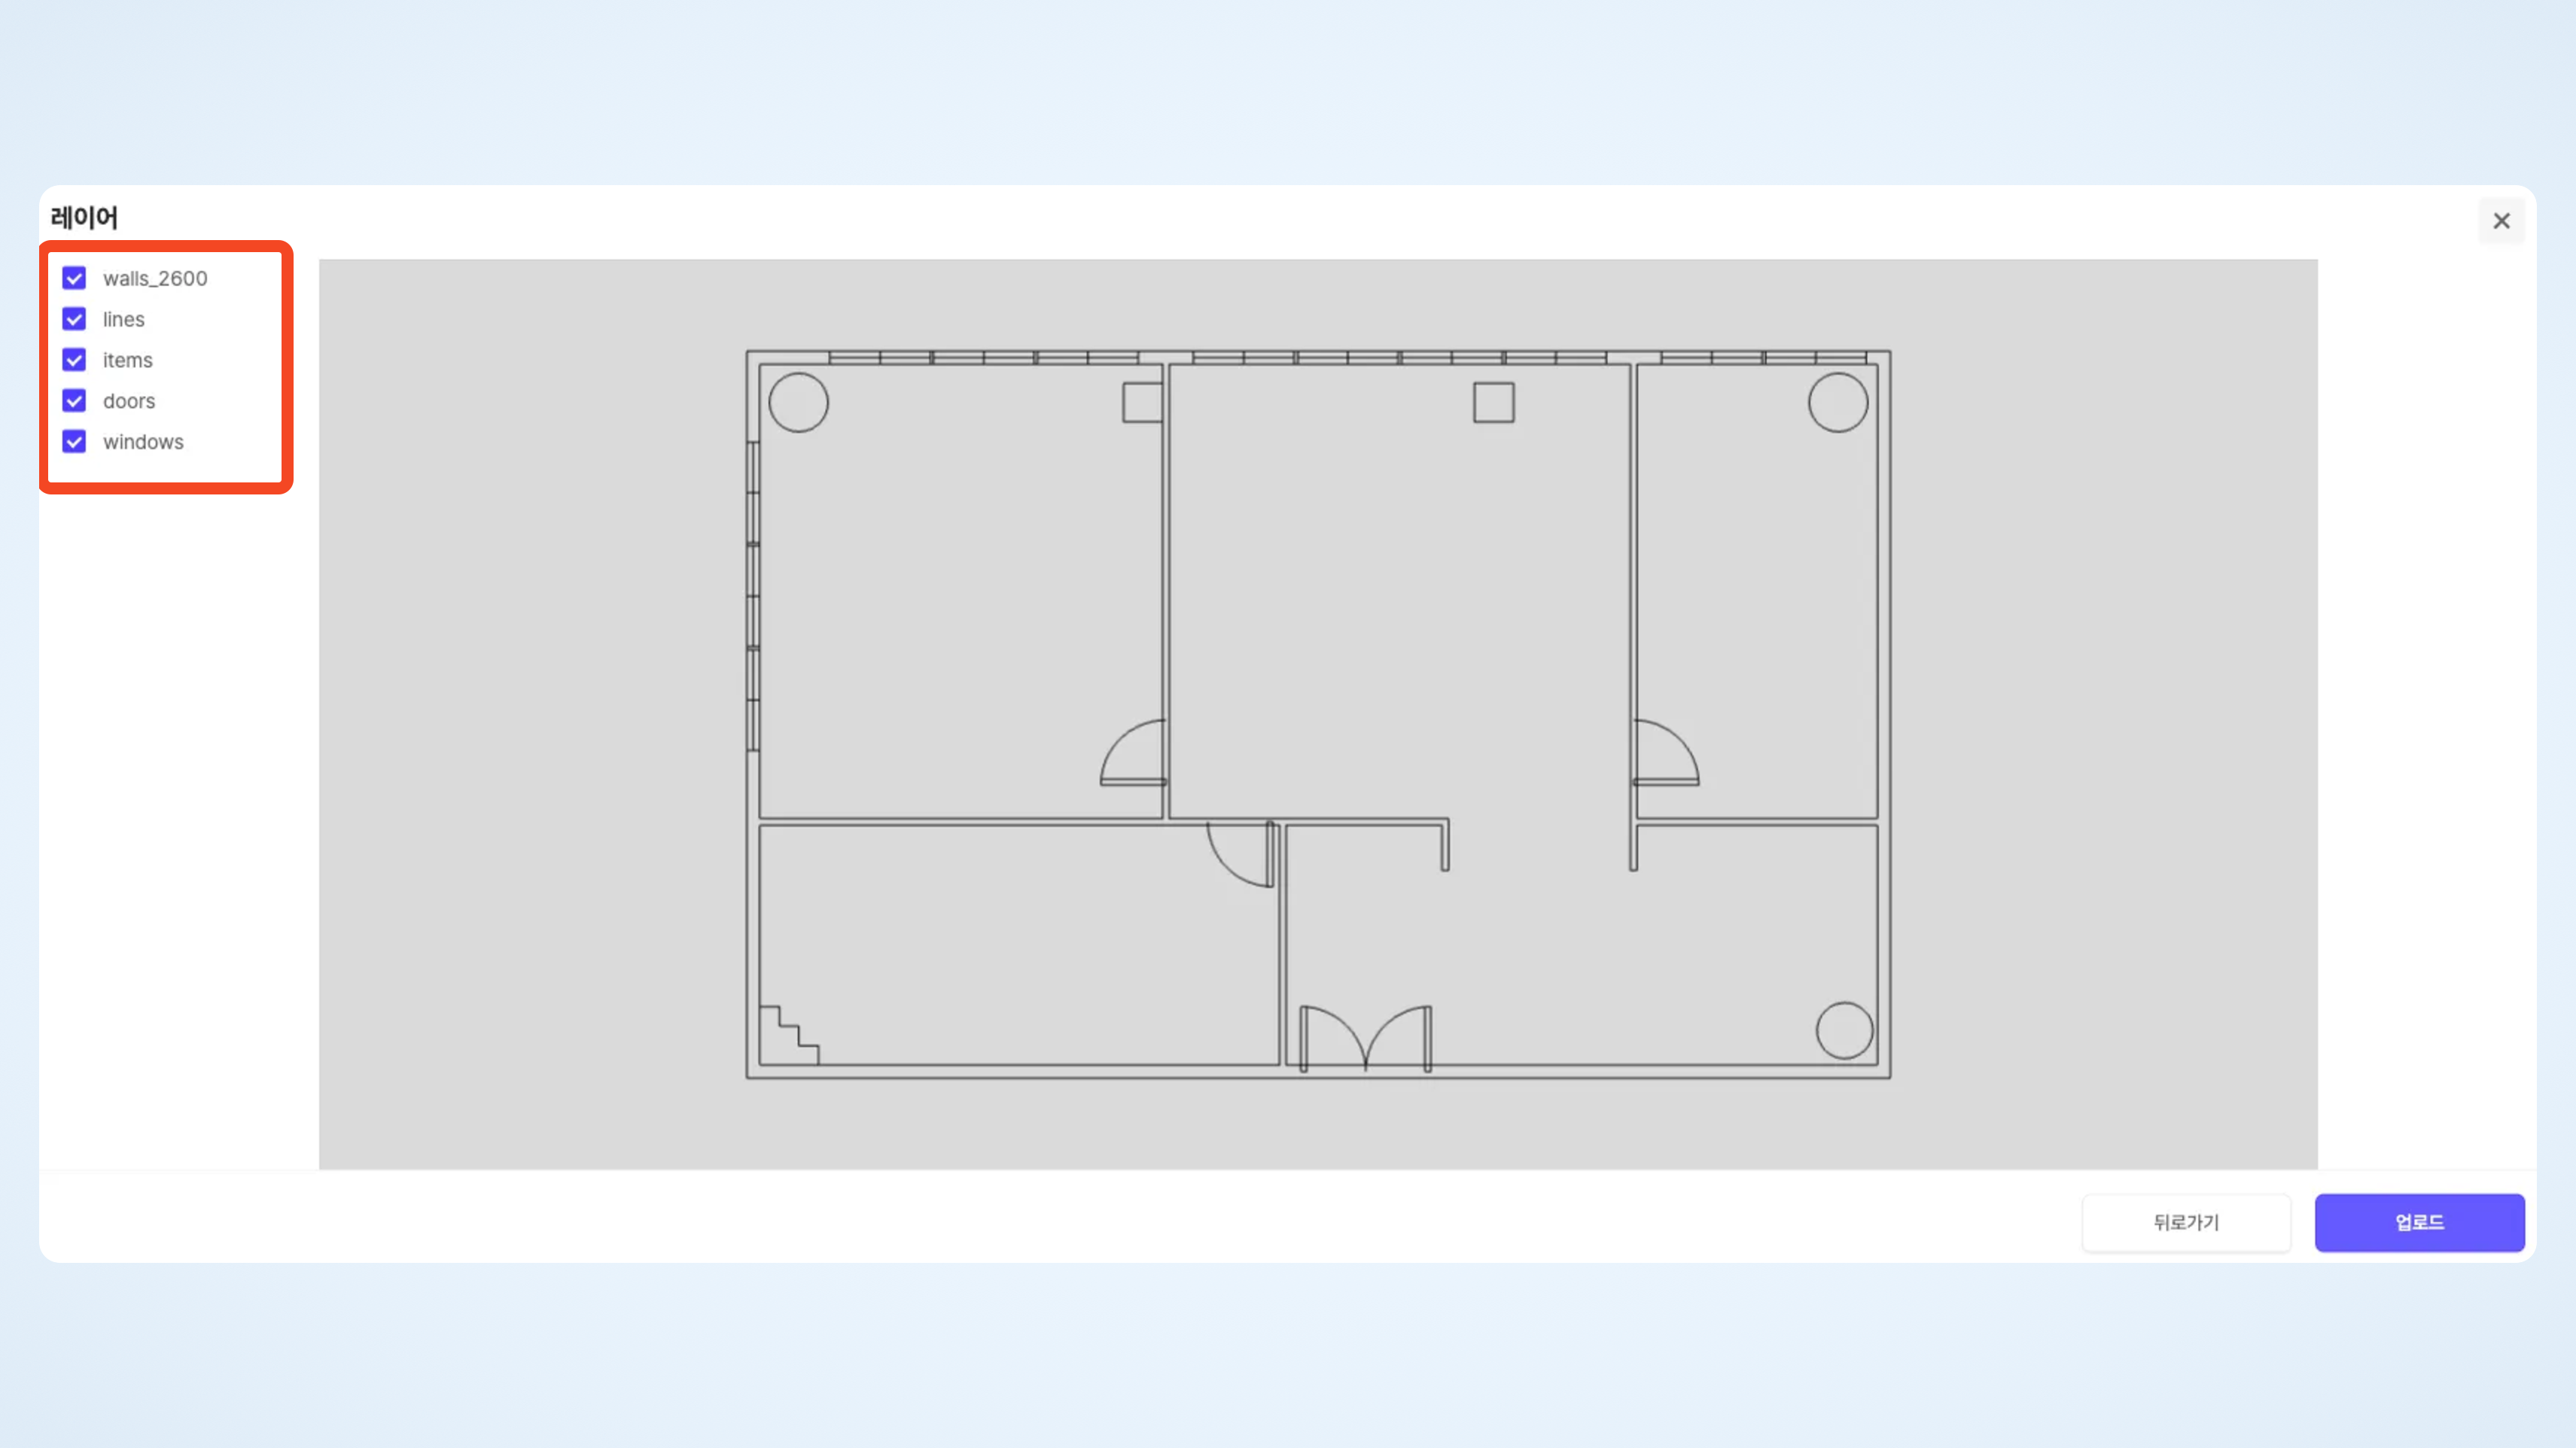
* \[図面アップロード] → \[CADアップロード] → \[ファイル選択] の順に進みます。
* その後、レイヤーを選択できる画面が表示されます。
* 必要なレイヤーだけをオン・オフできます。
* 選択が完了したら、右下の \[アップロード] ボタンを押してください。
## エディターで編集する
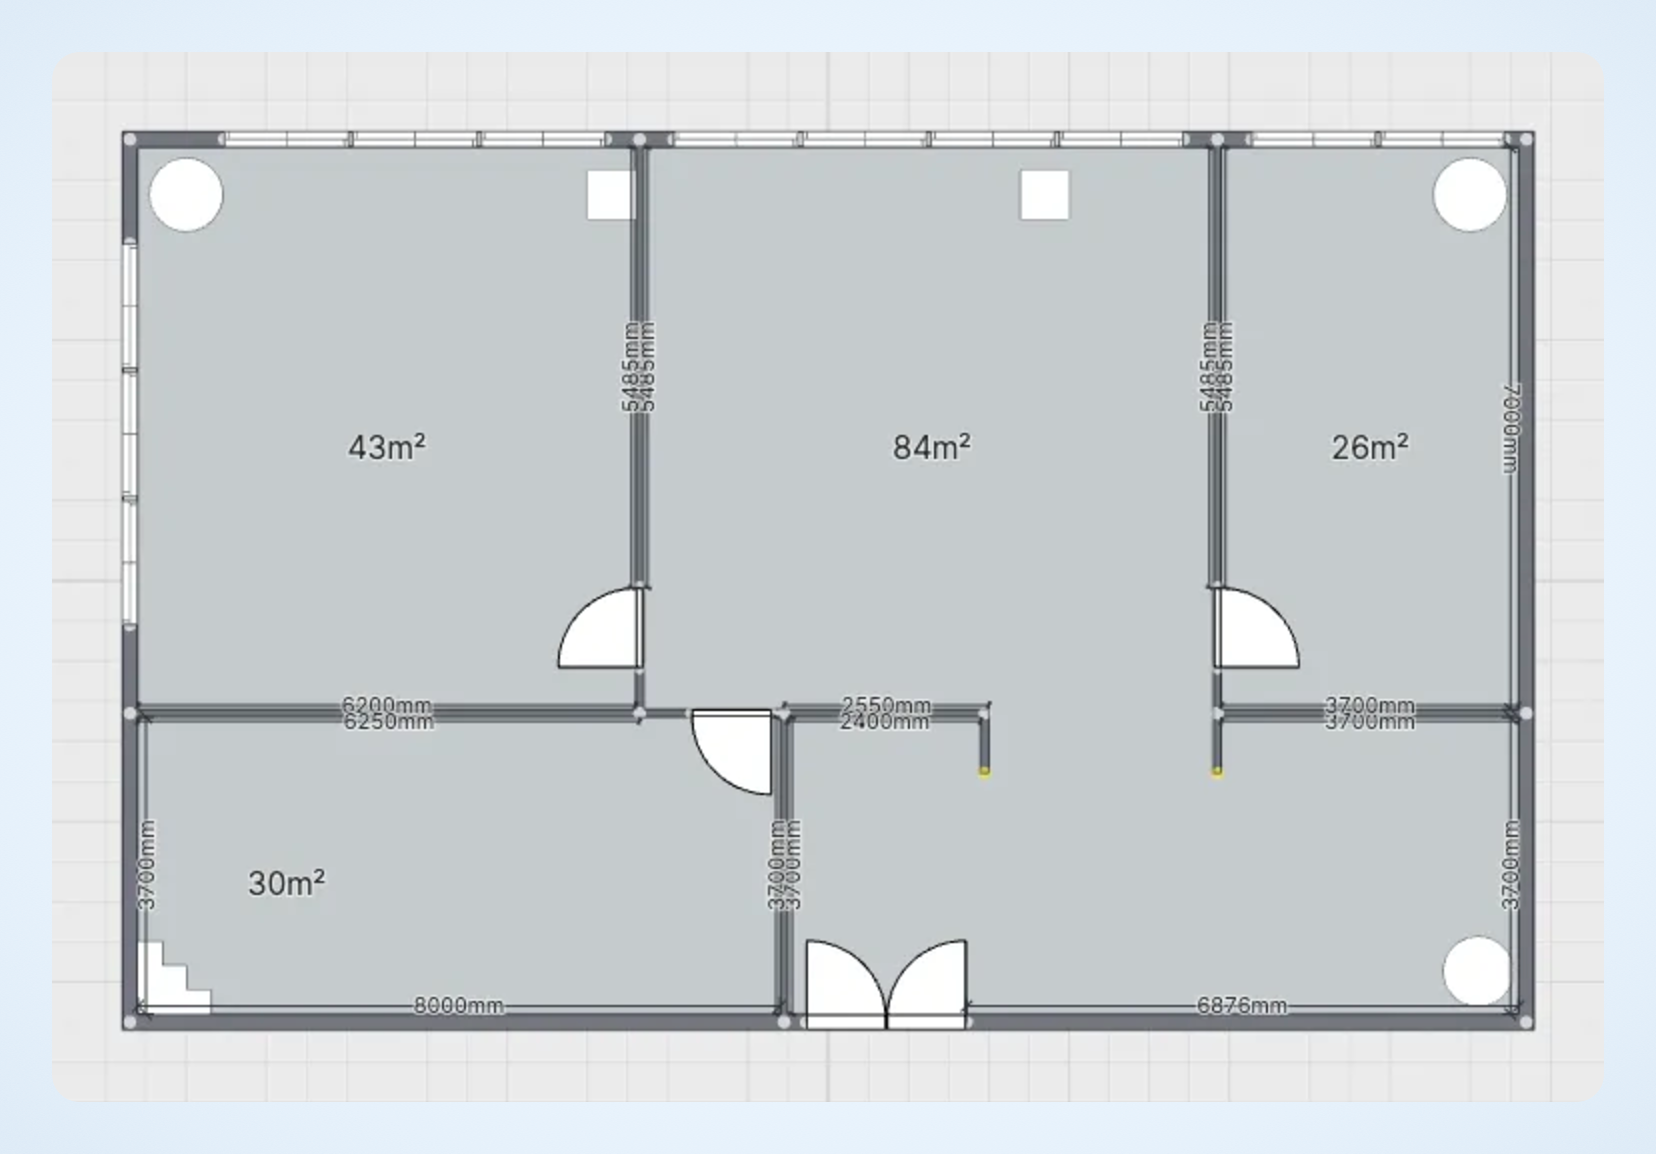
アップロードされた図面は Archisketch 形式に変換されるため、壁編集、製品配置、レンダリングなど Archisketch のさまざまな機能を活用できます。
## 柱を編集する
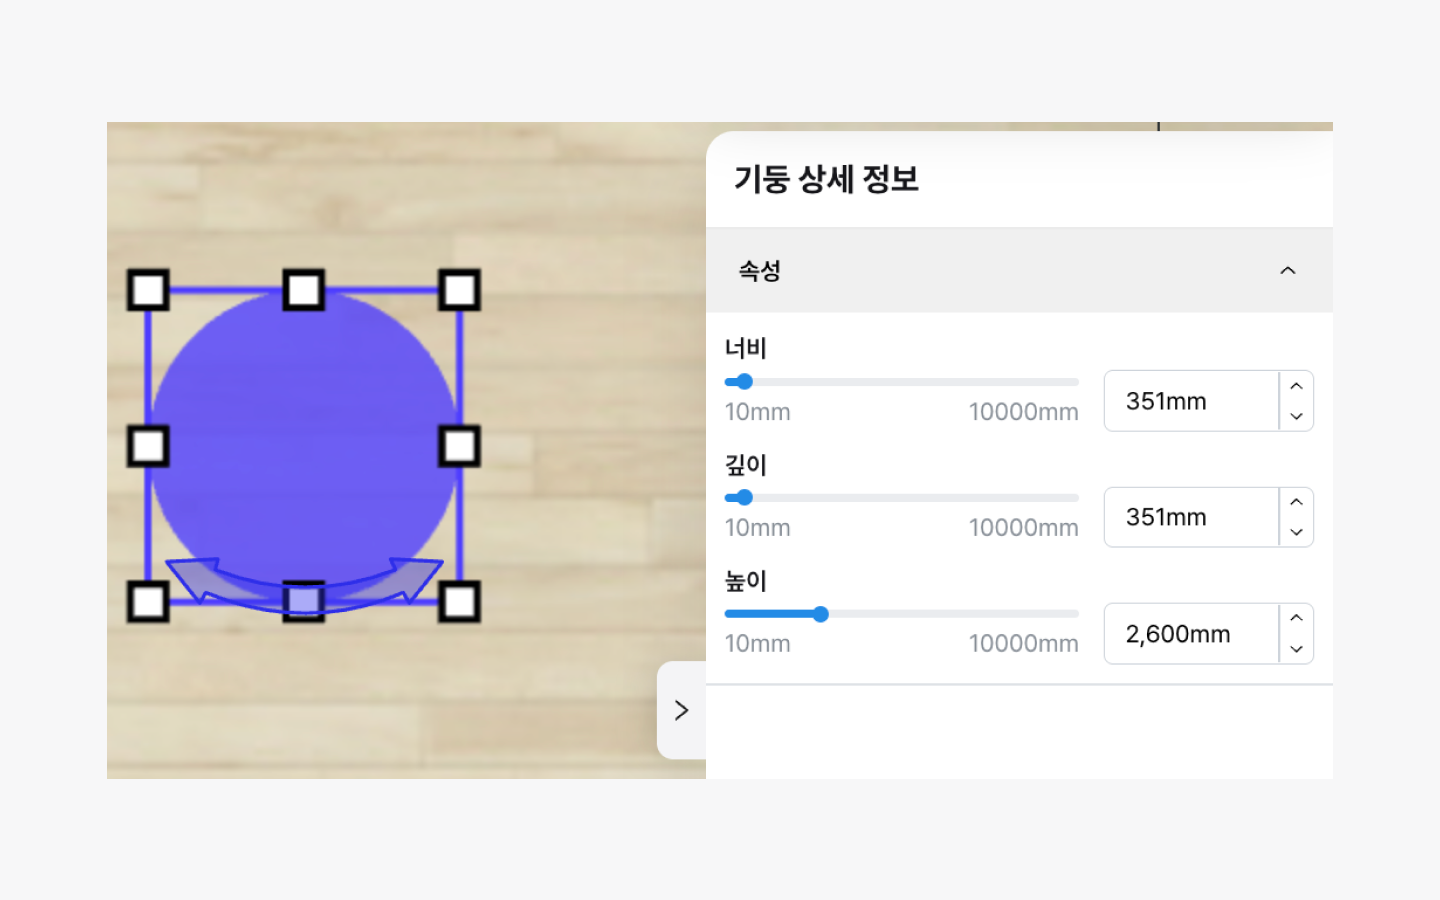
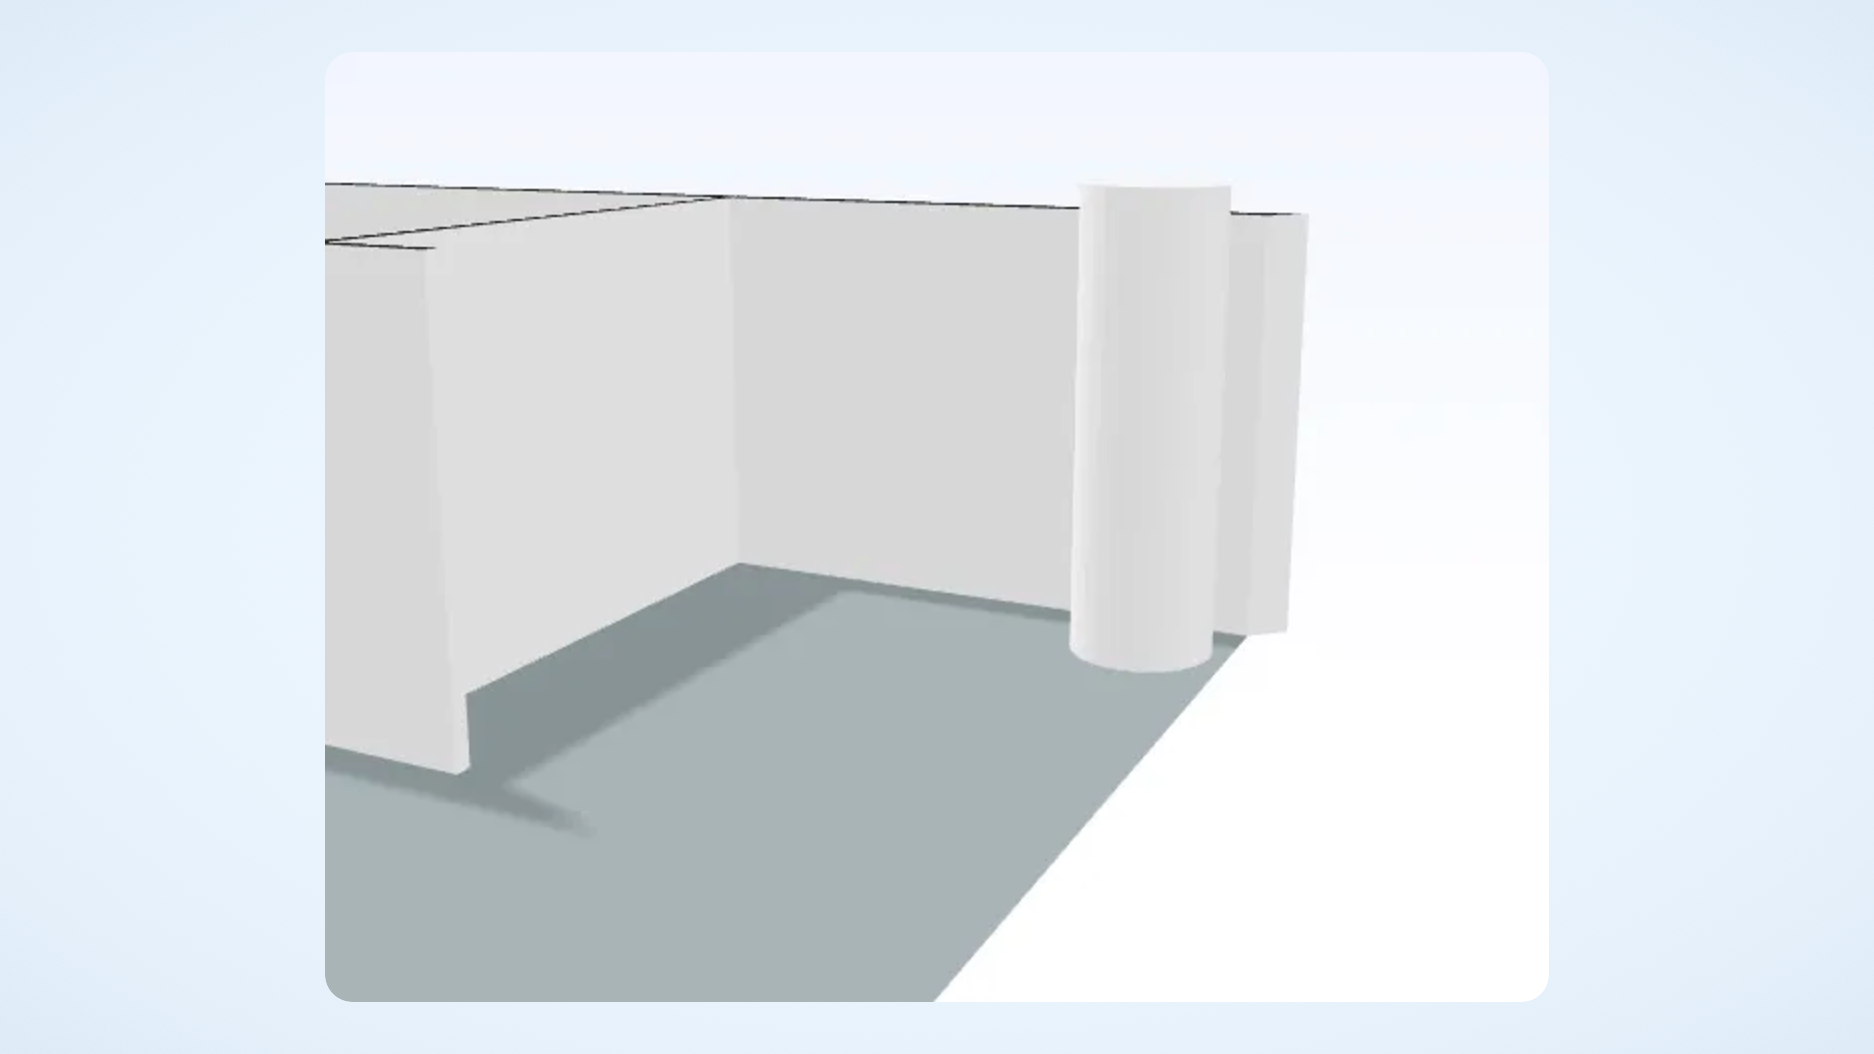
アップロードが完了したら柱を選択し、\[属性 > 高さ] を修正して柱を希望の高さに調整できます。
---
# Agent Instructions
This documentation is published with GitBook. GitBook is the documentation platform designed so that both humans and AI agents can read, navigate, and reason over technical content effectively. Learn more at gitbook.com.
## Querying This Documentation
If you need additional information that is not directly available in this page, you can query the documentation by asking a question.
Perform an HTTP GET request on the following URL with the `ask` and `goal` query parameters:
```
GET https://docs.archisketch.com/guide/user-jp/expert-feature/cad-upload.md?ask=&goal=
```
`ask` is the immediate question: it should be specific, self-contained, and written in natural language.
`goal` is what the user is ultimately trying to achieve, the reason they need the answer. Sharing it helps GitBook give you a better, more relevant answer. A goal is most helpful when it describes the outcome the user wants rather than restating the question. For example, with `ask=how do I create an API token`, a goal like `automate deployments from our CI pipeline` lets GitBook tailor the answer to that use case.
The response will contain a direct answer to the question and relevant excerpts and sources from the documentation.
Use this mechanism when the answer is not explicitly present in the current page, you need clarification or additional context, or you want to retrieve related documentation sections.