> For the complete documentation index, see [llms.txt](https://docs.archisketch.com/llms.txt). Markdown versions of documentation pages are available by appending `.md` to page URLs; this page is available as [Markdown](https://docs.archisketch.com/guide/user-jp/archisketch-ai/ai-furniture-swap.md).

# AI家具入れ替え

> **AI家具入れ替え**は、写真1枚で私たちの空間に新しい家具を配置し、気に入った製品に入れ替えたり、完成イメージのレンダリングまで作成できる機能です。このガイドに沿って順番に進めれば、初めてでも難しくなくご利用いただけます。
>
> 有料機能のご案内: 「AI家具入れ替え」は有料機能です。ご利用前に料金プランと利用条件をご確認ください

### 始める前に

* **準備物** — 入れ替えたい空間の写真1枚（室内がよく見える正面写真をおすすめします）
* **クレジット** — 画面右上で保有クレジットと言語をご確認いただけます。
* **進入経路** — 左側メニューから **AIスタジオ → AI家具入れ替え**を選択してください。

### 画面をひと目で見る

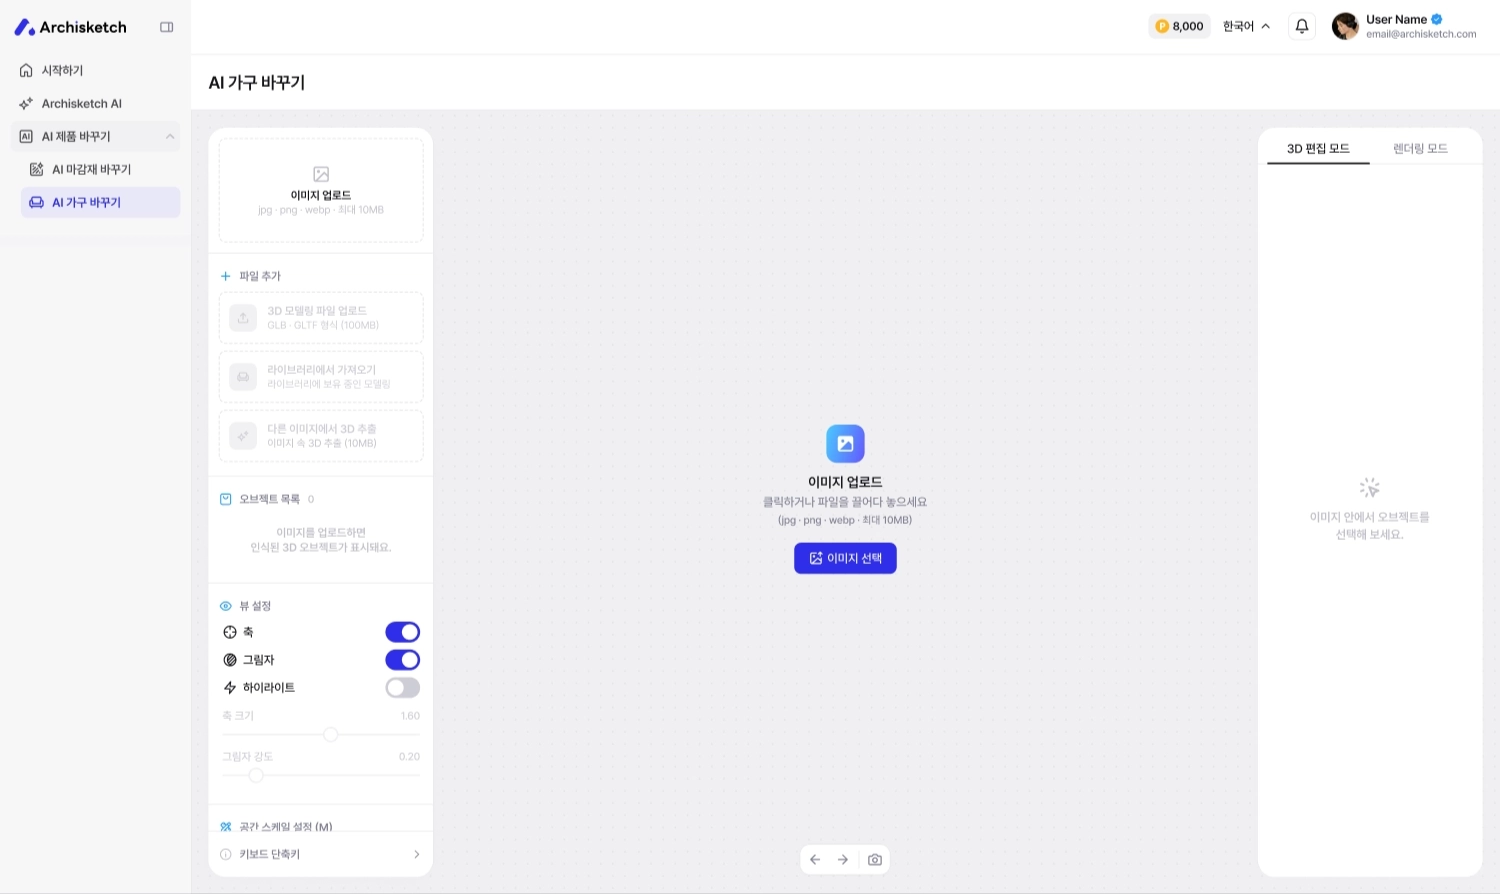
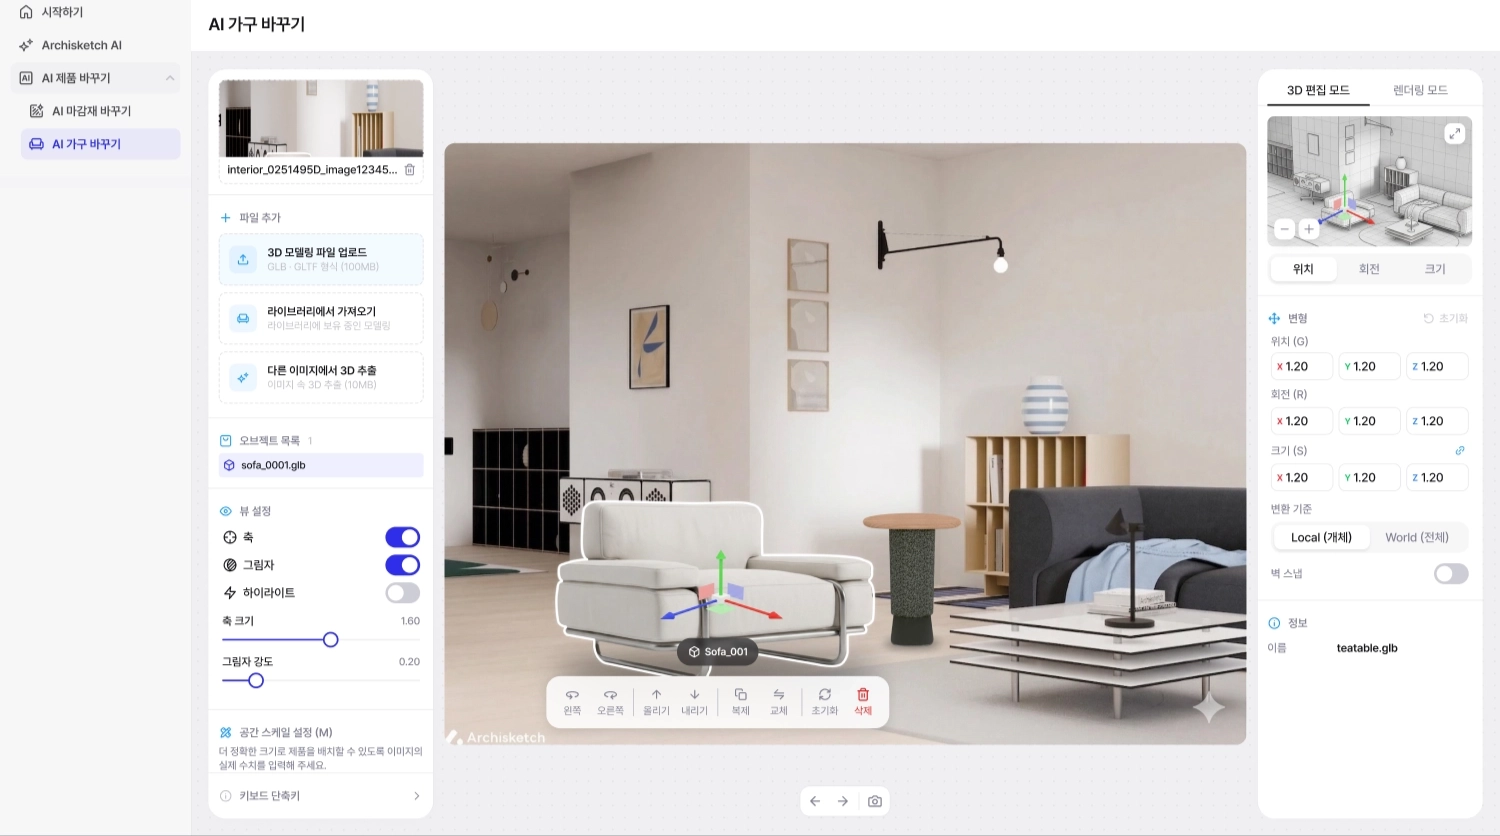
AI家具入れ替えの画面は、大きく3つの領域で構成されています。

<figure><img src="https://1692356280-files.gitbook.io/~/files/v0/b/gitbook-x-prod.appspot.com/o/spaces%2Fs45pRyTQeyYi0T0toKii%2Fuploads%2Fgit-blob-84817d1035e88db964f2e4459034030db33343d1%2Fai-furniture-swap-1.png?alt=media" alt=""><figcaption></figcaption></figure>

* **① 左側パネル** — 画像、ファイル追加、オブジェクト一覧、ビュー設定、空間スケール設定
* **② 中央キャンバス** — 3D編集スペースです。選択した家具には移動・回転・サイズ調整のハンドルが表示され、下部に編集ツールバーがあります。
* **③ 右側パネル** — 3D編集モード / レンダリングモード切り替え、位置・回転・サイズ値の入力

### STEP 1. 空間画像をアップロード

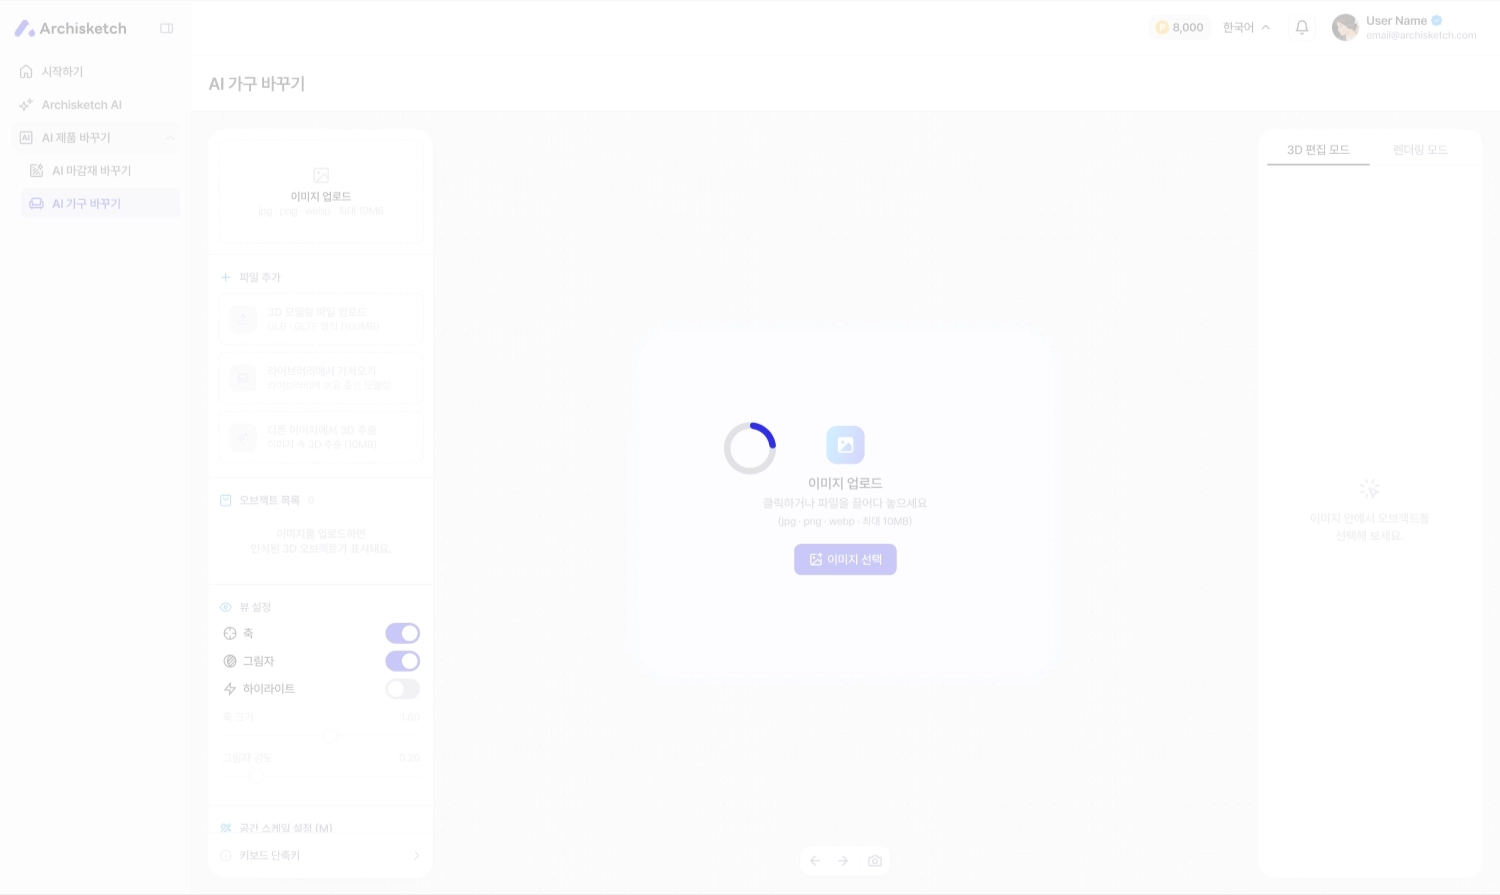
まず、入れ替えたい空間の写真をアップロードしてください。PCではファイルを選択し、モバイルではアップロードできます。

<figure><img src="https://1692356280-files.gitbook.io/~/files/v0/b/gitbook-x-prod.appspot.com/o/spaces%2Fs45pRyTQeyYi0T0toKii%2Fuploads%2Fgit-blob-18014d9820d99299453e5959c59dae3ee09e05ef%2Fai-furniture-swap-2.png?alt=media" alt=""><figcaption></figcaption></figure>

アップロードすると、AIが空間の構造と家具を自動で認識します。

💡 スムーズな認識のため、100Mb未満の画像をおすすめします。

### STEP 2. 3D画像の設定

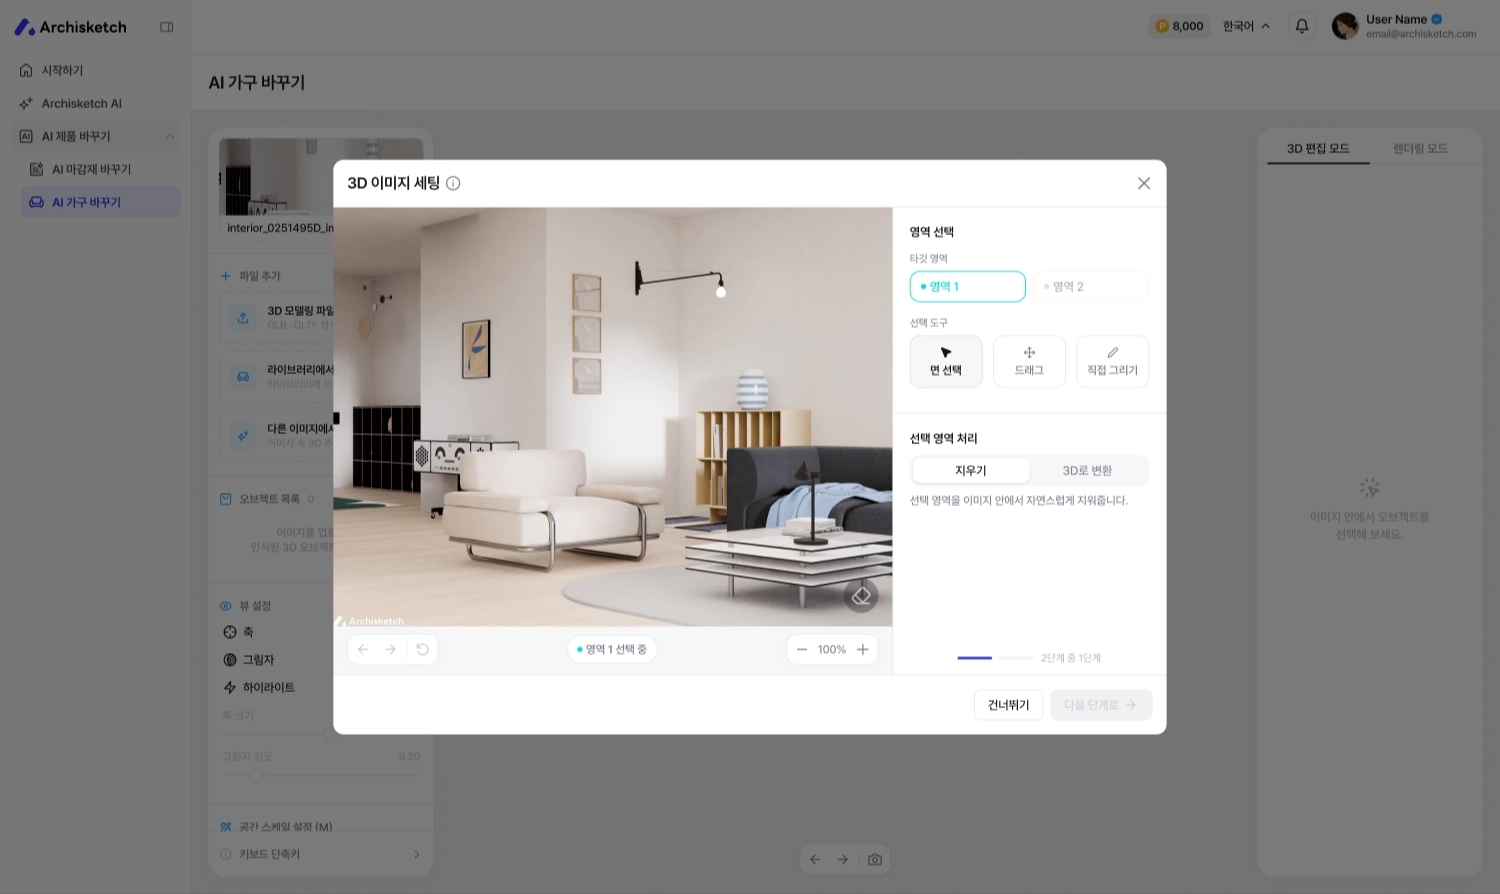
アップロードした写真を、編集しやすい状態に整える段階です。

<figure><img src="https://1692356280-files.gitbook.io/~/files/v0/b/gitbook-x-prod.appspot.com/o/spaces%2Fs45pRyTQeyYi0T0toKii%2Fuploads%2Fgit-blob-eac3c0bacb54fde407da88b51ba9162f1e4e72a2%2Fai-furniture-swap-3.png?alt=media" alt=""><figcaption></figcaption></figure>

#### 2-1. 編集する範囲を選択

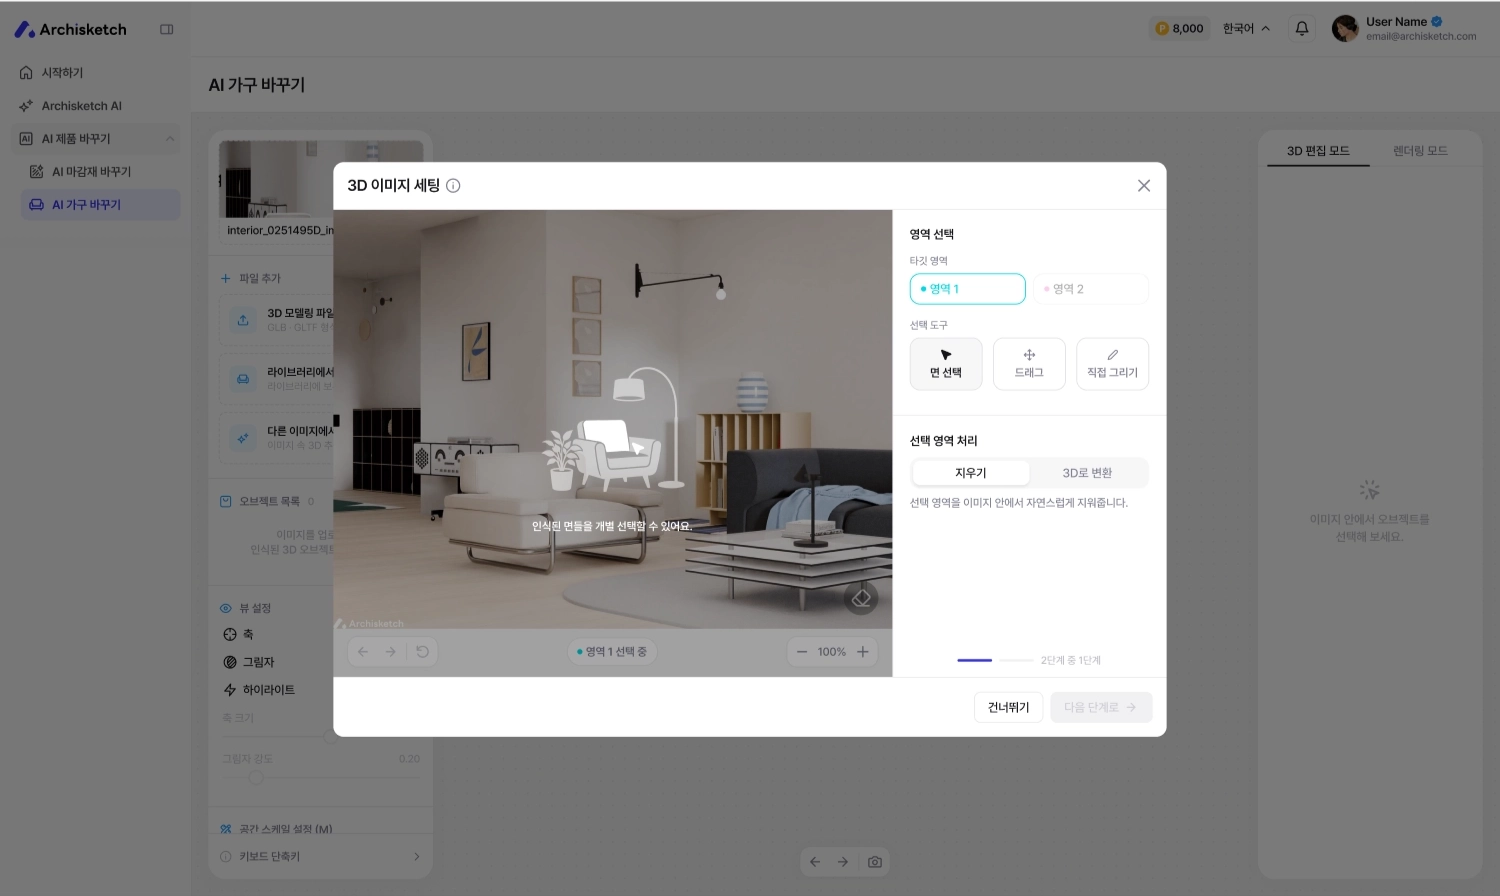
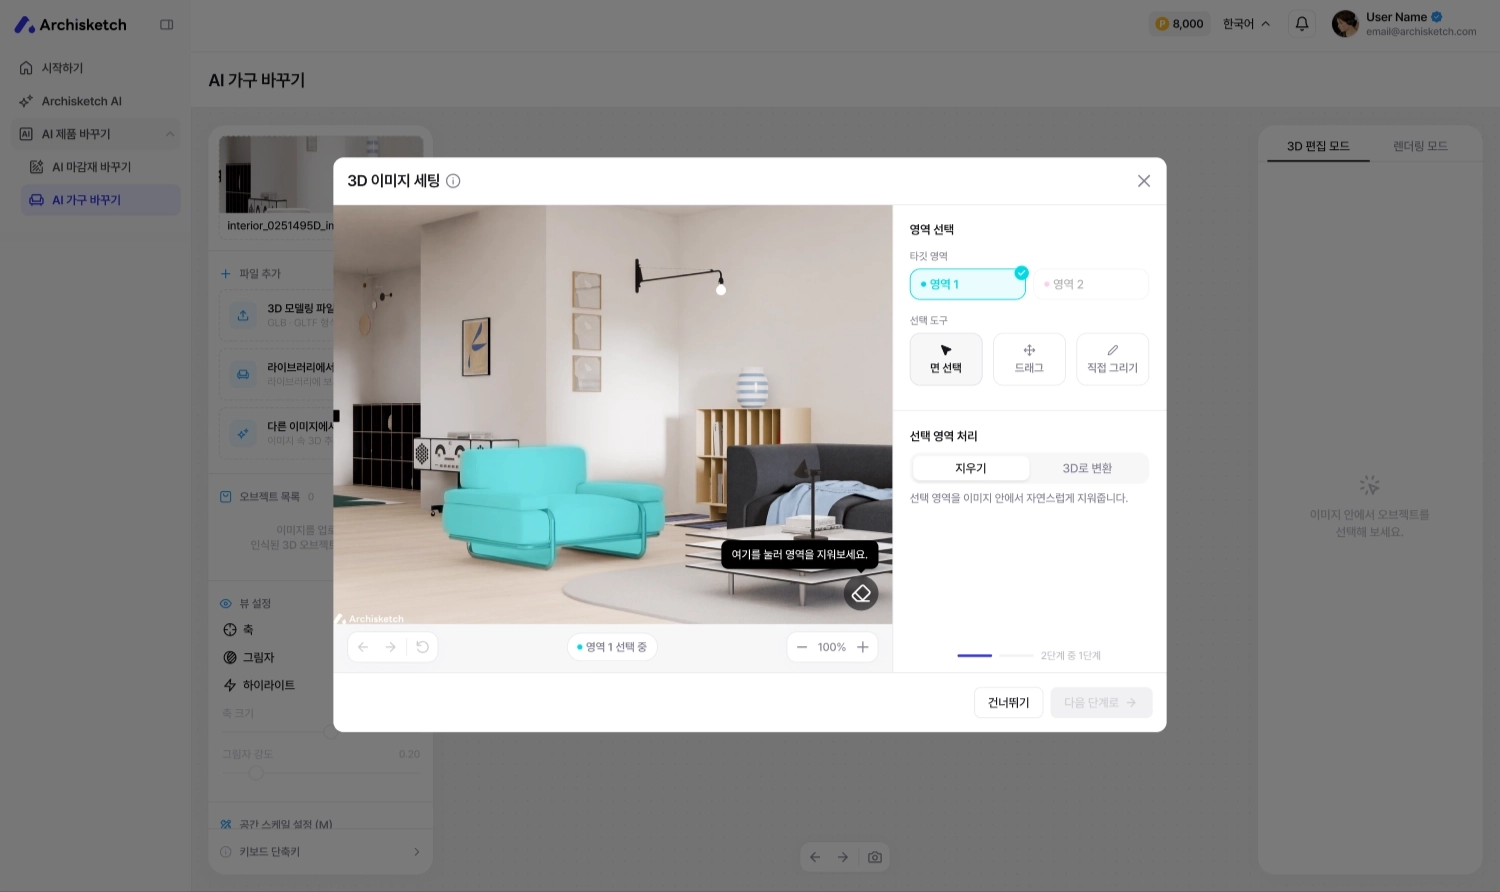
入れ替えたり削除したりしたい部分を先に指定します。3つの選択ツールを用意しています。

<figure><img src="https://1692356280-files.gitbook.io/~/files/v0/b/gitbook-x-prod.appspot.com/o/spaces%2Fs45pRyTQeyYi0T0toKii%2Fuploads%2Fgit-blob-33f42decedc512bca5a05889d5d54b2913e79c6a%2Fai-furniture-swap-4.png?alt=media" alt=""><figcaption></figcaption></figure>

* **面(Surface)** — 壁・床のように面単位で選択
* **ドラッグ(Drag)** — 四角形で範囲をドラッグして選択
* **自由(Free)** — 好きな形で自由に選択

選択を終えると、該当範囲が画面に表示されます。

<figure><img src="https://1692356280-files.gitbook.io/~/files/v0/b/gitbook-x-prod.appspot.com/o/spaces%2Fs45pRyTQeyYi0T0toKii%2Fuploads%2Fgit-blob-7ccd47ef7ead539c89f33636b1ca8bc25976cce6%2Fai-furniture-swap-5.png?alt=media" alt=""><figcaption></figcaption></figure>

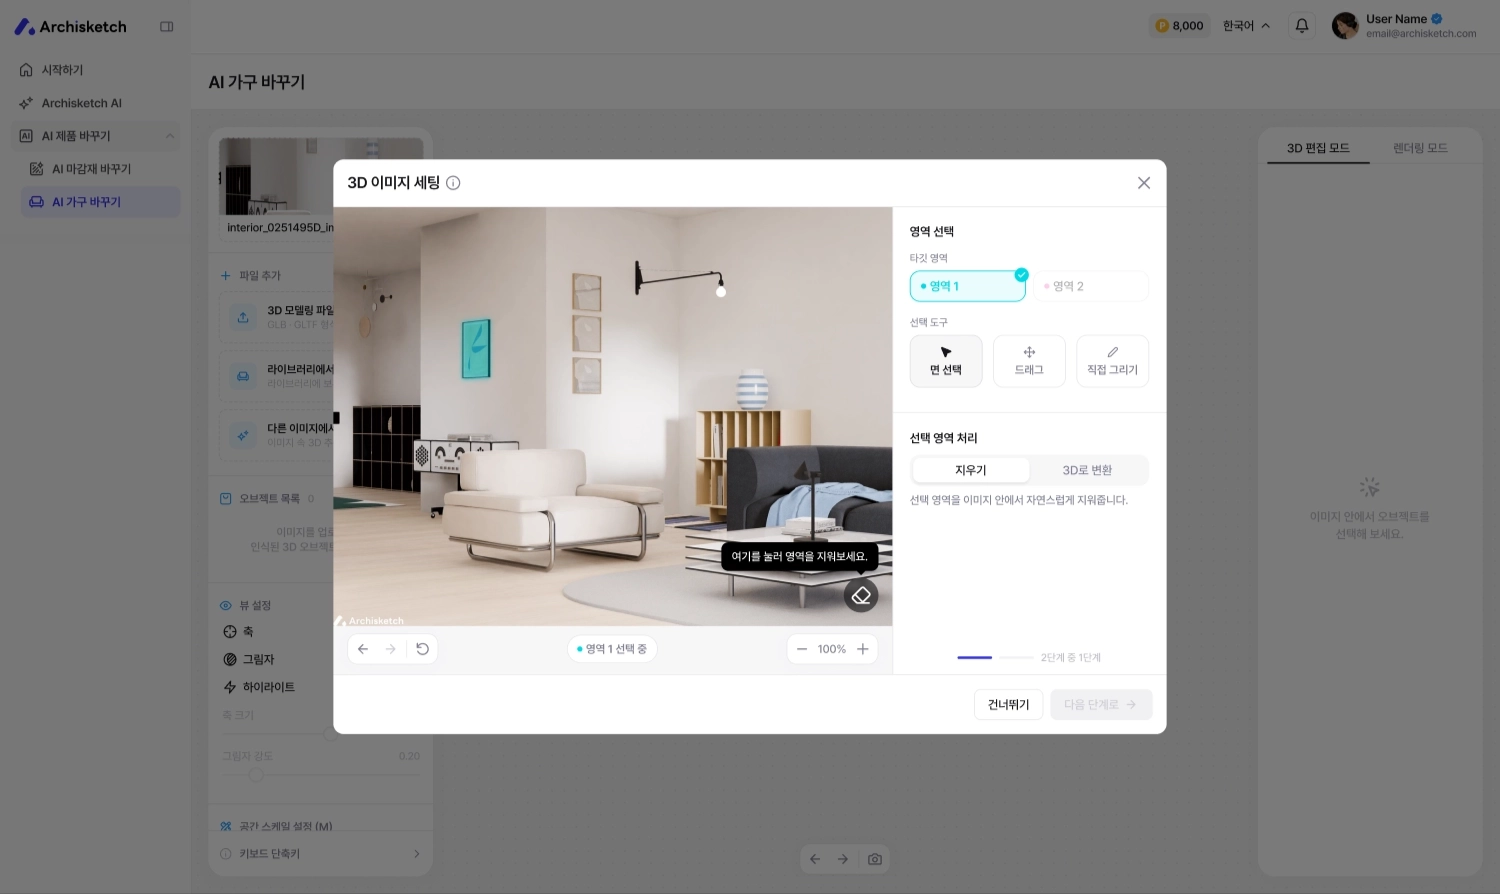
#### 2-2. 不要な要素を削除

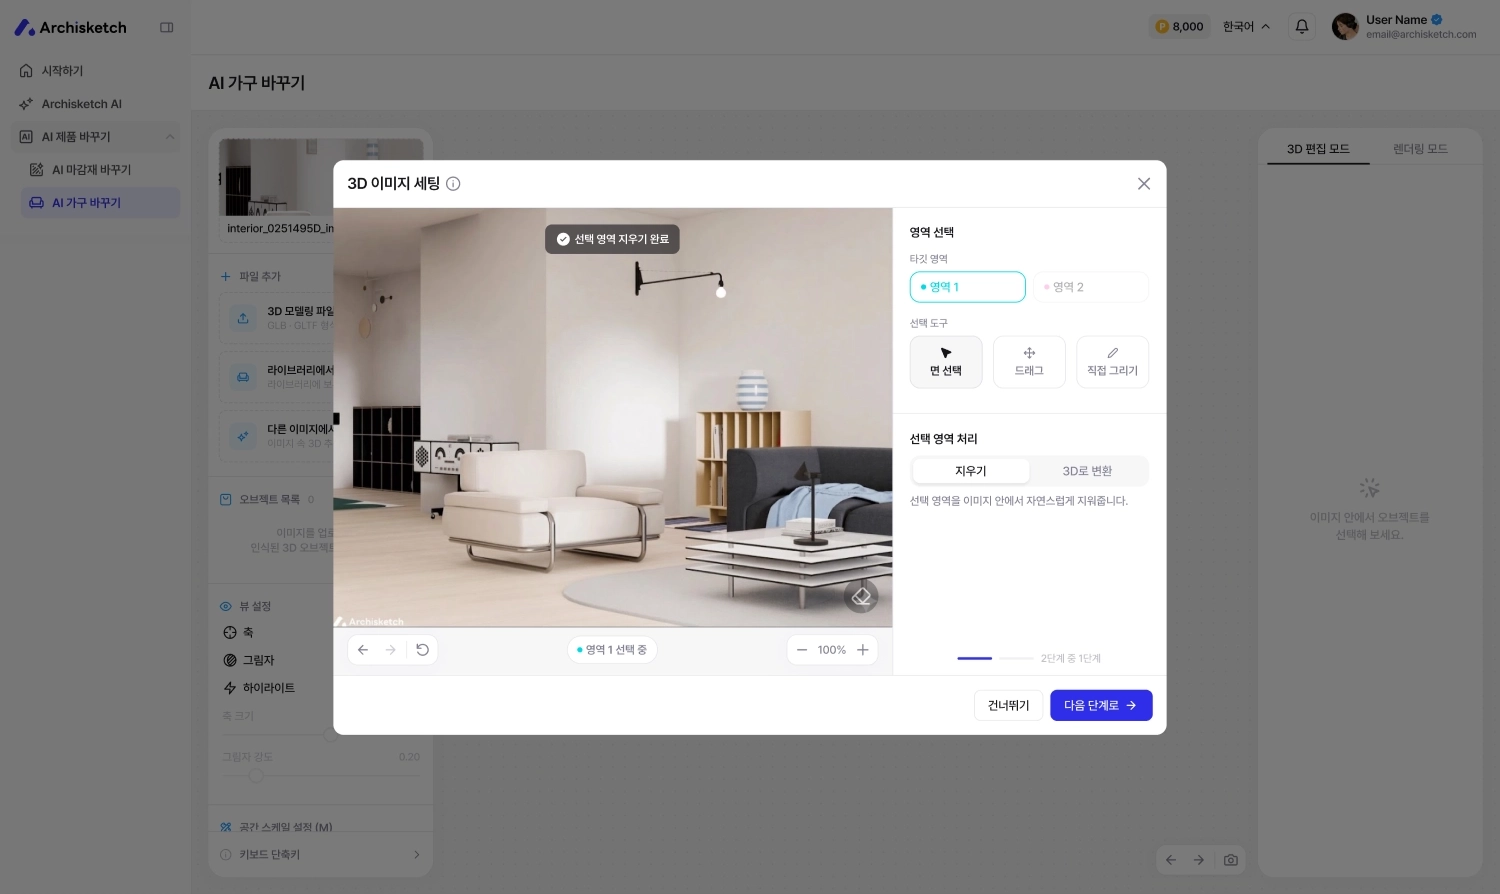
既存の家具や削除したい物を選んで、画像からきれいに除去できます。

<figure><img src="https://1692356280-files.gitbook.io/~/files/v0/b/gitbook-x-prod.appspot.com/o/spaces%2Fs45pRyTQeyYi0T0toKii%2Fuploads%2Fgit-blob-266b46f2b68d55b484d9f83e4c02e03452170dd5%2Fai-furniture-swap-6.png?alt=media" alt=""><figcaption></figcaption></figure>

削除を実行すると、AIがその部分を自然に埋めてくれます。

<figure><img src="https://1692356280-files.gitbook.io/~/files/v0/b/gitbook-x-prod.appspot.com/o/spaces%2Fs45pRyTQeyYi0T0toKii%2Fuploads%2Fgit-blob-ce0dfddc0e52bc323632cb5658ee709a691af63a%2Fai-furniture-swap-7.png?alt=media" alt=""><figcaption></figcaption></figure>

💡 現在は **部分削除**に対応しています。（全体削除は今後提供予定）

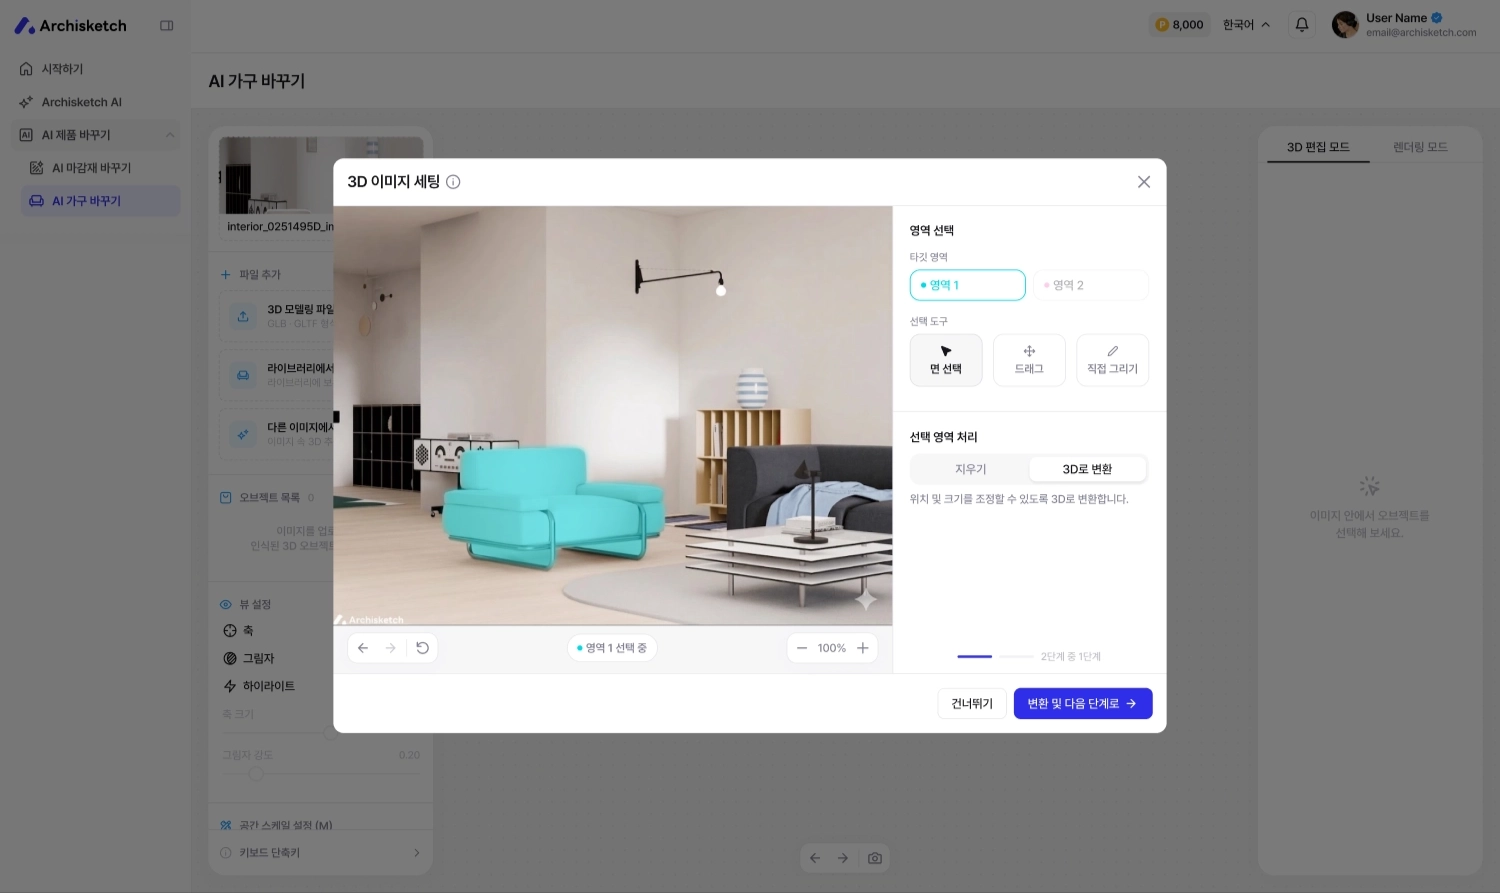
#### 2-3. 画像内の家具を3Dに変換

写真の中にある家具を3Dオブジェクトに変換すると、自由に移動・回転・編集できます。

<figure><img src="https://1692356280-files.gitbook.io/~/files/v0/b/gitbook-x-prod.appspot.com/o/spaces%2Fs45pRyTQeyYi0T0toKii%2Fuploads%2Fgit-blob-94b9ad012fe23839ec5d9fd48118031c9dbcdb7e%2Fai-furniture-swap-8.png?alt=media" alt=""><figcaption></figcaption></figure>

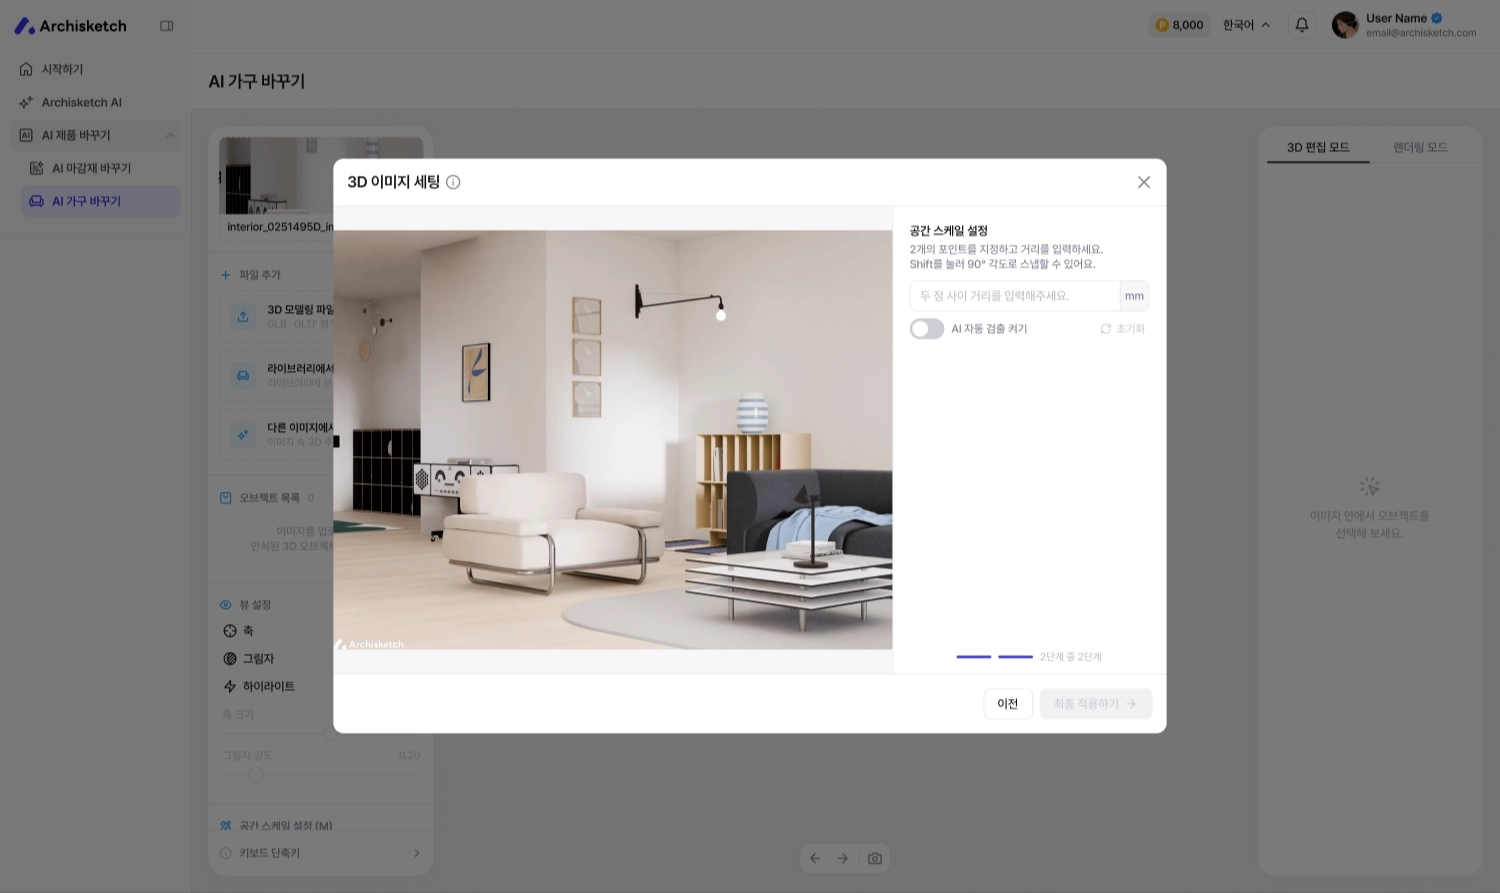
#### 2-4. 空間スケールの設定

実際の寸法を入力すると、配置する製品が **実寸サイズのまま** 表現されるため、より正確なシミュレーションが可能です。

<figure><img src="https://1692356280-files.gitbook.io/~/files/v0/b/gitbook-x-prod.appspot.com/o/spaces%2Fs45pRyTQeyYi0T0toKii%2Fuploads%2Fgit-blob-c9df29feeea1e211bb6b41b8c418f41bcce41644%2Fai-furniture-swap-9.png?alt=media" alt=""><figcaption></figcaption></figure>

### STEP 3. 新しい家具を読み込む（ファイル追加）

左側 **+ ファイル追加**から、配置する家具を3つの方法で読み込めます。

#### 3-1. 3Dモデリングファイルをアップロード

お持ちの3Dファイルを直接アップロードします。（GLTF・GLB形式、100Mb未満）

<figure><img src="https://1692356280-files.gitbook.io/~/files/v0/b/gitbook-x-prod.appspot.com/o/spaces%2Fs45pRyTQeyYi0T0toKii%2Fuploads%2Fgit-blob-83d55800a96f66bfdbdc0af1aa1e1d01199fae19%2Fai-furniture-swap-10.png?alt=media" alt=""><figcaption></figcaption></figure>

#### 3-2. ライブラリから取り込む

Archisketchライブラリに登録された製品を検索して、すぐに配置します。

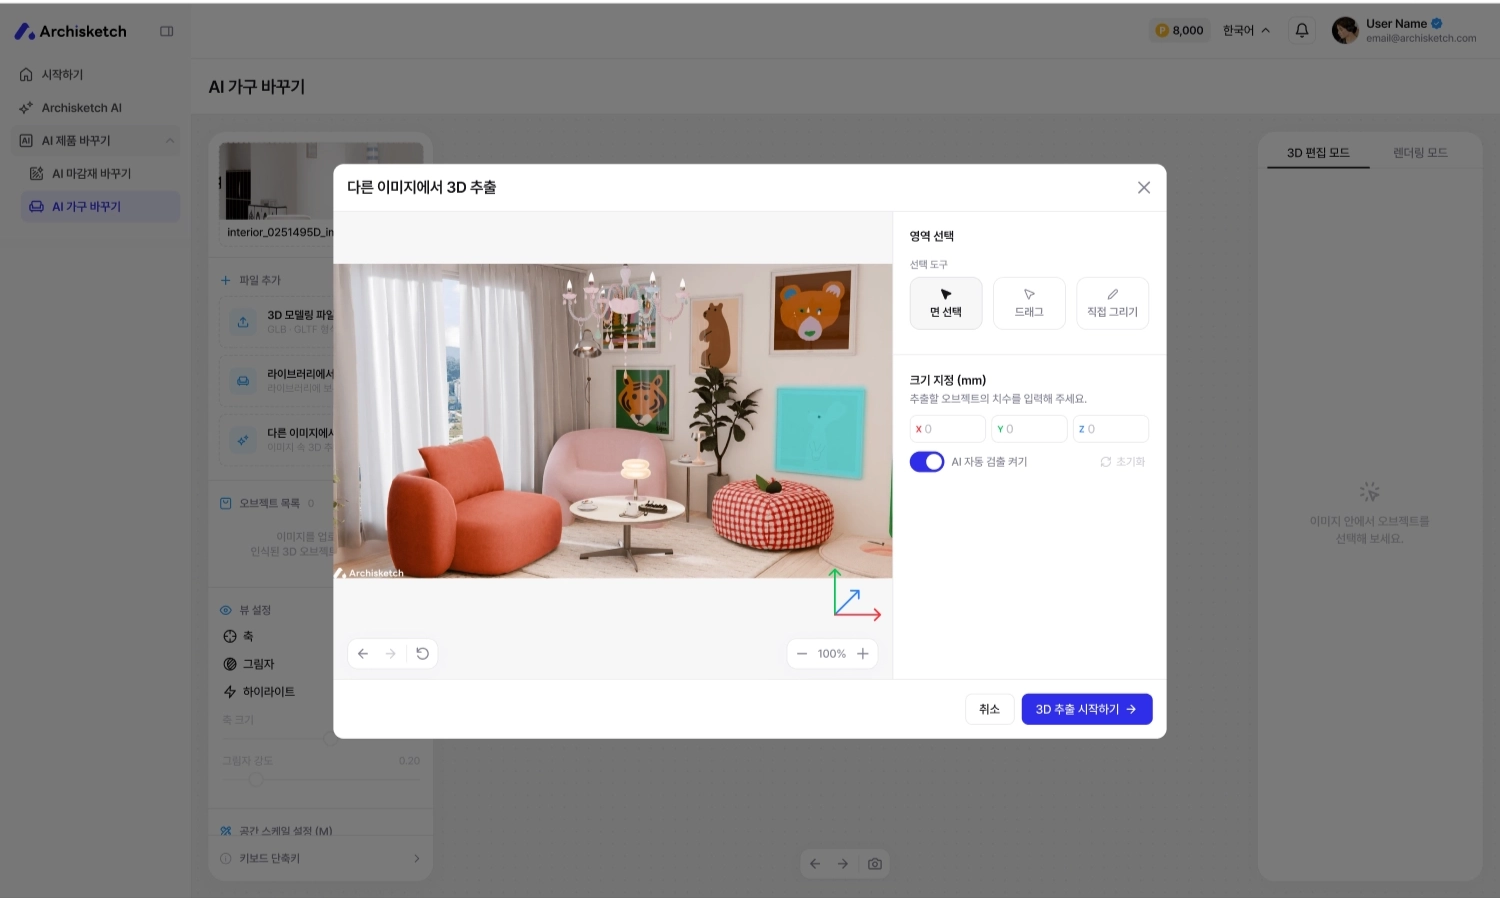
#### 3-3. 別の画像から3D抽出

別の写真の中のお気に入りの家具を3Dで抽出し、自分の空間に反映します。

<figure><img src="https://1692356280-files.gitbook.io/~/files/v0/b/gitbook-x-prod.appspot.com/o/spaces%2Fs45pRyTQeyYi0T0toKii%2Fuploads%2Fgit-blob-005e88bf4a937c064fc383d77c16f1fdce394547%2Fai-furniture-swap-11.png?alt=media" alt=""><figcaption></figcaption></figure>

💡 個人ライブラリへの反映は現在準備中です。

読み込んだ家具は左側の **オブジェクト一覧**で表示/非表示・選択などを管理できます。

<figure><img src="https://1692356280-files.gitbook.io/~/files/v0/b/gitbook-x-prod.appspot.com/o/spaces%2Fs45pRyTQeyYi0T0toKii%2Fuploads%2Fgit-blob-f14d4af29a1f843ffe3937488d7ae119d2da4eec%2Fai-furniture-swap-12.png?alt=media" alt=""><figcaption></figcaption></figure>

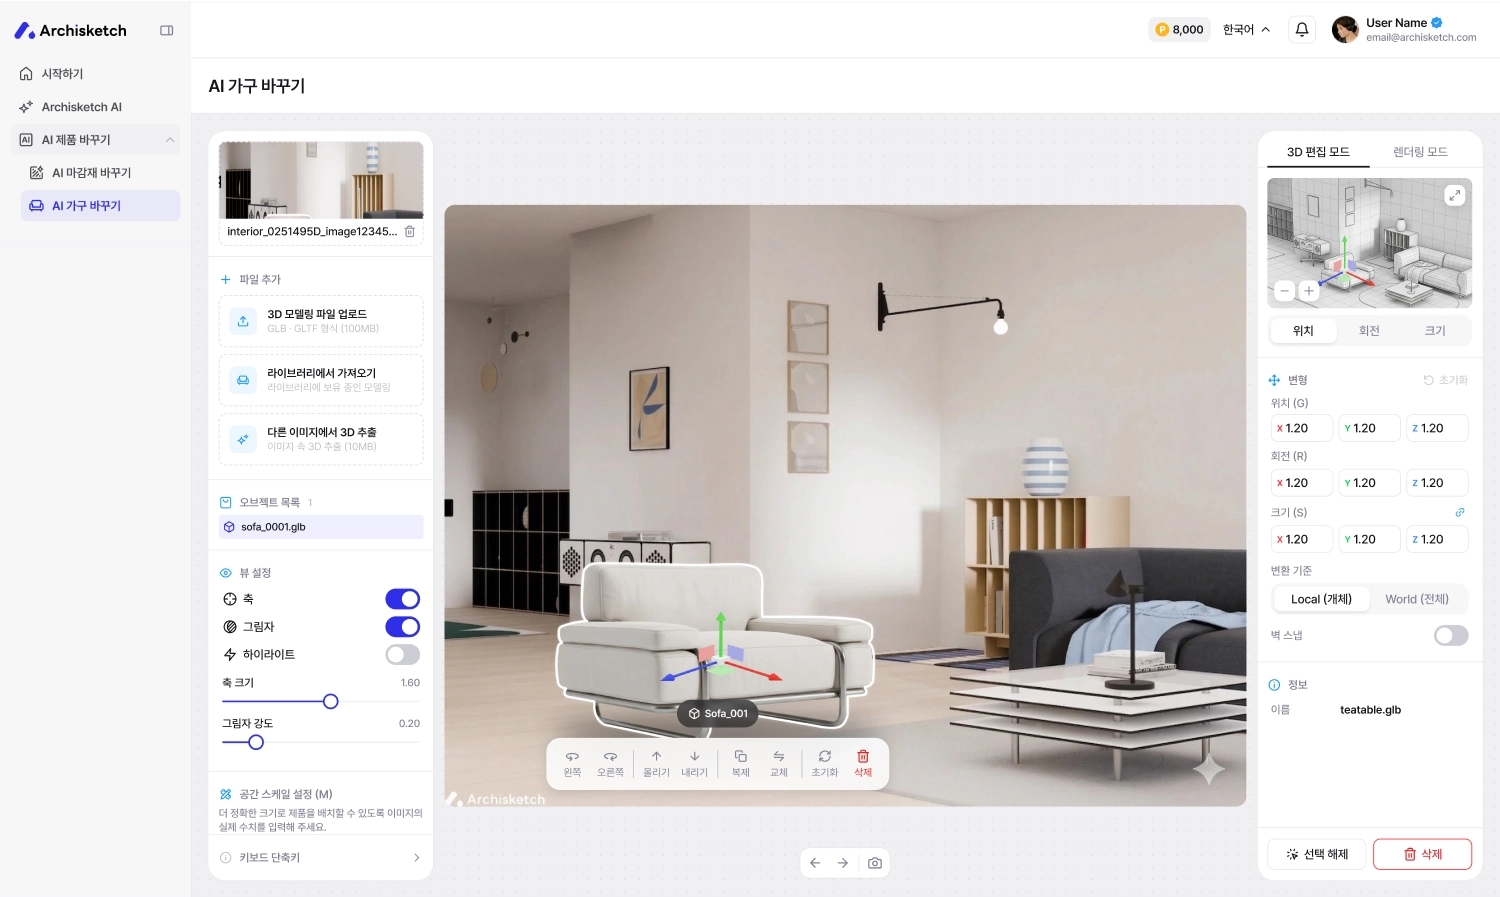
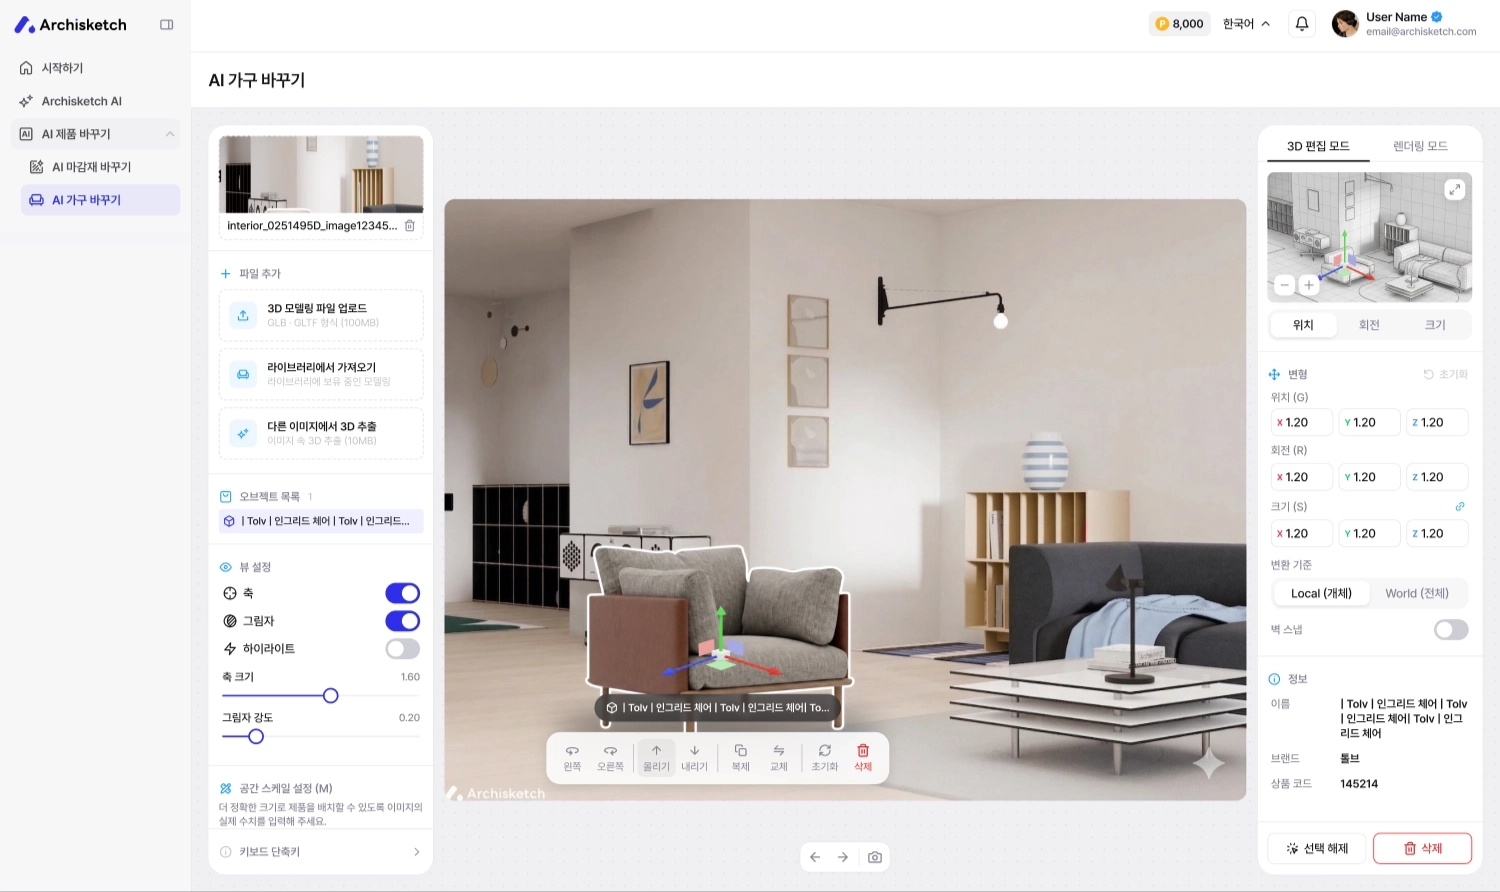
### STEP 4. 家具の配置・調整（3D編集モード）

配置した家具を希望の位置とサイズに合わせます。

<figure><img src="https://1692356280-files.gitbook.io/~/files/v0/b/gitbook-x-prod.appspot.com/o/spaces%2Fs45pRyTQeyYi0T0toKii%2Fuploads%2Fgit-blob-3587700a35b3d5ce09585bc474fd0d817f8f8a20%2Fai-furniture-swap-13.png?alt=media" alt=""><figcaption></figcaption></figure>

#### 4-1. 位置・回転・サイズ調整

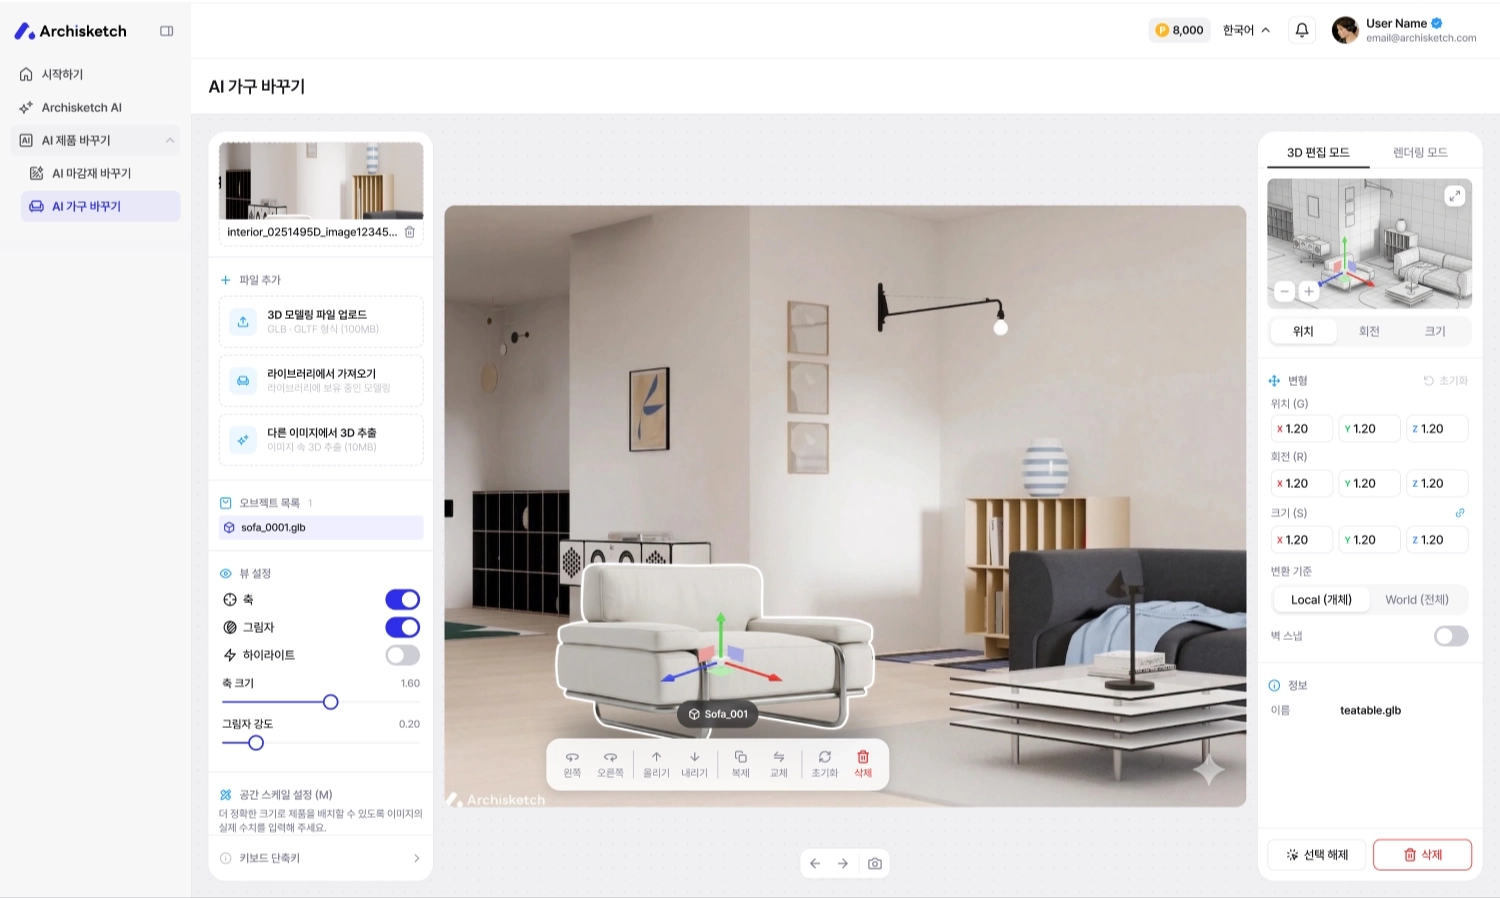
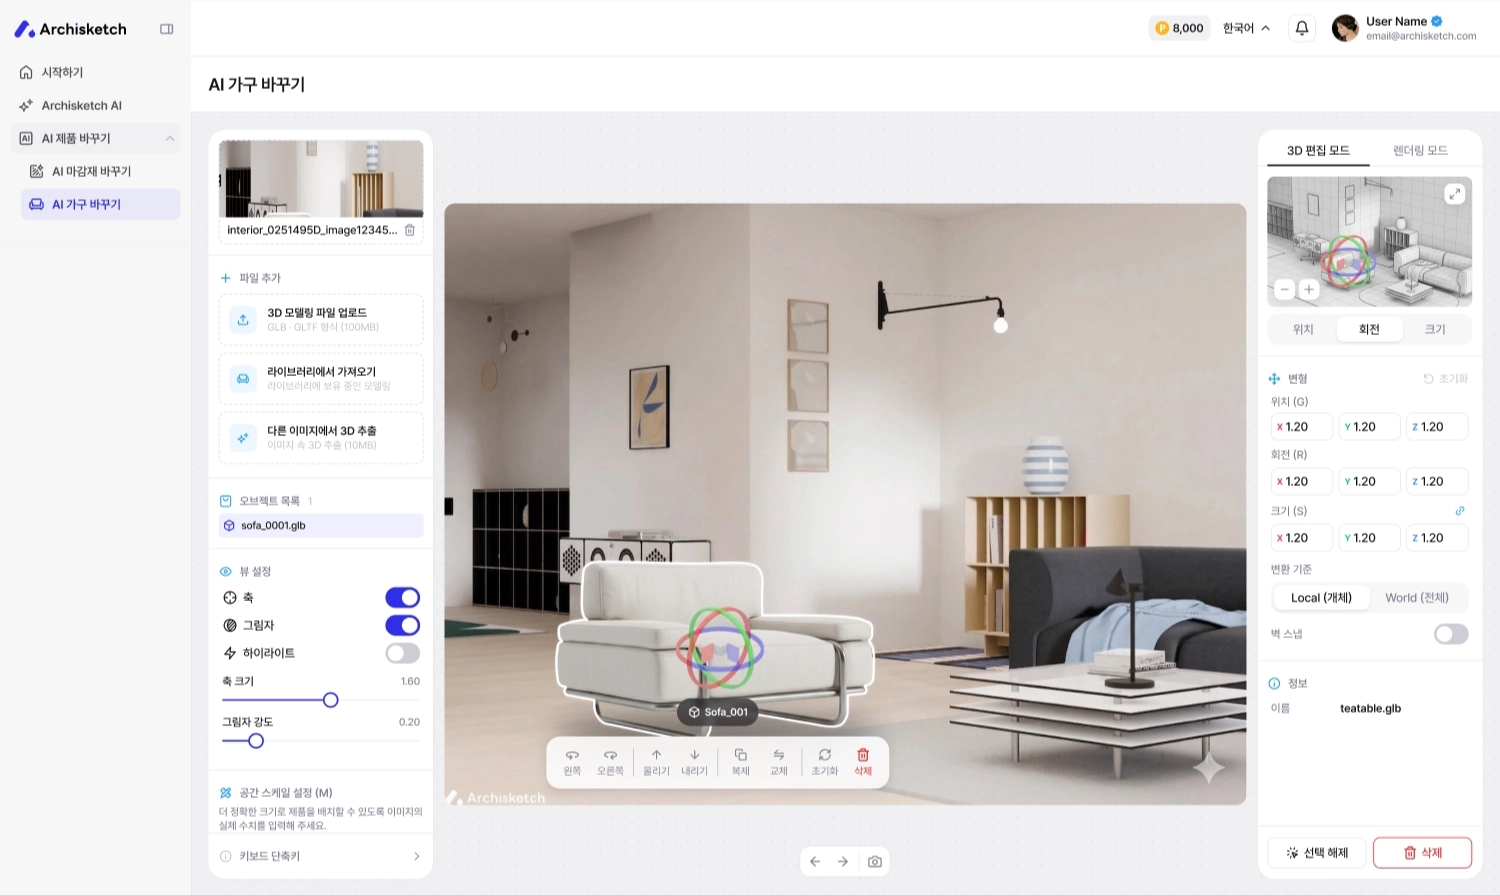
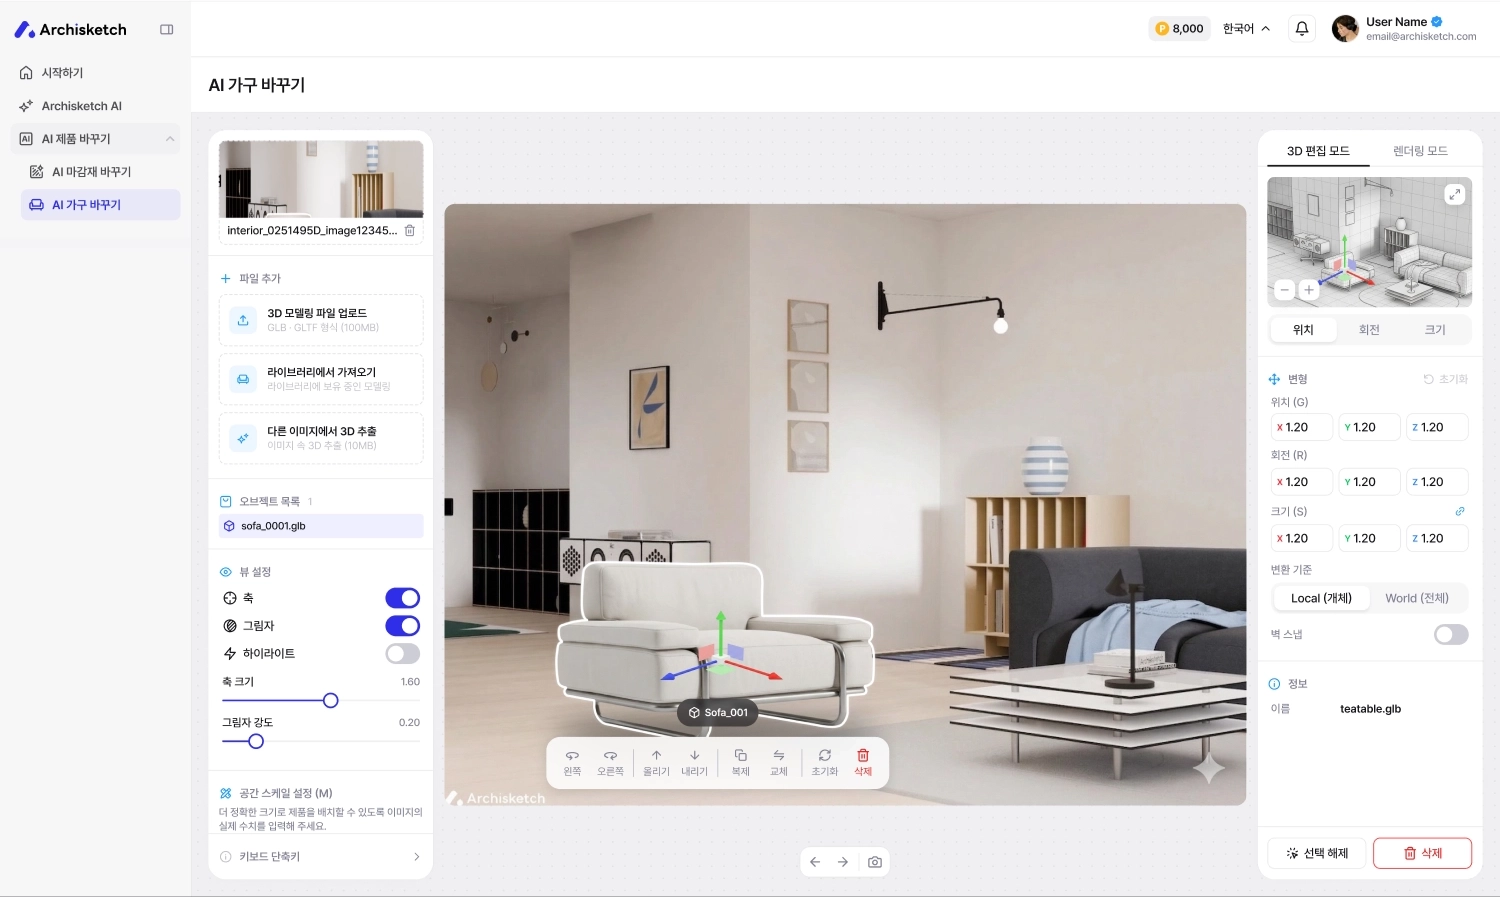
中央キャンバスのハンドルをドラッグするか、右側パネルで **位置(G)・回転(R)・サイズ(S)** の値を直接入力します。

基準を **Local(個体)** または \*\*World(全体)\*\* に切り替えられ、ボックススナップで床・壁にぴったり合わせられます。

<figure><img src="https://1692356280-files.gitbook.io/~/files/v0/b/gitbook-x-prod.appspot.com/o/spaces%2Fs45pRyTQeyYi0T0toKii%2Fuploads%2Fgit-blob-b609309aaa512d462ba02666e13b3a5de2af2d01%2Fai-furniture-swap-14.png?alt=media" alt=""><figcaption></figcaption></figure>

#### 4-2. ビュー設定

**軸・影・ハイライト** の表示を切り替えられ、軸の大きさや影の強さを調整して、よりリアルに確認できます。

<figure><img src="https://1692356280-files.gitbook.io/~/files/v0/b/gitbook-x-prod.appspot.com/o/spaces%2Fs45pRyTQeyYi0T0toKii%2Fuploads%2Fgit-blob-f8bdfa047a5177254b4f735c40c7c5e749e4edb0%2Fai-furniture-swap-15.png?alt=media" alt=""><figcaption></figcaption></figure>

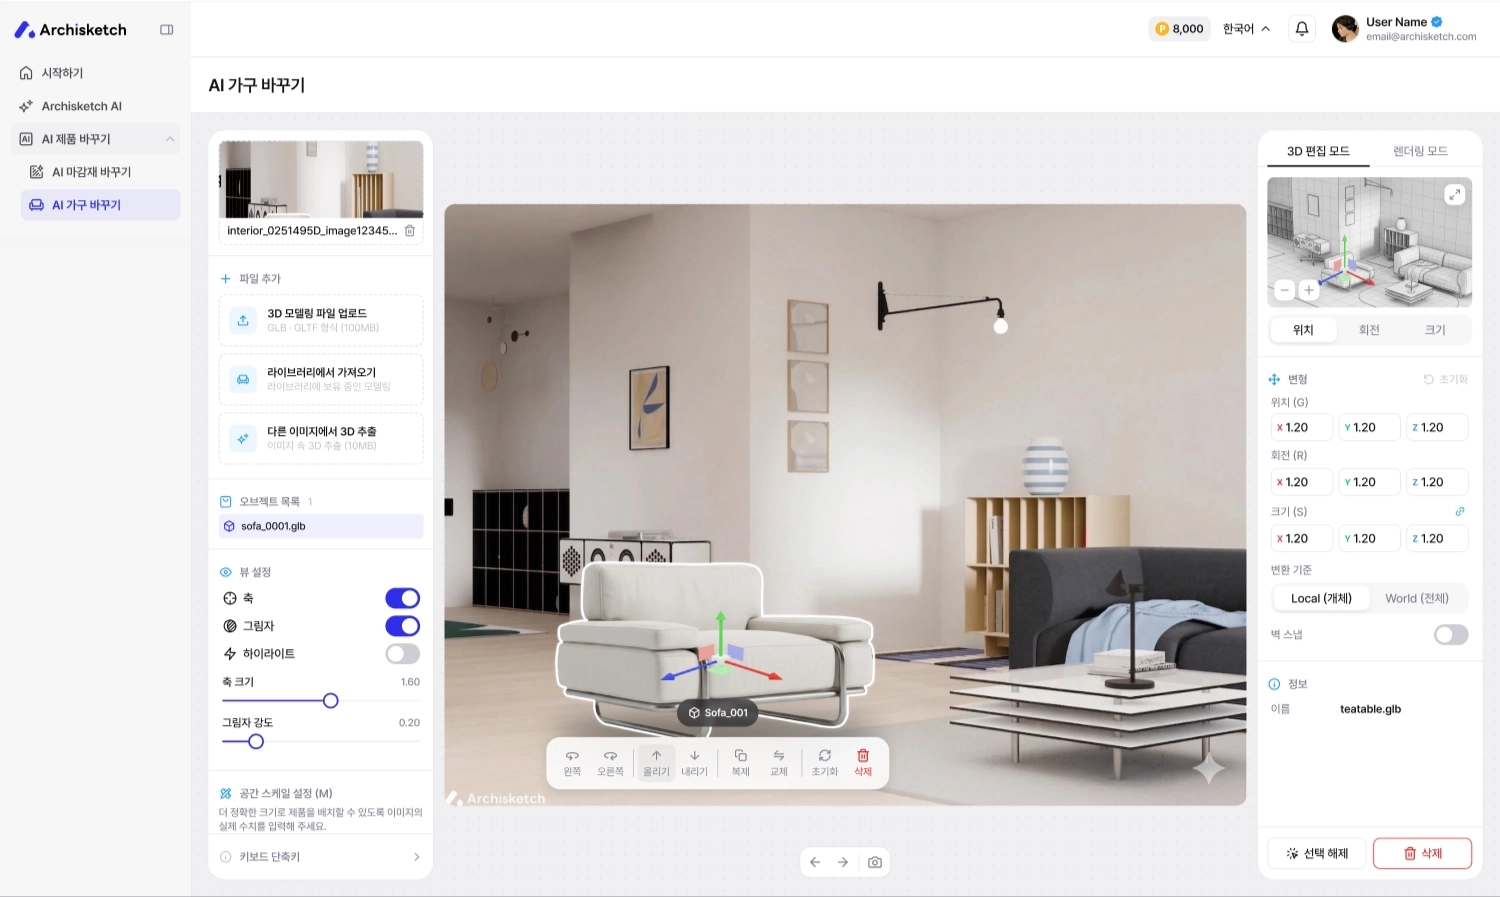
#### 4-3. 編集ツールバー

中央下部のツールバーで素早く編集できます — **選択 / 上げる / 下げる / 複製 / 交換 / 初期化 / 削除**

<figure><img src="https://1692356280-files.gitbook.io/~/files/v0/b/gitbook-x-prod.appspot.com/o/spaces%2Fs45pRyTQeyYi0T0toKii%2Fuploads%2Fgit-blob-98d5284f4d7f882b4ad1020a3dc668da2b13822b%2Fai-furniture-swap-16.png?alt=media" alt=""><figcaption></figcaption></figure>

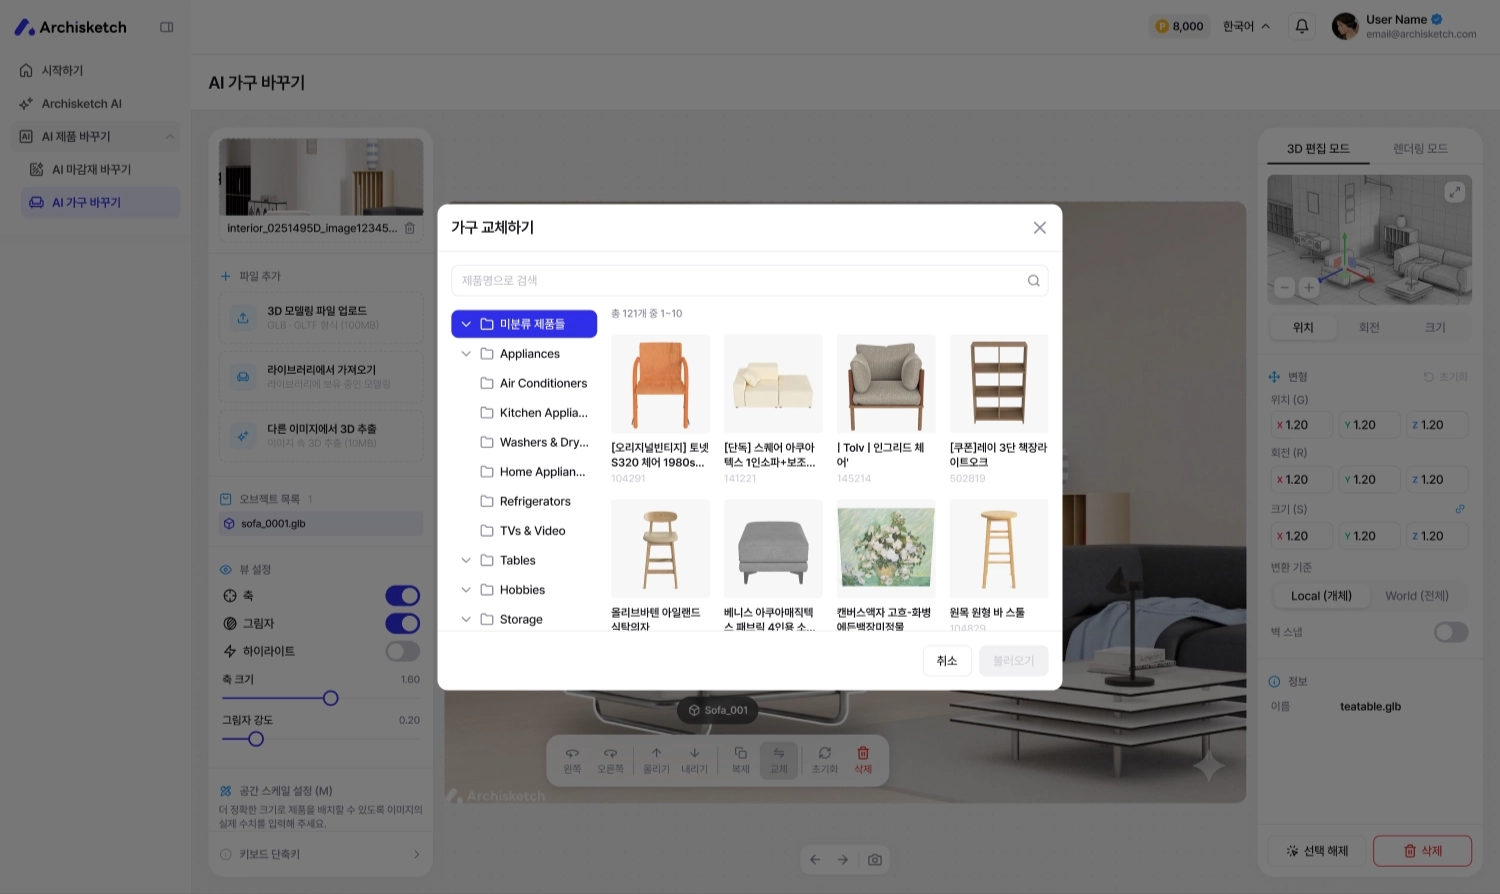
### STEP 5. 家具の交換

配置した家具を別の製品に簡単に入れ替えられます。ツールバーの **交換**を押したあと、リストから希望の製品を選択してください。

<figure><img src="https://1692356280-files.gitbook.io/~/files/v0/b/gitbook-x-prod.appspot.com/o/spaces%2Fs45pRyTQeyYi0T0toKii%2Fuploads%2Fgit-blob-c3020000156af74135f88a5a36de69abe10301a3%2Fai-furniture-swap-17.png?alt=media" alt=""><figcaption></figcaption></figure>

選択すると、同じ場所に新しい家具が適用されます。

<figure><img src="https://1692356280-files.gitbook.io/~/files/v0/b/gitbook-x-prod.appspot.com/o/spaces%2Fs45pRyTQeyYi0T0toKii%2Fuploads%2Fgit-blob-e17e6af0bc73349693ff2c49662f4f3ccaa97ec0%2Fai-furniture-swap-18.png?alt=media" alt=""><figcaption></figcaption></figure>

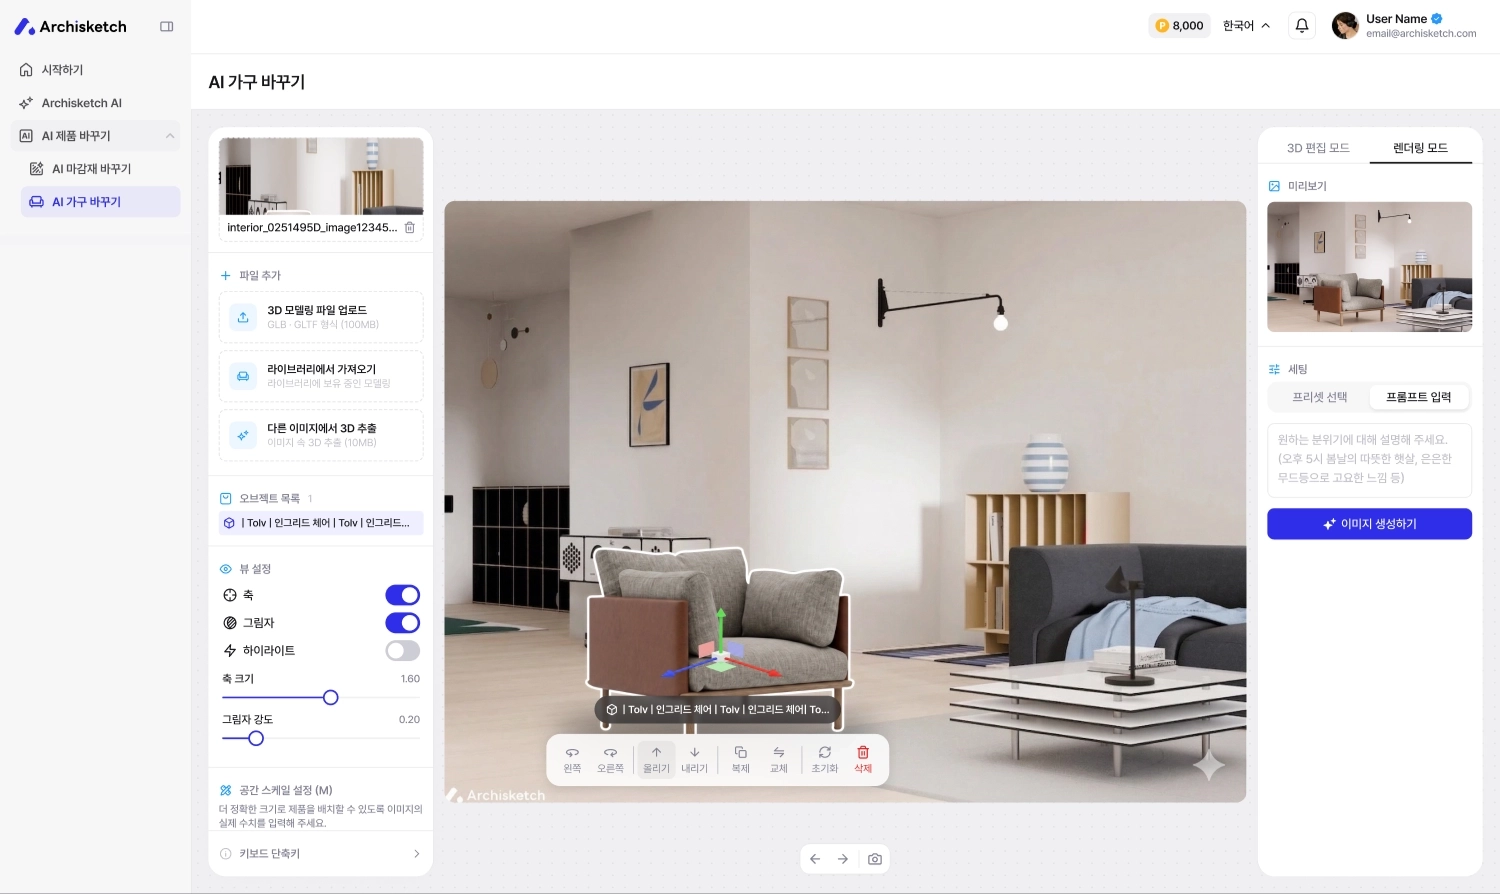
### STEP 6. レンダリング

編集が終わったら、右上の **レンダリングモード**に切り替えて完成画像を作成します。

希望の雰囲気をプロンプトで入力してレンダリングを実行した後、完成した画像を保存してください。

<figure><img src="https://1692356280-files.gitbook.io/~/files/v0/b/gitbook-x-prod.appspot.com/o/spaces%2Fs45pRyTQeyYi0T0toKii%2Fuploads%2Fgit-blob-11b60791fa9c54dce6827c13c6c1462a5f52b76a%2Fai-furniture-swap-19.png?alt=media" alt=""><figcaption></figcaption></figure>


---

# Agent Instructions
This documentation is published with GitBook. GitBook is the documentation platform designed so that both humans and AI agents can read, navigate, and reason over technical content effectively. Learn more at gitbook.com.

## Querying This Documentation
If you need additional information that is not directly available in this page, you can query the documentation dynamically by asking a question.

Perform an HTTP GET request on the current page URL with the `ask` query parameter, and the optional `goal` query parameter:

```
GET https://docs.archisketch.com/guide/user-jp/archisketch-ai/ai-furniture-swap.md?ask=<question>&goal=<endgoal>
```

`ask` is the immediate question: it should be specific, self-contained, and written in natural language.
`goal` is optional and describes the broader end goal you are ultimately trying to accomplish on behalf of the user. GitBook uses it to tailor the answer towards what is most useful for that goal.

The response will contain a direct answer to the question and relevant excerpts and sources from the documentation.

Use this mechanism when the answer is not explicitly present in the current page, you need clarification or additional context, or you want to retrieve related documentation sections.