> For the complete documentation index, see [llms.txt](https://docs.archisketch.com/llms.txt). Markdown versions of documentation pages are available by appending `.md` to page URLs; this page is available as [Markdown](https://docs.archisketch.com/guide/user-jp/archisketch-ai/ai-ai-snapshot.md).
# AIスナップショット(AI Snapshot)
AIスナップショットはレンダースタジオのレンダーモードの一つです。カメラ位置と雰囲気だけ決めれば、AIがプロンプト・プリセットをもとに自動で見栄えよく撮影(レンダリング)してくれます。
### AIスナップショットとは?
基本レンダリングが設定値を基準に行うなら、AIスナップショットは **プロンプト(例:「居心地のよい雰囲気」)やプリセット(朝/昼/日の出・日の入り)**を与えると、AIが照明・雰囲気を自動で整えてきれいに仕上げてくれます。なので、照明・カメラ・環境を **一つひとつ設定する必要がなく、**望む雰囲気だけ伝えればOKです。結果画像には配置された製品に **タグ(ピン)**を付けられるので、相談・情報確認に活用できます。さらに、設定をAIが代わりに行ってくれるぶん **結果物も1分以内に素早く** 受け取れます。
区分
一般レンダーショット
AIレンダーショット(AIスナップショット)
主な強み
設定したとおりに正確に再現
望む雰囲気を自動で演出
結果の出し方
照明・環境・カメラを細かく直接制御
プロンプト1行+プリセットで十分
速度
値を精密に調整して意図どおりに再現
設定なしで1分以内に結果を確保
こんなときに便利
正確なラフ案と確認、実測ベースの提案
マーケティングや相談用のきれいなカットを素早く
### **使用手順**
{% stepper %}
{% step %}
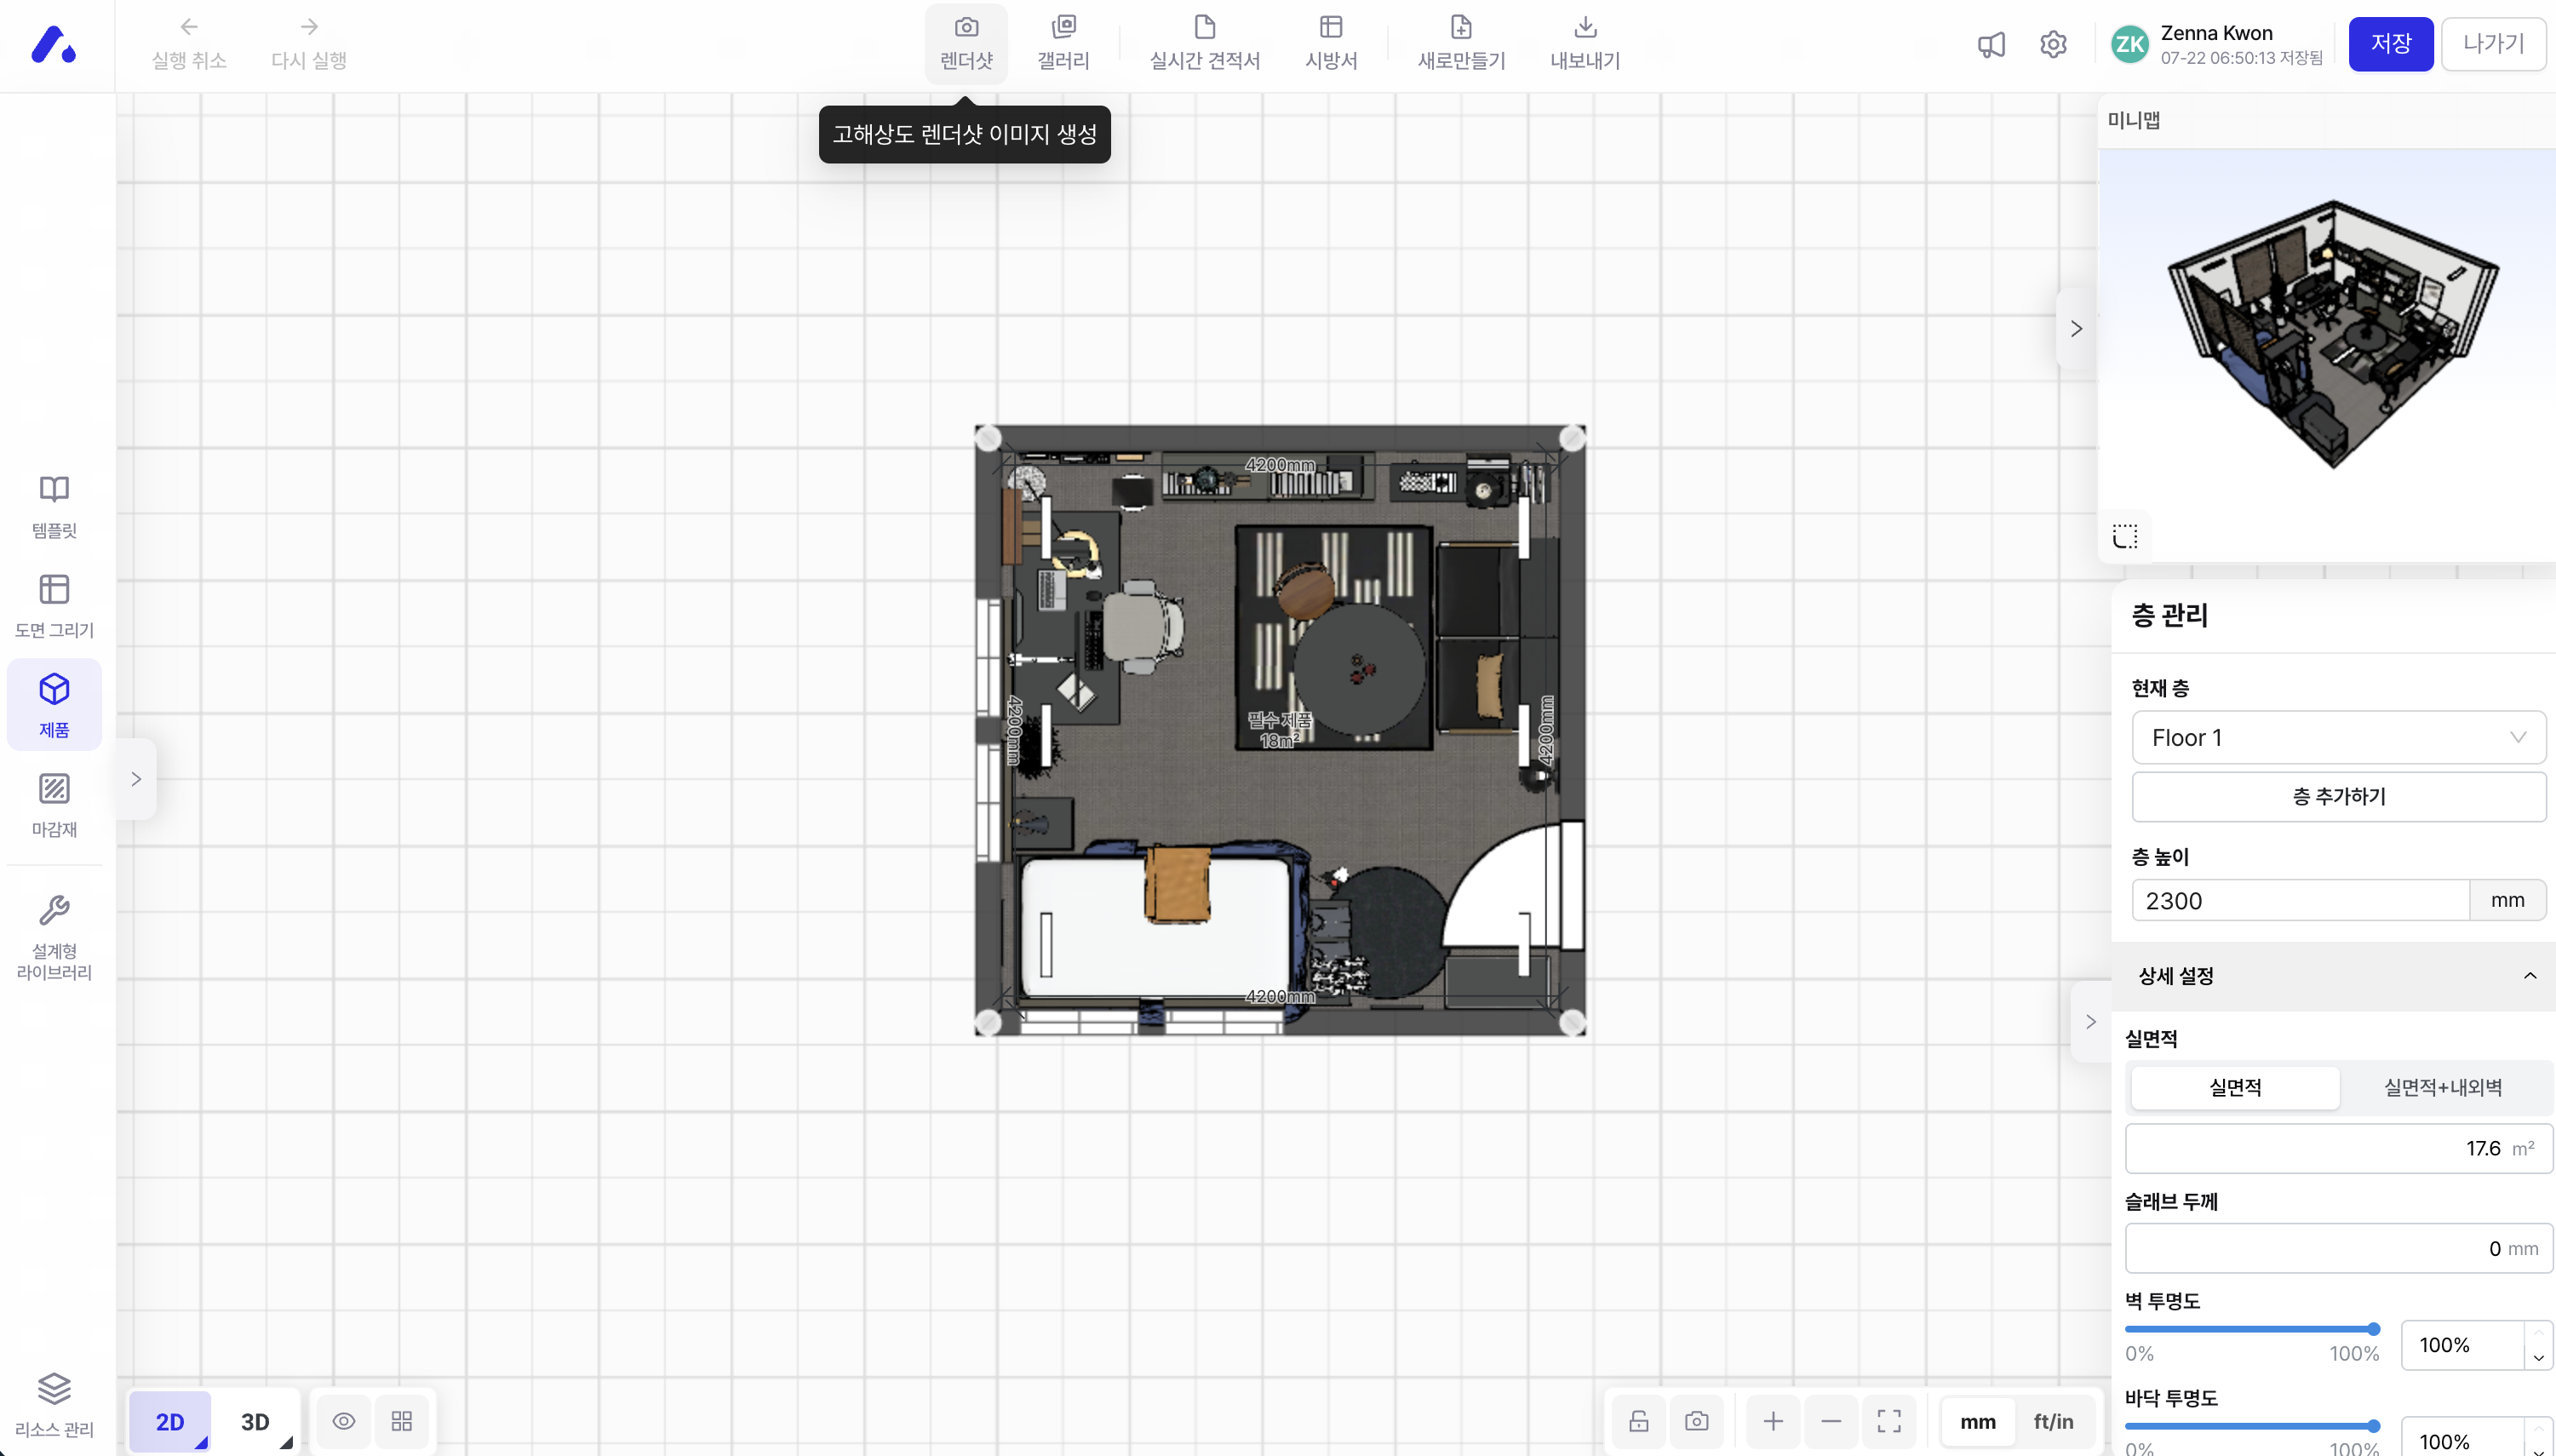
#### レンダーショットを開く
エディター上部のツールバーで **\[レンダーショット]**(高解像度レンダーショット画像生成)をクリックします。
{% endstep %}
{% step %}
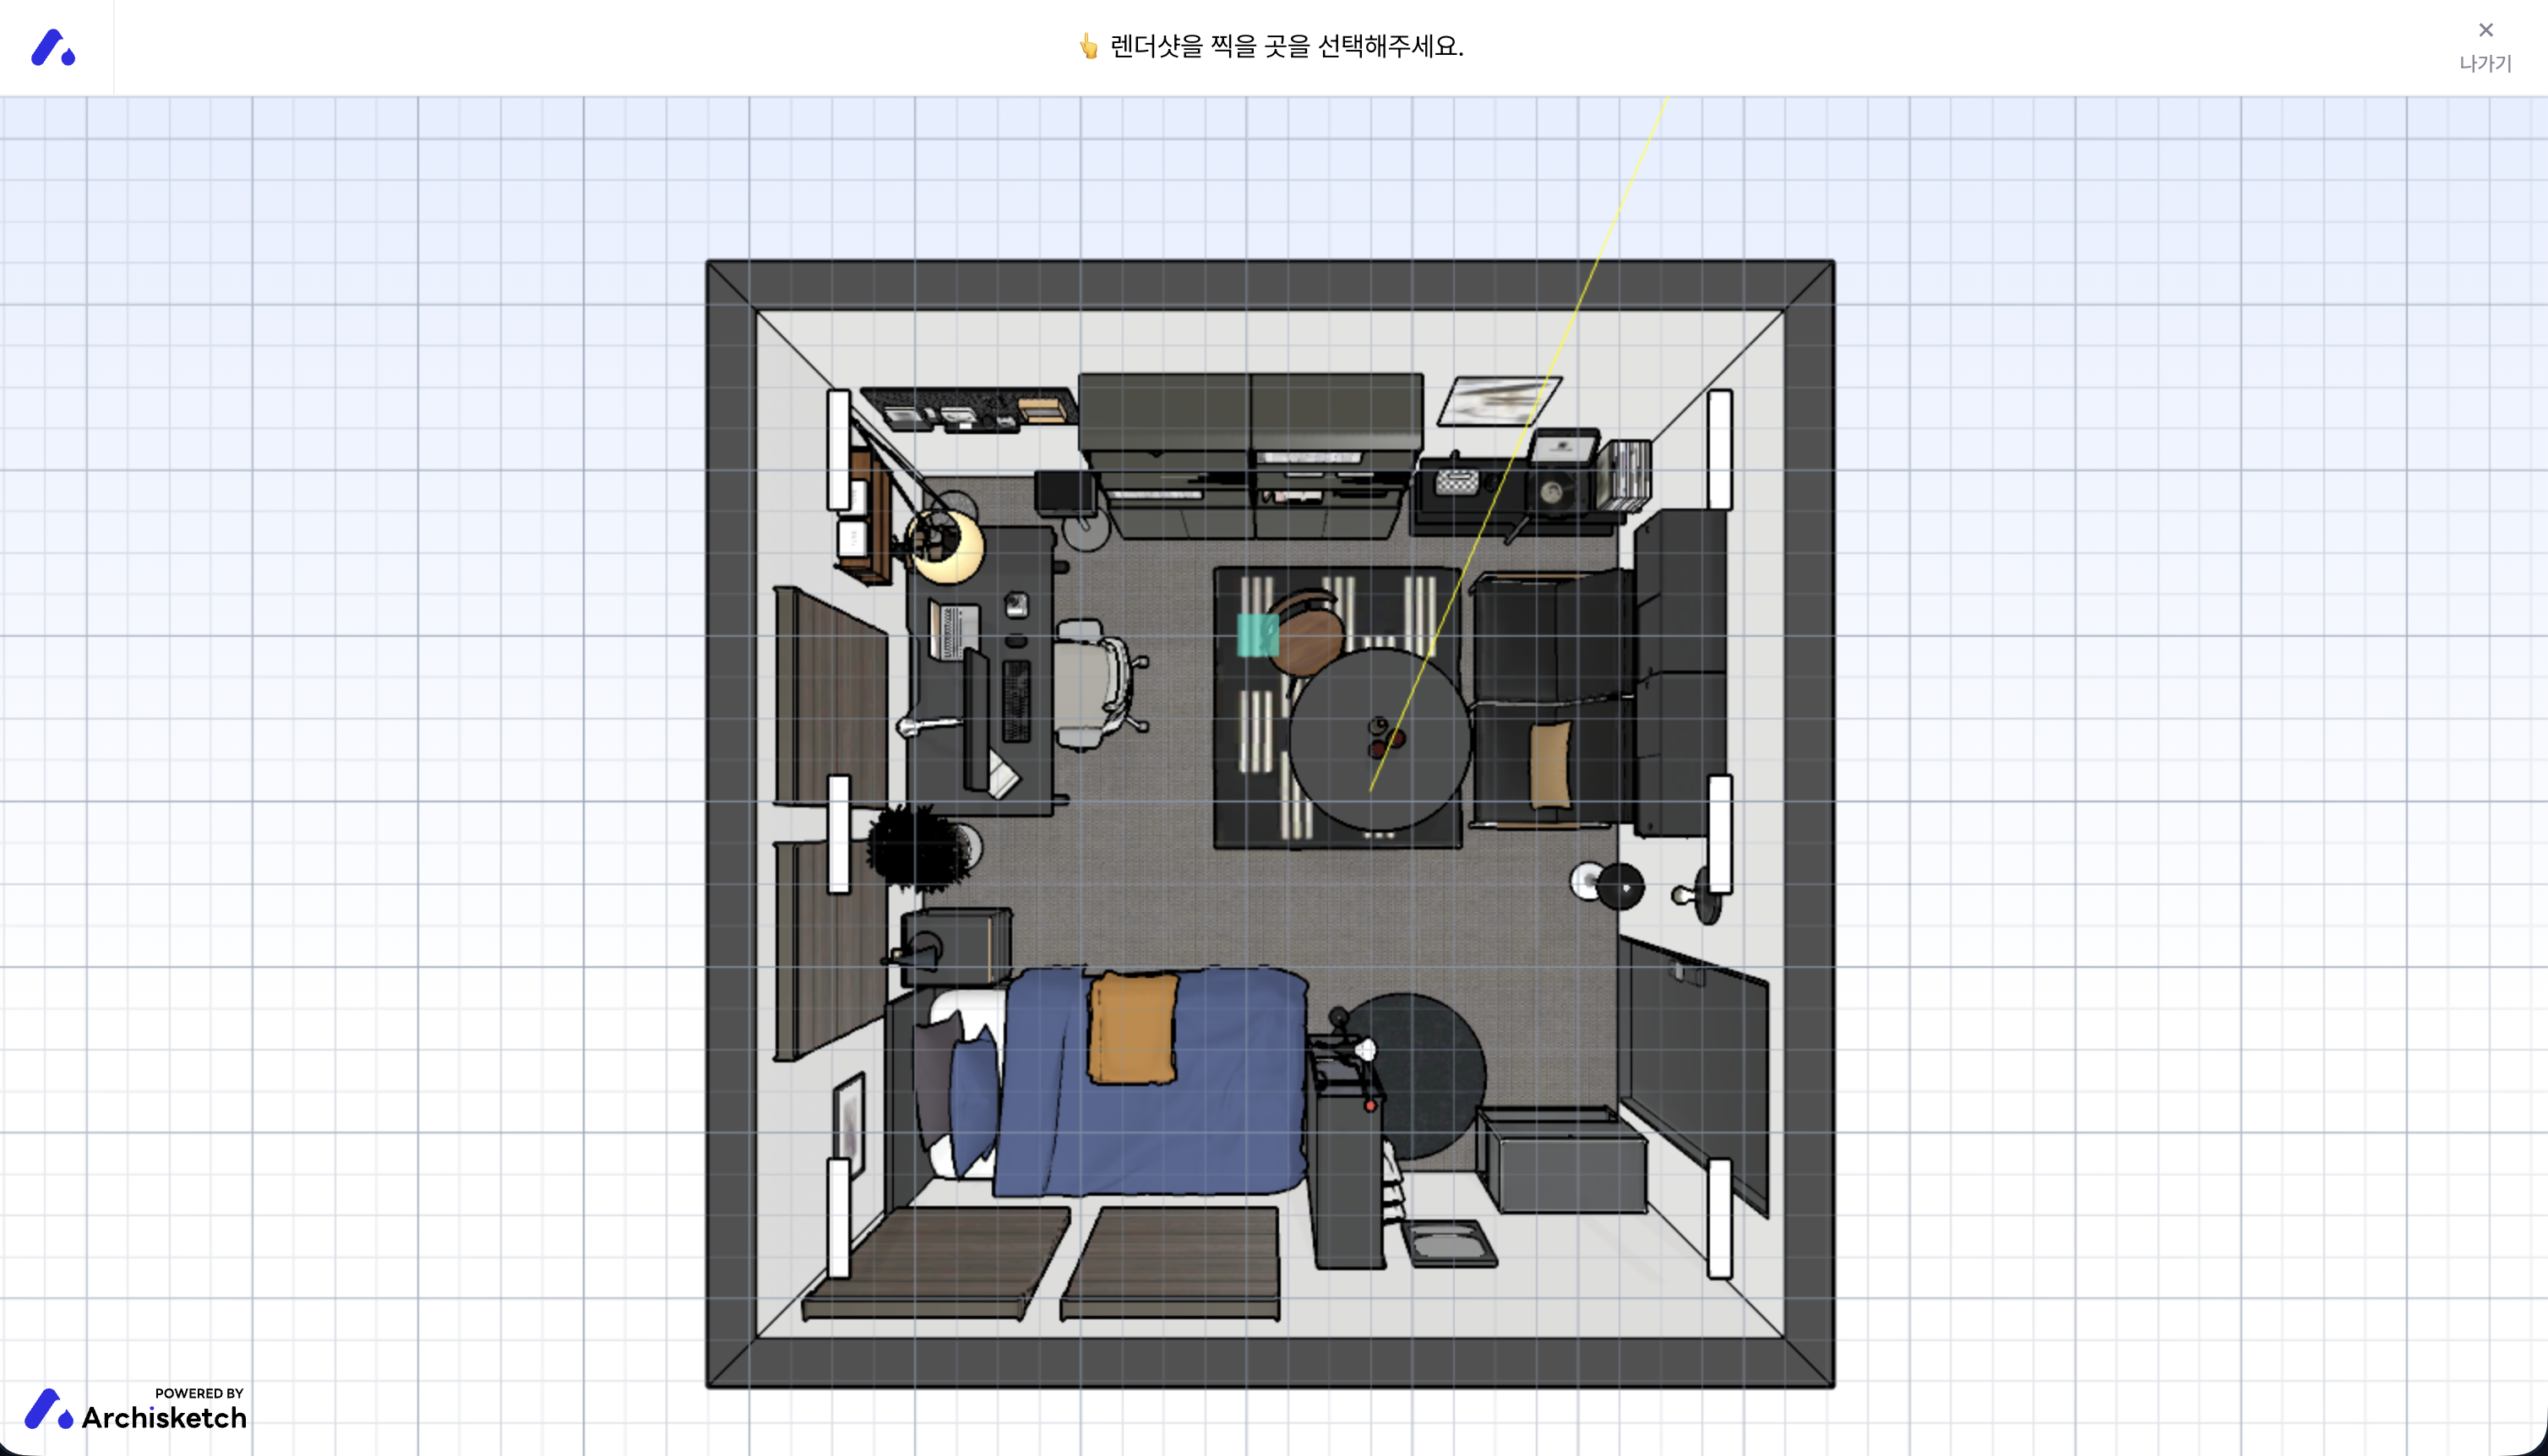
#### 撮影位置の選択
2D図面で「レンダーショットを撮影する場所を選択してください」という案内に従い **カメラ位置と向く方向(黄色の線)**を指定します。
{% endstep %}
{% step %}
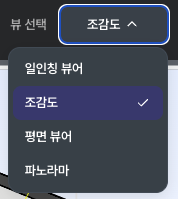
#### レンダーモード・ビューの選択
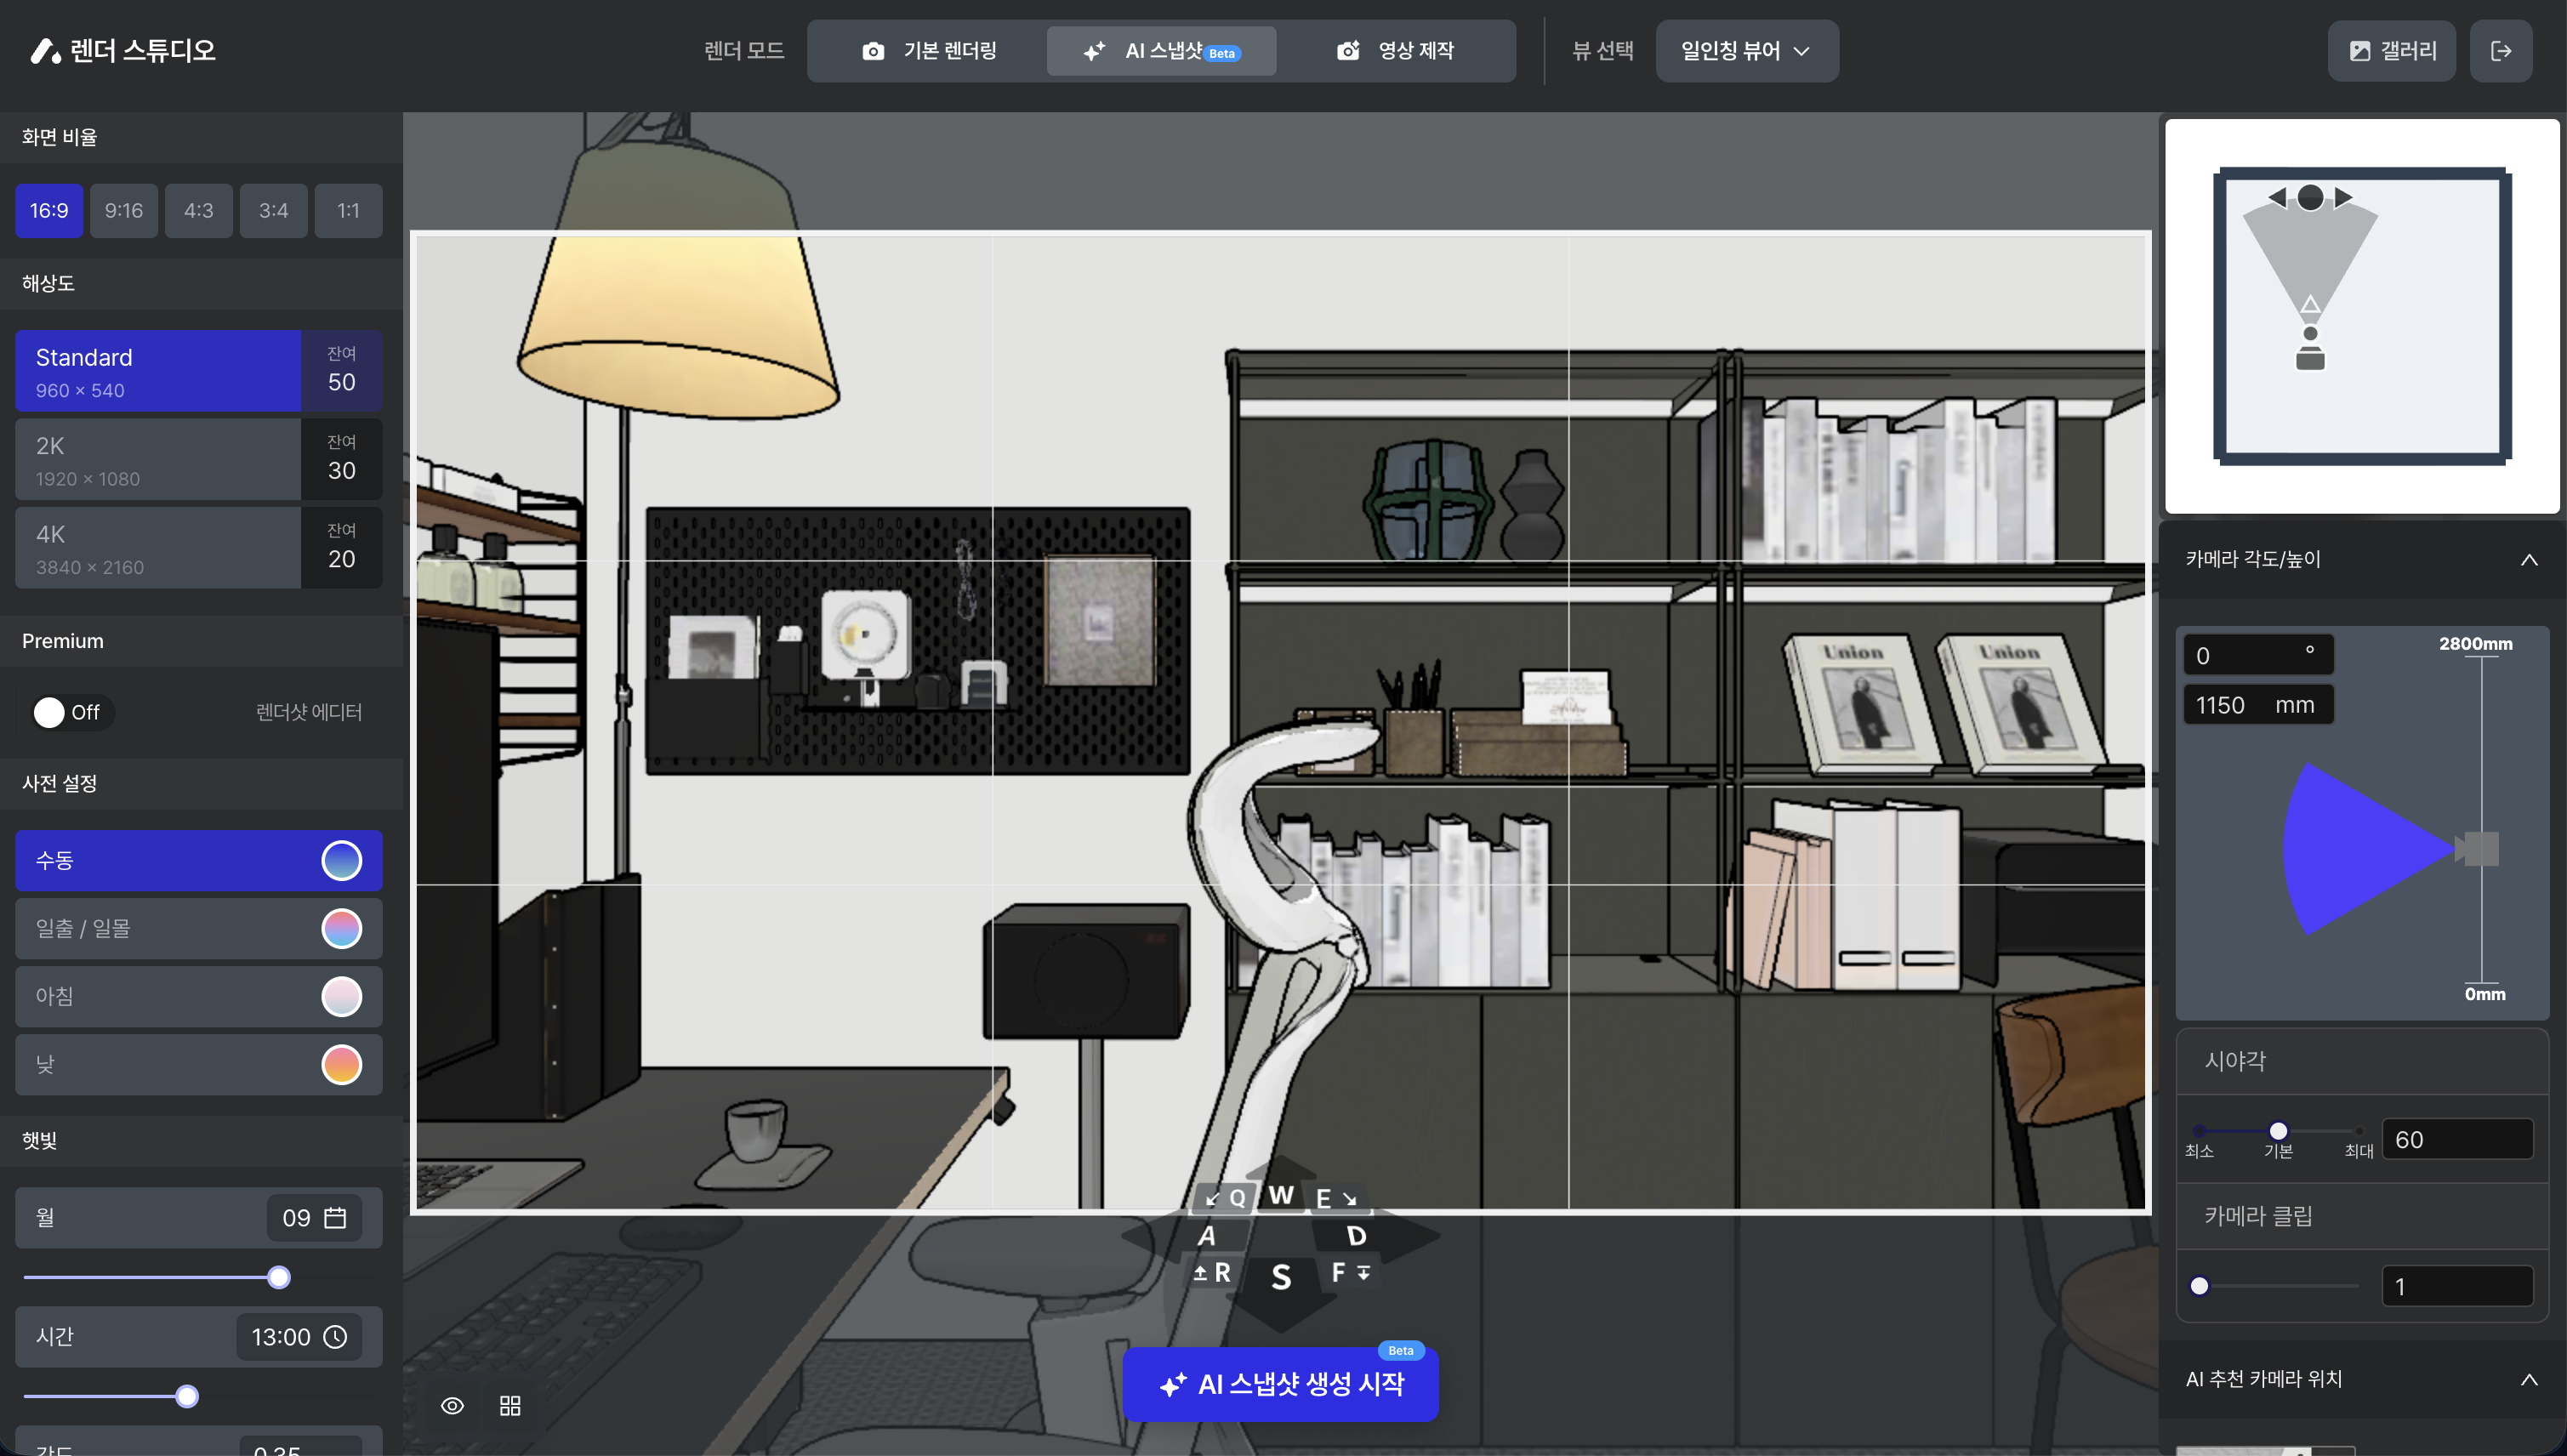
レンダースタジオ上部のレンダーモードで **AIスナップショット**を選びます。
ビューも希望する視点に応じて選択できます。(一人称ビューア/鳥瞰図/平面ビューア/パノラマ)
**ビュー選択の4種類(希望の視点で撮影)**
* **一人称ビューア** — 人の目線の高さから見る視点。実際の空間に立っているような自然な室内カットに向いています。
* **鳥瞰図** — 空間を上から斜めに見下ろす視点。全体の配置・構造をひと目で見せたいときに向いています。
* **平面ビューア** — 真上から見下ろした平面視点。配置図のようにレイアウトを見せるときに使います。
* **パノラマ** — 360°で空間を収める視点。見回す没入型ビューに向いています。
{% endstep %}
{% step %}
#### 画面・品質・雰囲気・カメラ設定(任意)
AIスナップショットは照明・環境・カメラを **一つひとつ手動で設定する必要がありません。** プロンプトとプリセット(雰囲気)だけ与えれば、AIが自動で整えてくれます。 **さらに細かく調整したいときだけ** 下の項目を調整すればOKです。(設定項目は **アスペクト比・解像度・プリセット・日差し・カメラ角度/高さ/画角** — 基本レンダーショットと同じです。)
🔗 **レンダーショット設定を詳しく見る** → [レンダースタジオガイド](https://docs.archisketch.com/guide/user/rendershot/render-studio)
{% endstep %}
{% step %}
#### 生成開始(プロンプト)
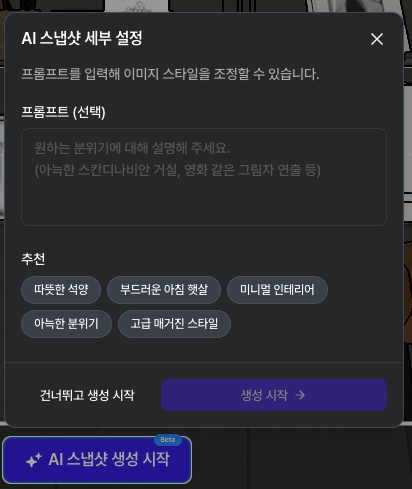
下部 **✨ AIスナップショット生成開始**をクリックします。希望の雰囲気を **プロンプト**として自由に入力すると(例:「居心地のよい雰囲気」)、AIがそれに合わせて撮影します。プロンプトなしでプリセットだけでも可能です。
{% endstep %}
{% step %}
#### 生成待機
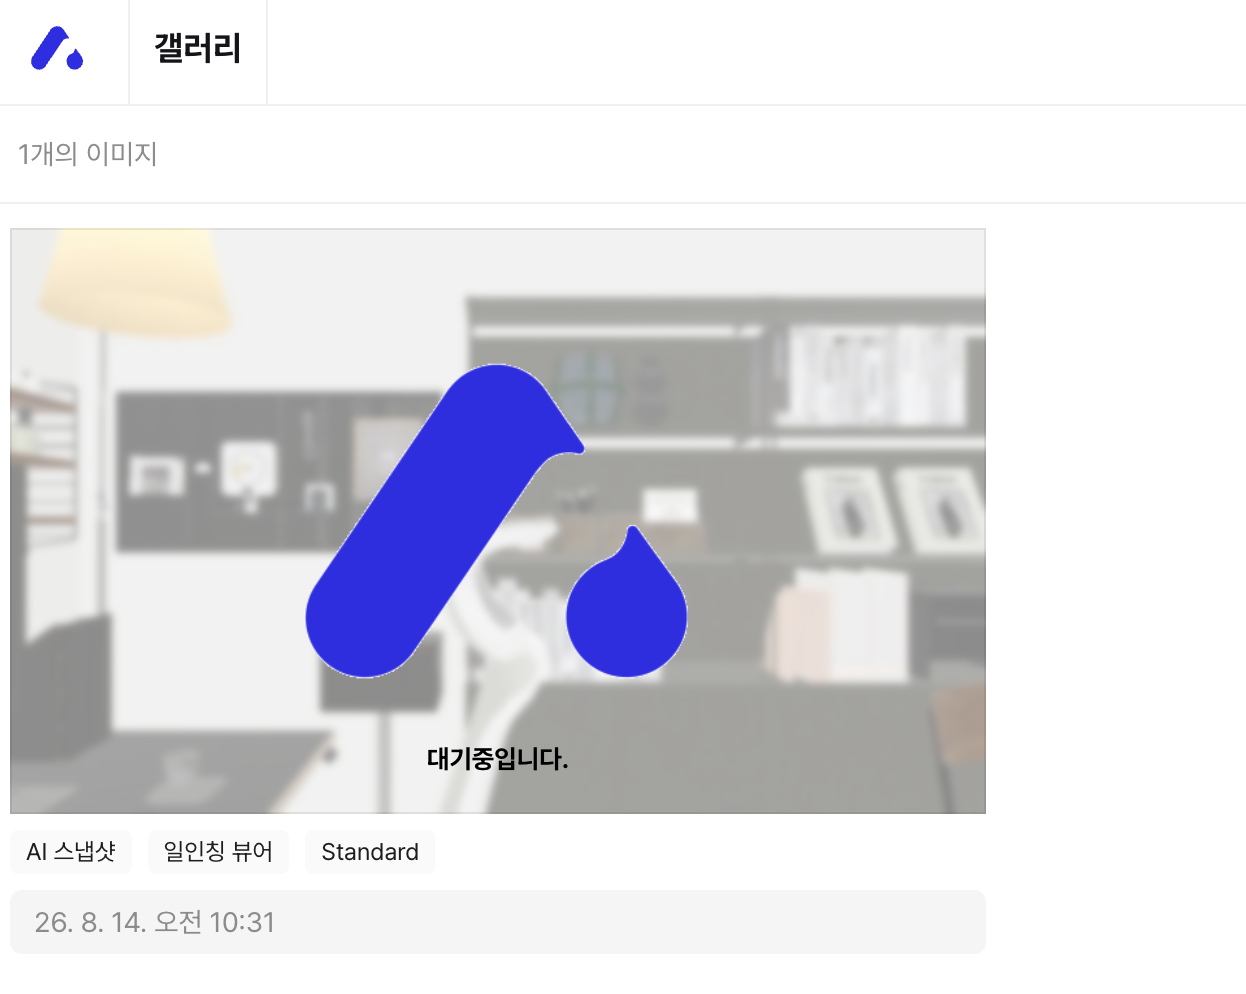
ギャラリーに **「待機中です」** の状態で表示され、しばらくすると完成します。
{% endstep %}
{% step %}
#### 結果確認・タグ・ダウンロード
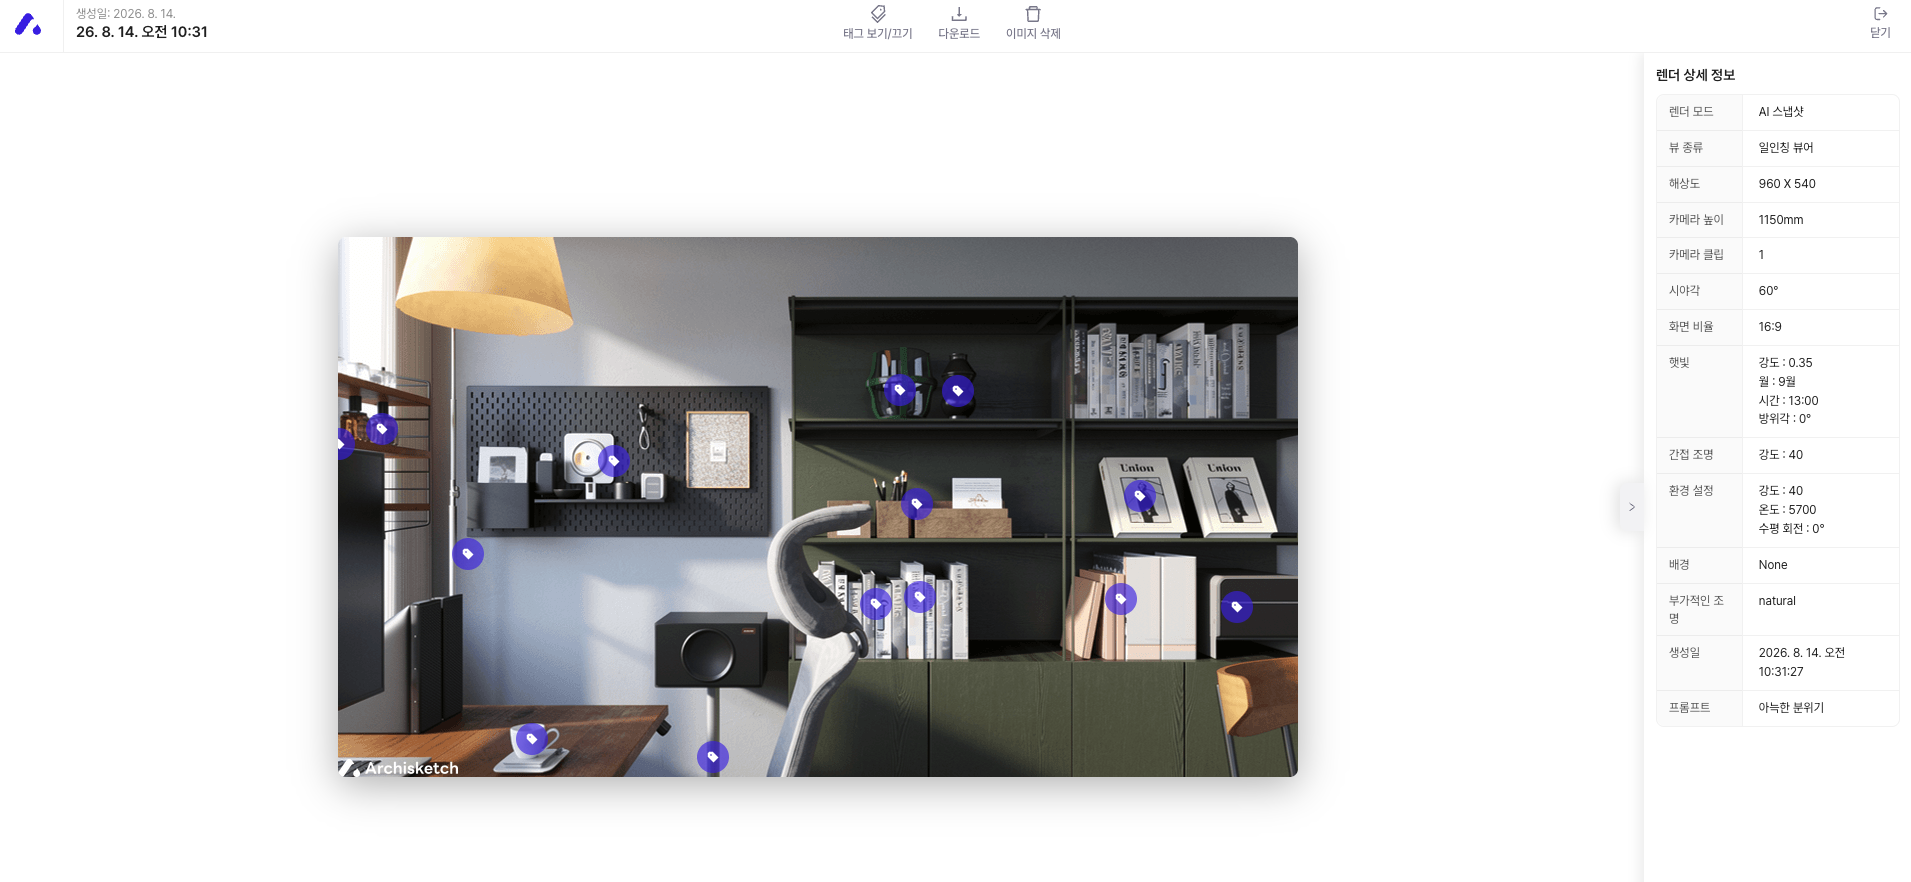
* **ギャラリー**で生成されたスナップショットを確認します(レンダーモード・ビュー・解像度・生成日タグ)。
* 画像をクリックすると **レンダー詳細情報**(レンダーモード・ビュー種別・解像度・カメラ高さ・画角・日差し・環境設定・**プロンプト**)を確認できます。
{% endstep %}
{% endstepper %}
{% hint style="info" %}
**タグ(ピン)**は、結果画像内の製品位置に付く表示で、オンにすると消費者が製品をすぐ確認・相談できます。
{% endhint %}
---
# Agent Instructions
This documentation is published with GitBook. GitBook is the documentation platform designed so that both humans and AI agents can read, navigate, and reason over technical content effectively. Learn more at gitbook.com.
## Querying This Documentation
If you need additional information that is not directly available in this page, you can query the documentation by asking a question.
Perform an HTTP GET request on the following URL with the `ask` and `goal` query parameters:
```
GET https://docs.archisketch.com/guide/user-jp/archisketch-ai/ai-ai-snapshot.md?ask=&goal=
```
`ask` is the immediate question: it should be specific, self-contained, and written in natural language.
`goal` is what the user is ultimately trying to achieve, the reason they need the answer. Sharing it helps GitBook give you a better, more relevant answer. A goal is most helpful when it describes the outcome the user wants rather than restating the question. For example, with `ask=how do I create an API token`, a goal like `automate deployments from our CI pipeline` lets GitBook tailor the answer to that use case.
The response will contain a direct answer to the question and relevant excerpts and sources from the documentation.
Use this mechanism when the answer is not explicitly present in the current page, you need clarification or additional context, or you want to retrieve related documentation sections.