> For the complete documentation index, see [llms.txt](https://docs.archisketch.com/llms.txt). Markdown versions of documentation pages are available by appending `.md` to page URLs; this page is available as [Markdown](https://docs.archisketch.com/guide/user-en/rendershot/rendering-guide.md).
# Archisketch Rendering Guidebook
How to take great Archisketch render shots

## How to take great Archisketch render shots!
Does the Render Studio setup feel complicated?
Don't worry! You can take amazing render shots like an interior designer too.\
We can create convincing results that look like interior feature photos!\
Shall we take it easy and try following along?
## Take a shot first and get a feel for it
Just following the settings below will guarantee basic quality.\
Don't overthink it—just take a shot first!\
Once you get the hang of it, fine-tuning becomes much easier.
#### 1. Field of view
* Start by taking a shot with the default value. (Default: 60)

#### If walls or front furniture are blocking the view so you can't see well?
{% hint style="info" %}
If you increase the field of view too much to capture the whole space at once, the distortion becomes severe! Use the camera clip to cut out the obstructing parts!
{% endhint %}


#### 2. Camera angle/height
* Set the camera angle to 0 degrees!
* Set it between 900 and 1200 mm. (This is the most suitable height for taking interior shots!)

If you've followed along well, you should see a Before & After like the one below 🌝


Doesn't the composition look much more stable? 🤩
{% hint style="info" %}
Camera angle setting tip! Summary
**Field of view 60** Don't go over!
Camera **Angle 0 degrees**
Camera **Height 900\~1200 mm** Set it between
{% endhint %}
***
## Solving brightness issues ️
You've set everything, but you're still not happy with the brightness?\
Don't worry!\
With a slight adjustment to the lighting and background settings, you can get much more natural and beautiful results.
#### If it's too bright and glaring?
* **Background image**change it.
* The default setting (NONE) is the brightest because it's a white background.
* Choose a background image to add a more realistic atmosphere.


* **Environment setting intensity**lower it.
* If you lower the brightness of the background image, the indoor brightness will also go down.

#### If it's too dark and the mood feels gloomy?
* **Increase the auxiliary lighting intensity.**
* Actually, there are hidden lights inside Render Studio! (Default intensity: 20)
* Want more brightness? Crank up the intensity and test it out!

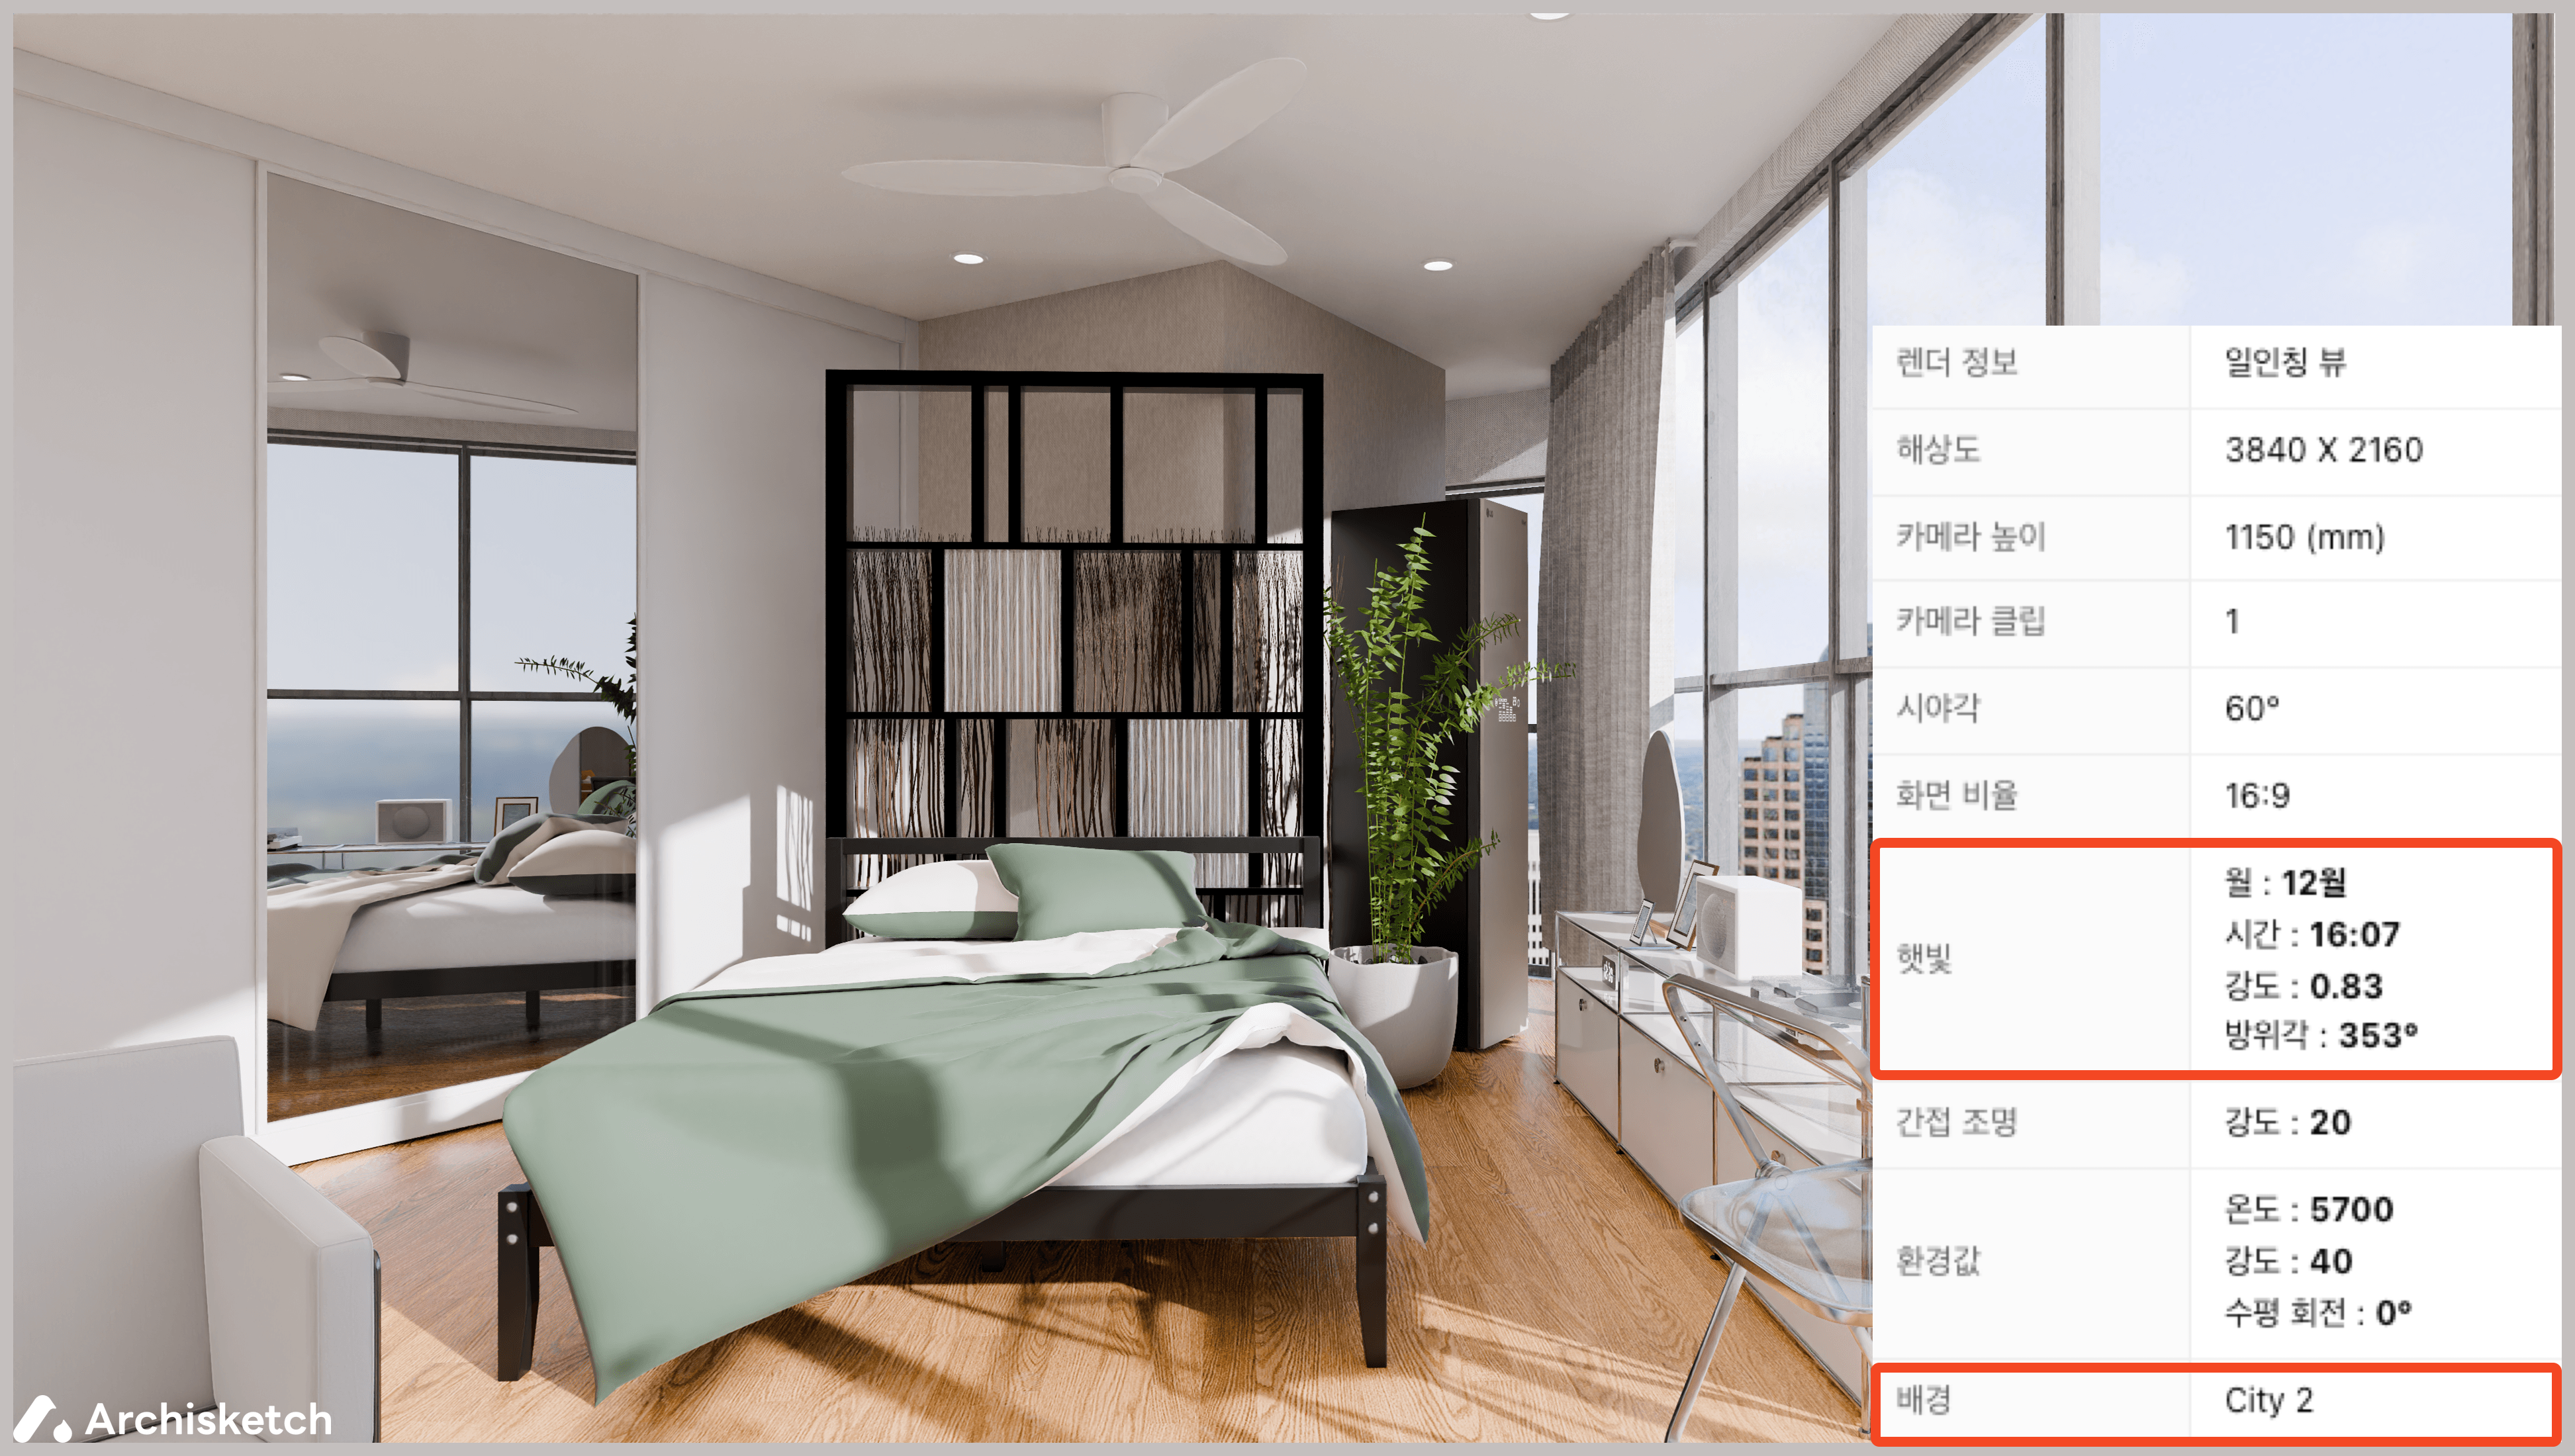
* **Bring sunlight into the room.**
* When sunlight comes in through the windows, the room looks brighter.
* Tip: After changing the month to December or January, adjust the sunlight angle so that more sunlight enters the house.
* Recommended intensity: 0.3\~1.0 (If it's too strong, it may become overly bright, so find a suitable intensity.)
Sunlight intensity: 0.83
{% hint style="info" %}
Rendering tip!
**When it's too bright**
Add a background image
Lower the environment setting intensity
**When it's dark**
Increase the auxiliary lighting intensity
Let sunlight in
Furniture reflected in mirrors or reflective surfaces can be **When rendering at 4K or higher resolution**you can check it.
{% endhint %}
Now you can take great render shots like a pro too!
Take a shot first, then make adjustments to find the best result. Practice is the answer when it comes to rendering!
---
# Agent Instructions
This documentation is published with GitBook. GitBook is the documentation platform designed so that both humans and AI agents can read, navigate, and reason over technical content effectively. Learn more at gitbook.com.
## Querying This Documentation
If you need additional information that is not directly available in this page, you can query the documentation by asking a question.
Perform an HTTP GET request on the following URL with the `ask` and `goal` query parameters:
```
GET https://docs.archisketch.com/guide/user-en/rendershot/rendering-guide.md?ask=&goal=
```
`ask` is the immediate question: it should be specific, self-contained, and written in natural language.
`goal` is what the user is ultimately trying to achieve, the reason they need the answer. Sharing it helps GitBook give you a better, more relevant answer. A goal is most helpful when it describes the outcome the user wants rather than restating the question. For example, with `ask=how do I create an API token`, a goal like `automate deployments from our CI pipeline` lets GitBook tailor the answer to that use case.
The response will contain a direct answer to the question and relevant excerpts and sources from the documentation.
Use this mechanism when the answer is not explicitly present in the current page, you need clarification or additional context, or you want to retrieve related documentation sections.