> For the complete documentation index, see [llms.txt](https://docs.archisketch.com/llms.txt). Markdown versions of documentation pages are available by appending `.md` to page URLs; this page is available as [Markdown](https://docs.archisketch.com/guide/user-en/make-project/floor-plan-image-upload.md).
# Upload floor plan image
Upload floor plan image
## Upload floor plan image
{% stepper %}
{% step %}
### Open floor plan image upload screen
Please select \[New Project] → \[Draw Floor Plan Directly].
Clicking Upload floor plan image will display the upload screen.


{% endstep %}
{% step %}
### Upload floor plan image
Once the upload screen appears, you're ready to upload the floor plan image.\
Drag and drop the image or select a file directly to upload it.
* Uploadable extensions: jpg, jpeg, png, gif
* Maximum file size: 10MB

{% endstep %}
{% step %}
### Set upload options
Please set the options below to match the uploaded image.
1. Rotation and flip function: You can rotate the image or flip it horizontally/vertically to match the floor plan orientation.
2. Turn off auto-detection: If you turn off auto-detection, you need to enter the floor plan scale manually.
3. Area setting: You can crop only the necessary part and upload it accurately.\
Dimension information must be included for automatic dimension detection to be possible.

{% endstep %}
{% step %}
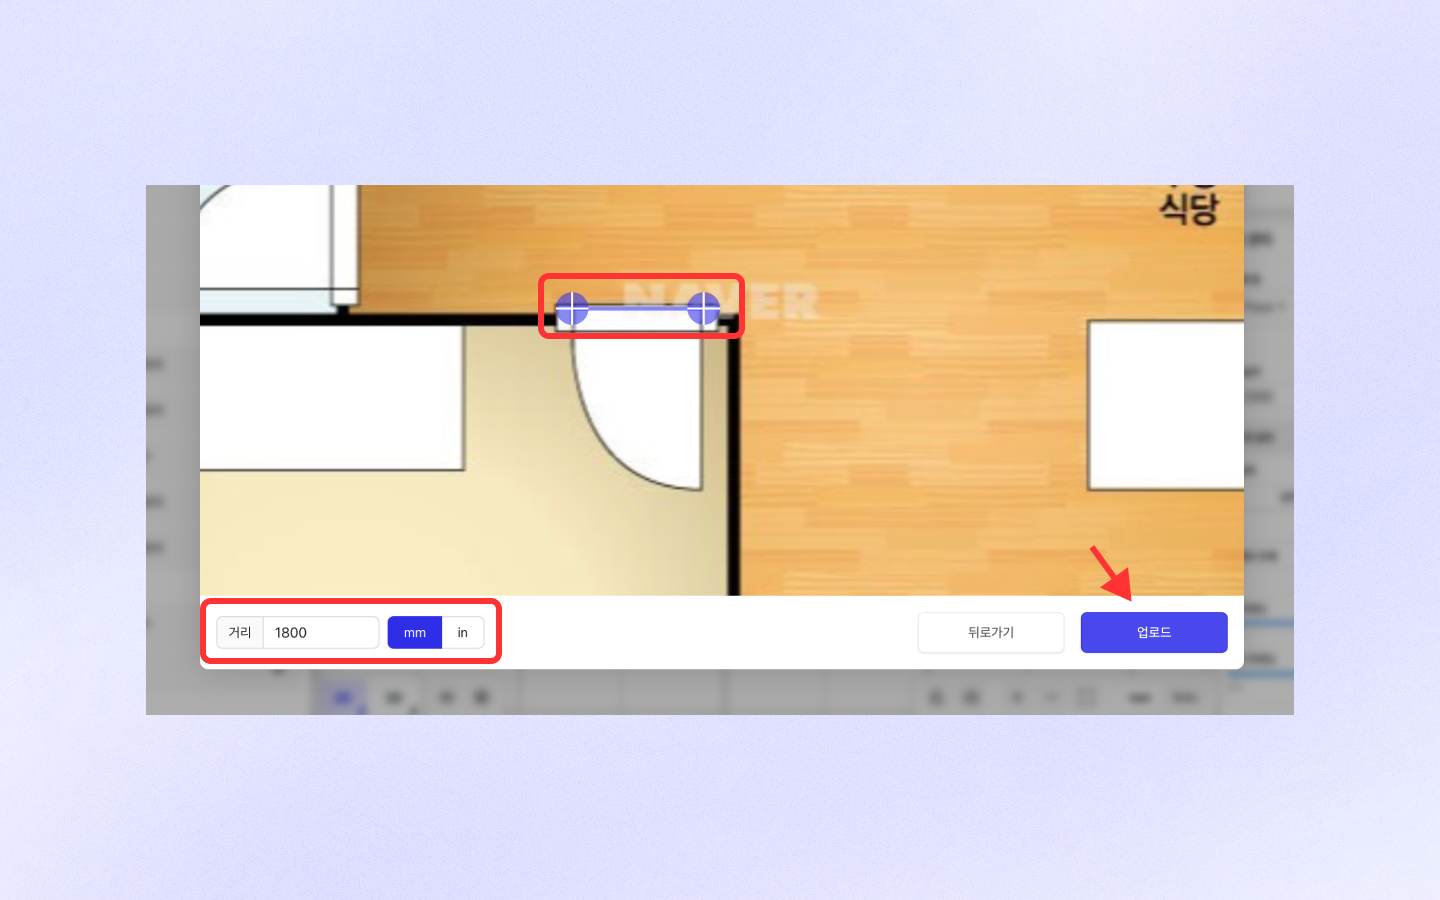
### Check dimensions and upload
If you proceed to the next step, AI will automatically recognize the dimensions and distances.\
Check whether the \[distance] and the area distance match, and if they're correct, click the upload button.\
If recognition doesn't work well, you can set the area again or edit the numbers.
{% endstep %}
{% step %}
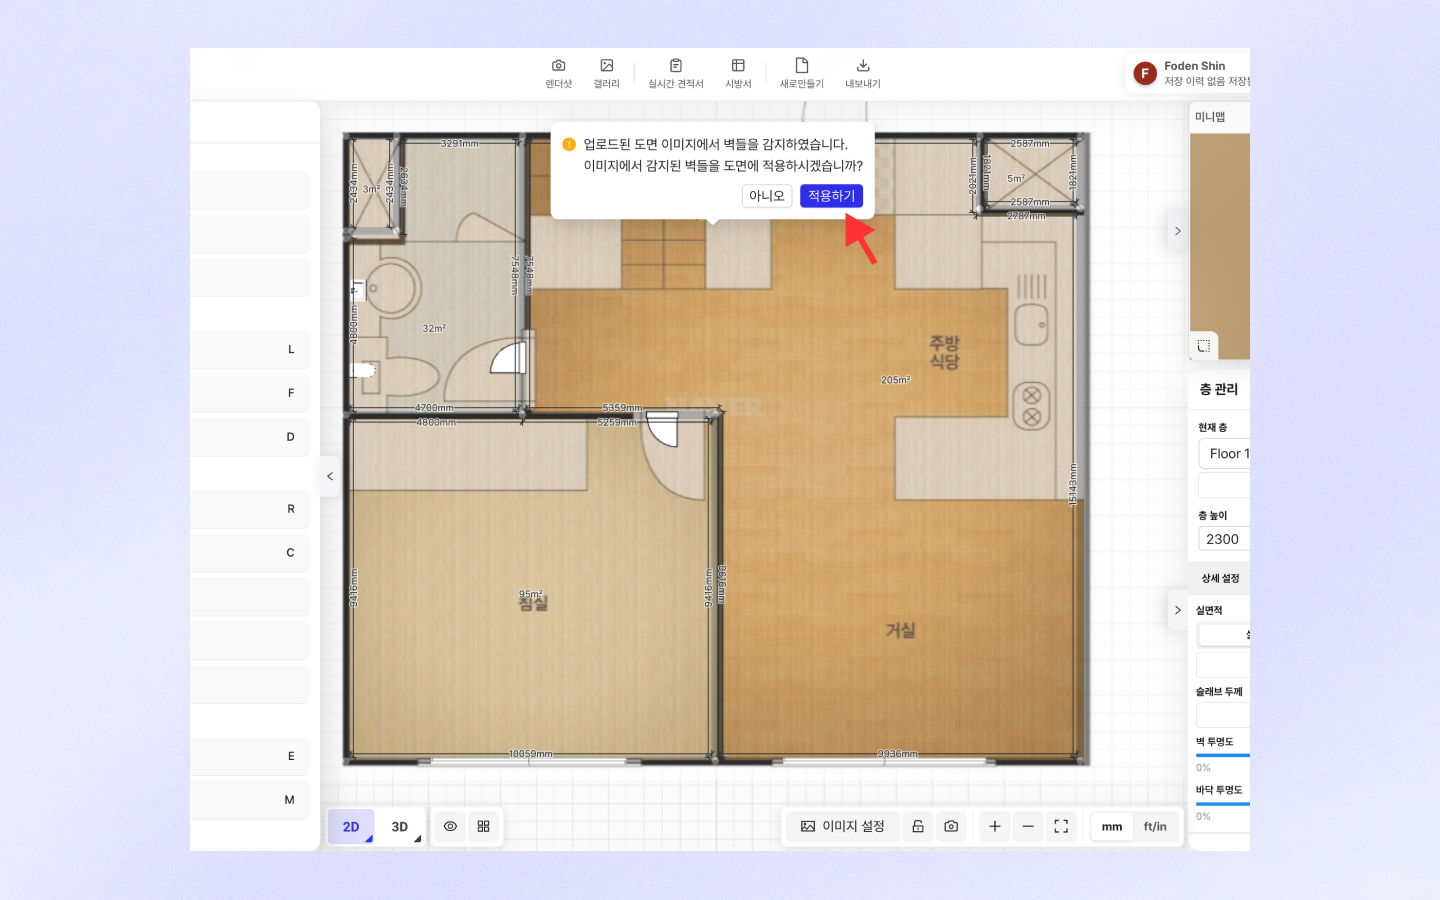
### Review and refine the generated floor plan
After uploading, AI automatically recognizes walls, doors, and windows and quickly draws the floor plan.
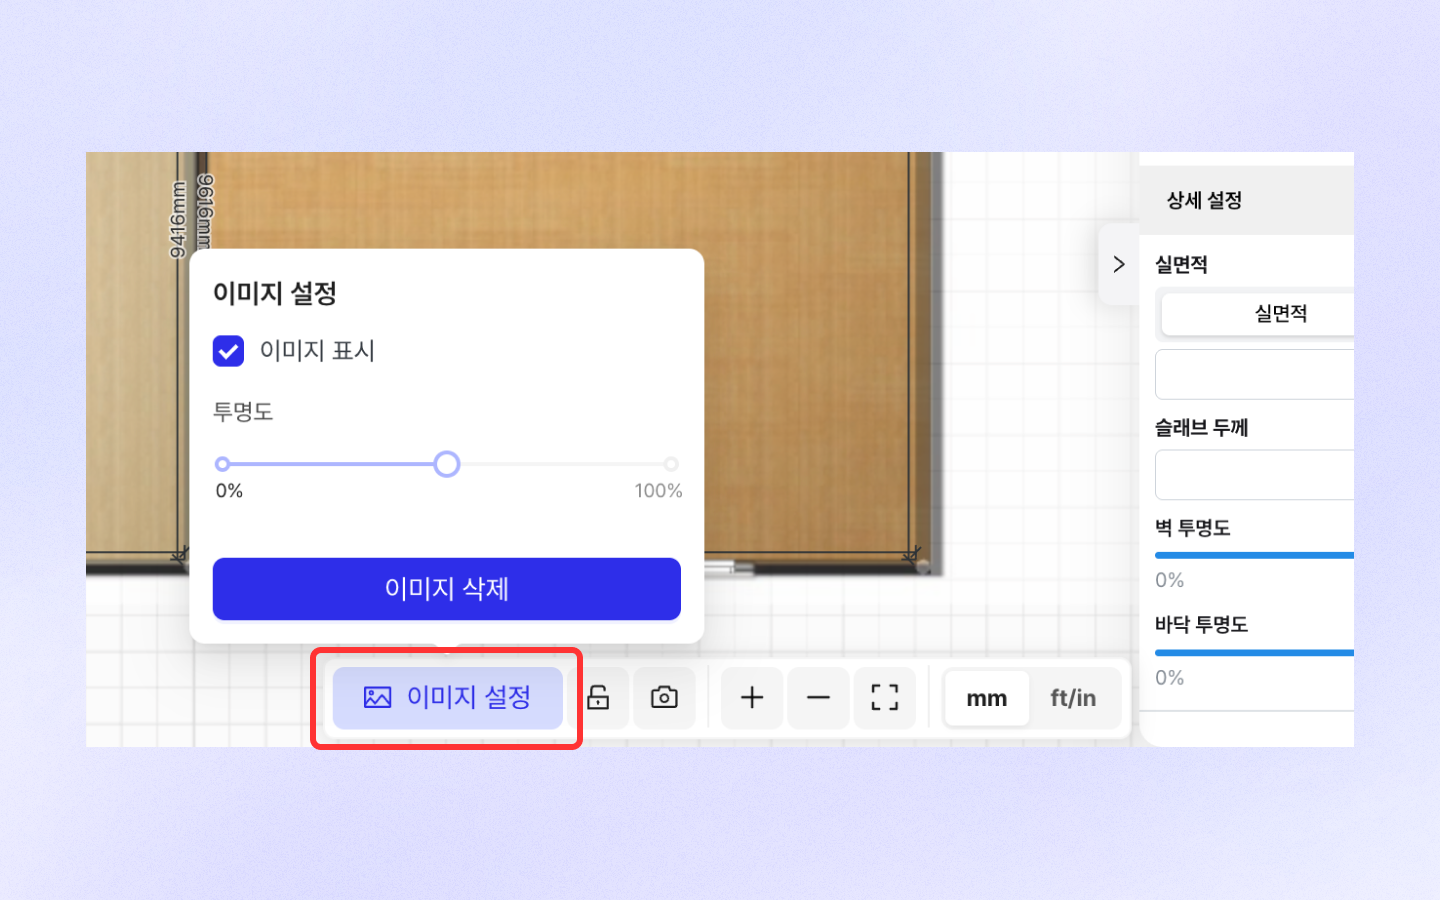
Click \[Image Settings] at the bottom, and you can freely adjust the transparency of the floor plan image, as well as turn image display on or off.\
Now adjust your floor plan conveniently and decorate it however you want! 🥳
{% endstep %}
{% endstepper %}
---
# Agent Instructions
This documentation is published with GitBook. GitBook is the documentation platform designed so that both humans and AI agents can read, navigate, and reason over technical content effectively. Learn more at gitbook.com.
## Querying This Documentation
If you need additional information that is not directly available in this page, you can query the documentation by asking a question.
Perform an HTTP GET request on the following URL with the `ask` and `goal` query parameters:
```
GET https://docs.archisketch.com/guide/user-en/make-project/floor-plan-image-upload.md?ask=&goal=
```
`ask` is the immediate question: it should be specific, self-contained, and written in natural language.
`goal` is what the user is ultimately trying to achieve, the reason they need the answer. Sharing it helps GitBook give you a better, more relevant answer. A goal is most helpful when it describes the outcome the user wants rather than restating the question. For example, with `ask=how do I create an API token`, a goal like `automate deployments from our CI pipeline` lets GitBook tailor the answer to that use case.
The response will contain a direct answer to the question and relevant excerpts and sources from the documentation.
Use this mechanism when the answer is not explicitly present in the current page, you need clarification or additional context, or you want to retrieve related documentation sections.