> For the complete documentation index, see [llms.txt](https://docs.archisketch.com/llms.txt). Markdown versions of documentation pages are available by appending `.md` to page URLs; this page is available as [Markdown](https://docs.archisketch.com/guide/user-en/make-project/draw-floor-plan.md).
# Draw floor plan
Draw a Floor Plan Yourself
## Draw a Floor Plan Yourself
In Archisketch, it’s okay even if you don’t have a floor plan for your home or don’t have the original drawing.\
You can easily draw your home in 3D using measurements you took yourself.\
When you enter a blank project, you’ll see the Floor Plan tab on the left, where you can draw the floor plan easily.

### Draw Walls
When you start drawing a wall (shortcut: L), a settings window appears at the top.

❶ Select wall reference: When drawing a wall, you can choose to base it on the center, inner wall, or outer wall.
❷ Wall thickness setting: You can set the thickness of the wall. The default is set to 200.
❸ Snap mode: Turning on snap mode activates yellow guide lines to make drawing walls easier. You can also turn snap mode off and draw freely.
❹ Orthogonal mode: Turning on orthogonal mode allows you to draw walls only at 90-degree angles.
When drawing walls, a floor surface is automatically created only when the endpoints connect.\
If wall ends are not connected, the unconnected points are shown in yellow.

### Draw Curved Walls
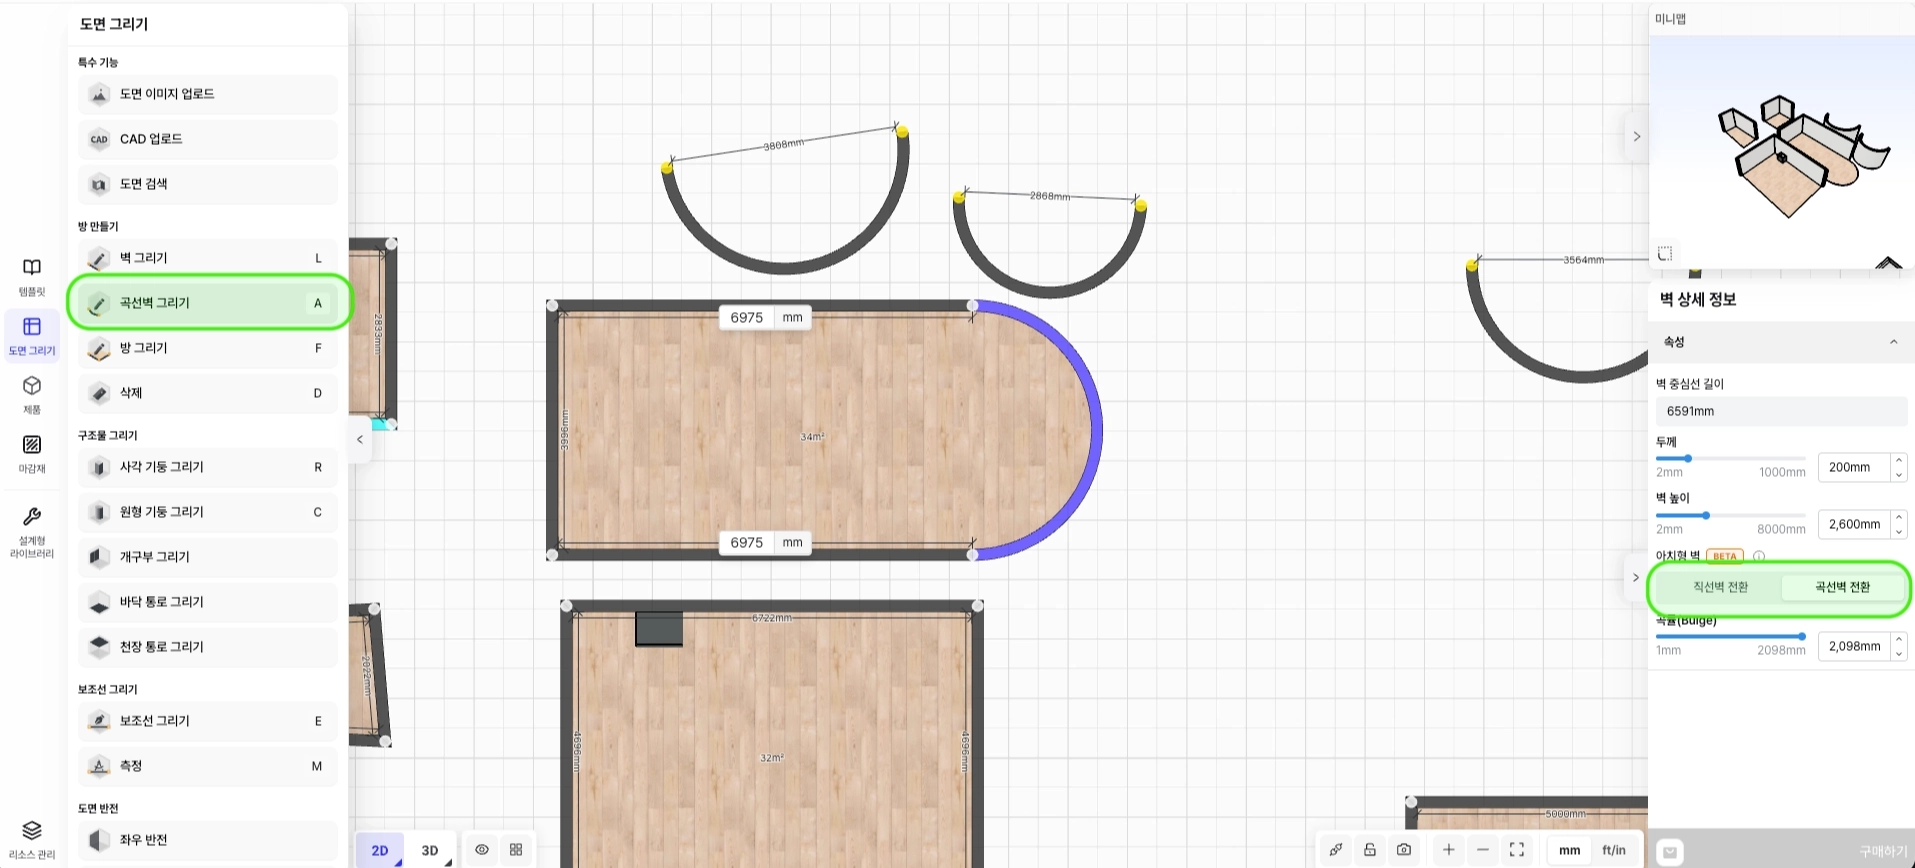
Not only straight walls but also **curved walls**can be created. This is used to represent round spaces like stadiums or walls with rounded ends.
#### Three Ways to Create Curved Walls
1. **Draw directly** — In the drawing tools, **Draw Curved Walls**select it and draw right away.
2. **Convert existing walls** — Click a wall, then **convert it to a curved wall in \[Wall Details]**.
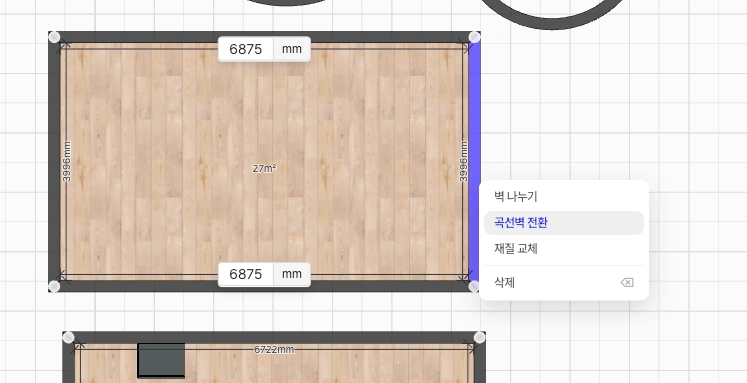
3. **Right-click menu** — Right-click an existing wall and **curved walls** select the item.
You can click Floor Plan Drawing > Draw Curved Wall, or click a created wall and change it to a curved wall in \[Wall Details].
You can convert a straight wall to a curved wall from the right-click menu of a created wall.
#### Adjust Curvature
After creating a curved wall, **adjust the degree of bending (curvature)**to create various shapes such as stadium-style spaces or rounded ends.
{% hint style="warning" %}
**Please note** — Currently, curved walls **only support convex shapes that extend outward from the room**. They cannot yet be applied to concave walls that curve inward or partition walls shared by two rooms. (This limitation is for stability and may be expanded later.)\
{% endhint %}
#### Frequently Asked Questions
* **Can I change a curved wall back to a straight wall?** Yes, you can change it back to straight from Wall Details or the right-click menu.
* **I need a concave curve.** Currently, only convex shapes are supported. If needed, please divide the space layout to express it.
### Draw Rooms
Using room drawing makes it easier and faster to draw a floor plan.\
If you need to draw a floor plan from scratch, we strongly recommend using the room drawing feature.

* Select the Room Drawing tool (shortcut: F).
* Click the starting point with your mouse on the grid screen.
* Click the ending point to create a room of the desired size. At this point, the size is automatically determined according to the grid.
* To enter exact dimensions, before clicking the ending point, type the horizontal length on your keyboard while the dimension number is active, then press Enter or Tab to enter the vertical length, and press Enter again to complete the room.
* Press Esc to exit the mode.
### Adjust Wall Length
You can easily adjust the size by grabbing a wall with the mouse cursor and dragging it.\
After clicking a wall, drag the mouse to expand or reduce the wall to the desired size.

Not only walls, but you can also grab and move vertices to create rooms in various shapes, not just rectangles.\
Click and drag the vertex you want, and you can adjust the room’s size and shape freely.

You can adjust wall length by entering the exact number yourself.\
Click the wall orthogonal to the wall whose length you want to change, and the number input field for the wall to be changed will be activated, allowing you to enter the desired value and press Enter to adjust the length.

### Split Wall
The split wall feature lets you edit walls in more diverse ways and design spaces more creatively.\
When you click a wall, the split wall tool appears.

1. You can separate finishing materials vertically and manage them individually.

2. You can cut a wall to easily delete unwanted parts of the wall.

**Shortcut**
| Feature | Shortcut 1 | Shortcut 2 |
| -------------------- | ---------------- | ---------- |
| Draw Walls | L | |
| Draw Rooms | F | |
| Erase Wall | D | |
| Delete Selected Wall | Delete | Backspace |
| Delete Selected Room | Delete | Backspace |
| Undo | Ctrl + Z | |
| Redo | Ctrl + Shift + Z | |
## Frequently Asked Questions
### Can I make a curved wall?
It is difficult to set a wall surface into a curved shape, but you can use the \[Split Wall] feature to implement the wall as a curved surface.\
By splitting the wall multiple times, you can create a shape closer to a curved surface, and by adjusting the width of fixed-window products and placing them, you can also create an effect like a panoramic window.

### Can I reverse the floor plan direction?
You can find the floor plan reverse feature under Floor Plan Drawing > Reverse Floor Plan.\
Both horizontal and vertical flipping are possible.

### Can I print the floor plan?
The floor plan print feature is not provided.\
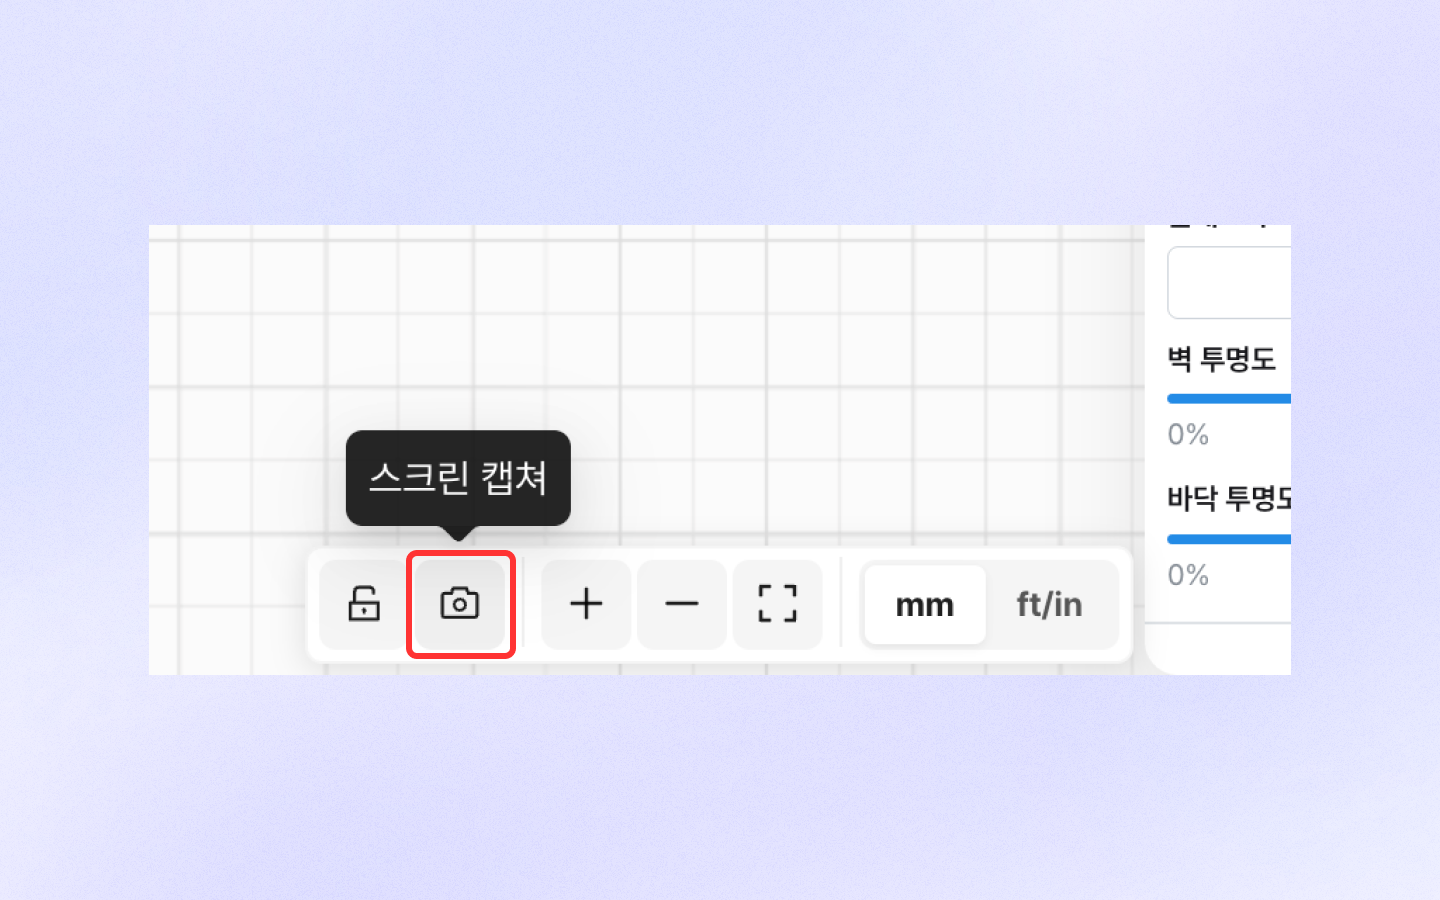
Instead, we recommend using the screen capture function in 2D mode to save the image.
---
# Agent Instructions
This documentation is published with GitBook. GitBook is the documentation platform designed so that both humans and AI agents can read, navigate, and reason over technical content effectively. Learn more at gitbook.com.
## Querying This Documentation
If you need additional information that is not directly available in this page, you can query the documentation by asking a question.
Perform an HTTP GET request on the following URL with the `ask` and `goal` query parameters:
```
GET https://docs.archisketch.com/guide/user-en/make-project/draw-floor-plan.md?ask=&goal=
```
`ask` is the immediate question: it should be specific, self-contained, and written in natural language.
`goal` is what the user is ultimately trying to achieve, the reason they need the answer. Sharing it helps GitBook give you a better, more relevant answer. A goal is most helpful when it describes the outcome the user wants rather than restating the question. For example, with `ask=how do I create an API token`, a goal like `automate deployments from our CI pipeline` lets GitBook tailor the answer to that use case.
The response will contain a direct answer to the question and relevant excerpts and sources from the documentation.
Use this mechanism when the answer is not explicitly present in the current page, you need clarification or additional context, or you want to retrieve related documentation sections.