> For the complete documentation index, see [llms.txt](https://docs.archisketch.com/llms.txt). Markdown versions of documentation pages are available by appending `.md` to page URLs; this page is available as [Markdown](https://docs.archisketch.com/guide/user-en/expert-feature/cad-upload.md).
# CAD upload
Archisketch supports CAD drawing uploads. However, before uploading, the layers in the drawing must be organized according to Archisketch's requirements. If the layers are not organized, an error
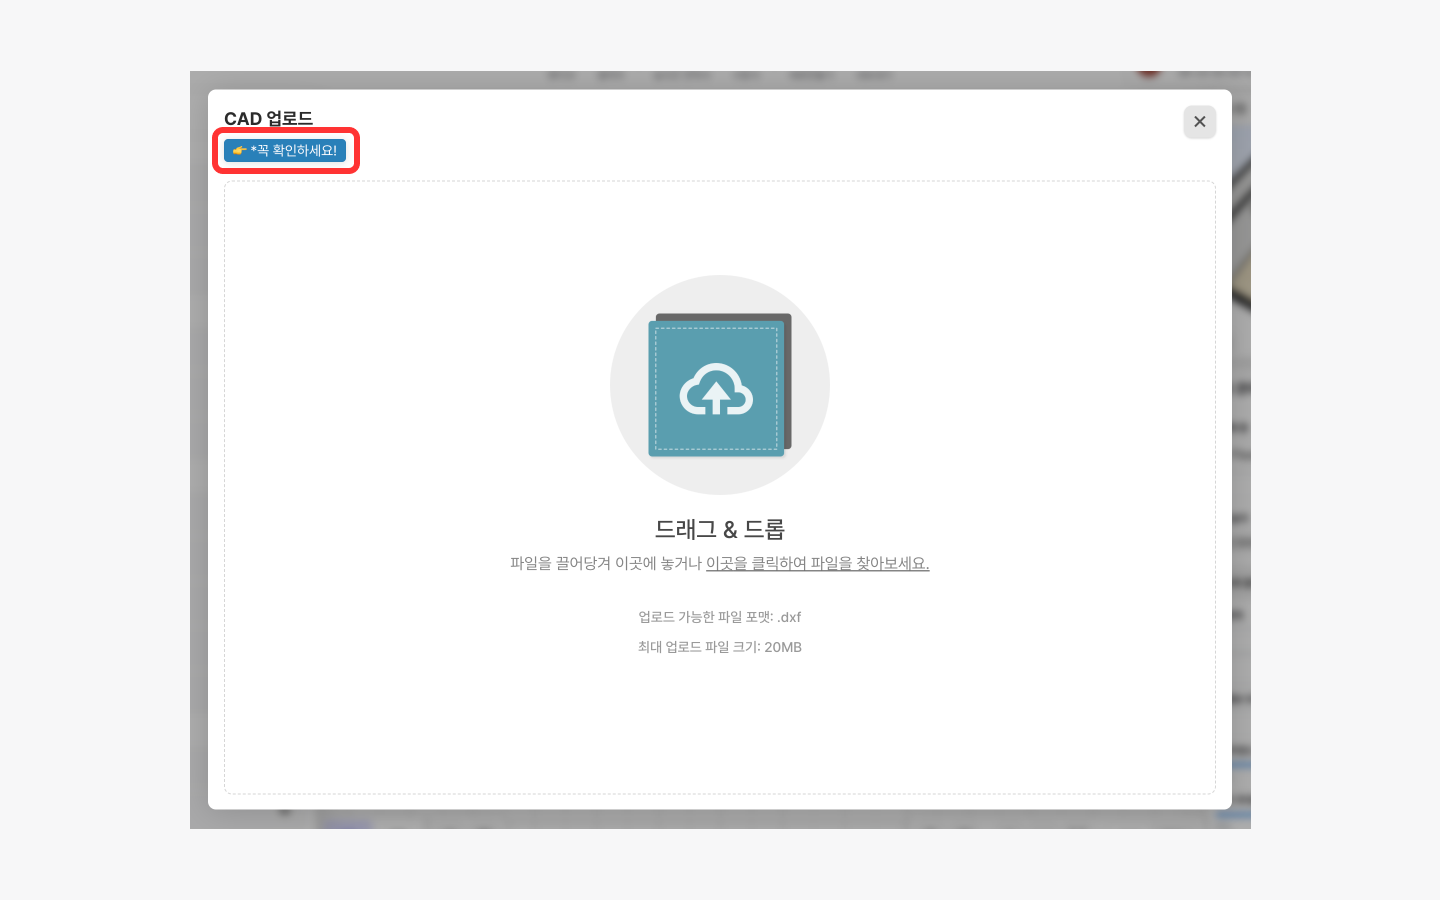
Archisketch supports CAD drawing upload.\
However, before uploading, the drawing’s layers must be organized to meet Archisketch’s requirements.\
If the layers are not organized, errors may occur, so please be sure to refer to the instructions below, organize them, and then upload.
{% hint style="warning" %}
This feature is available to paid Archisketch customers.
{% endhint %}
## Example
## Uploadable file format (DXF)
* File format: DXF
* Maximum file size: 10MB
## Organize layers in CAD
Archisketch can recognize only a total of 4 layers.\
Before uploading the drawing, set the layer names in CAD as shown below. (Case-insensitive settings are allowed)
| Type | Layer name |
| ------- | -------------------------- |
| Walls | **`wall`** |
| Doors | **`door`** |
| Windows | **`window`** |
| Columns | **`line`** or **`column`** |
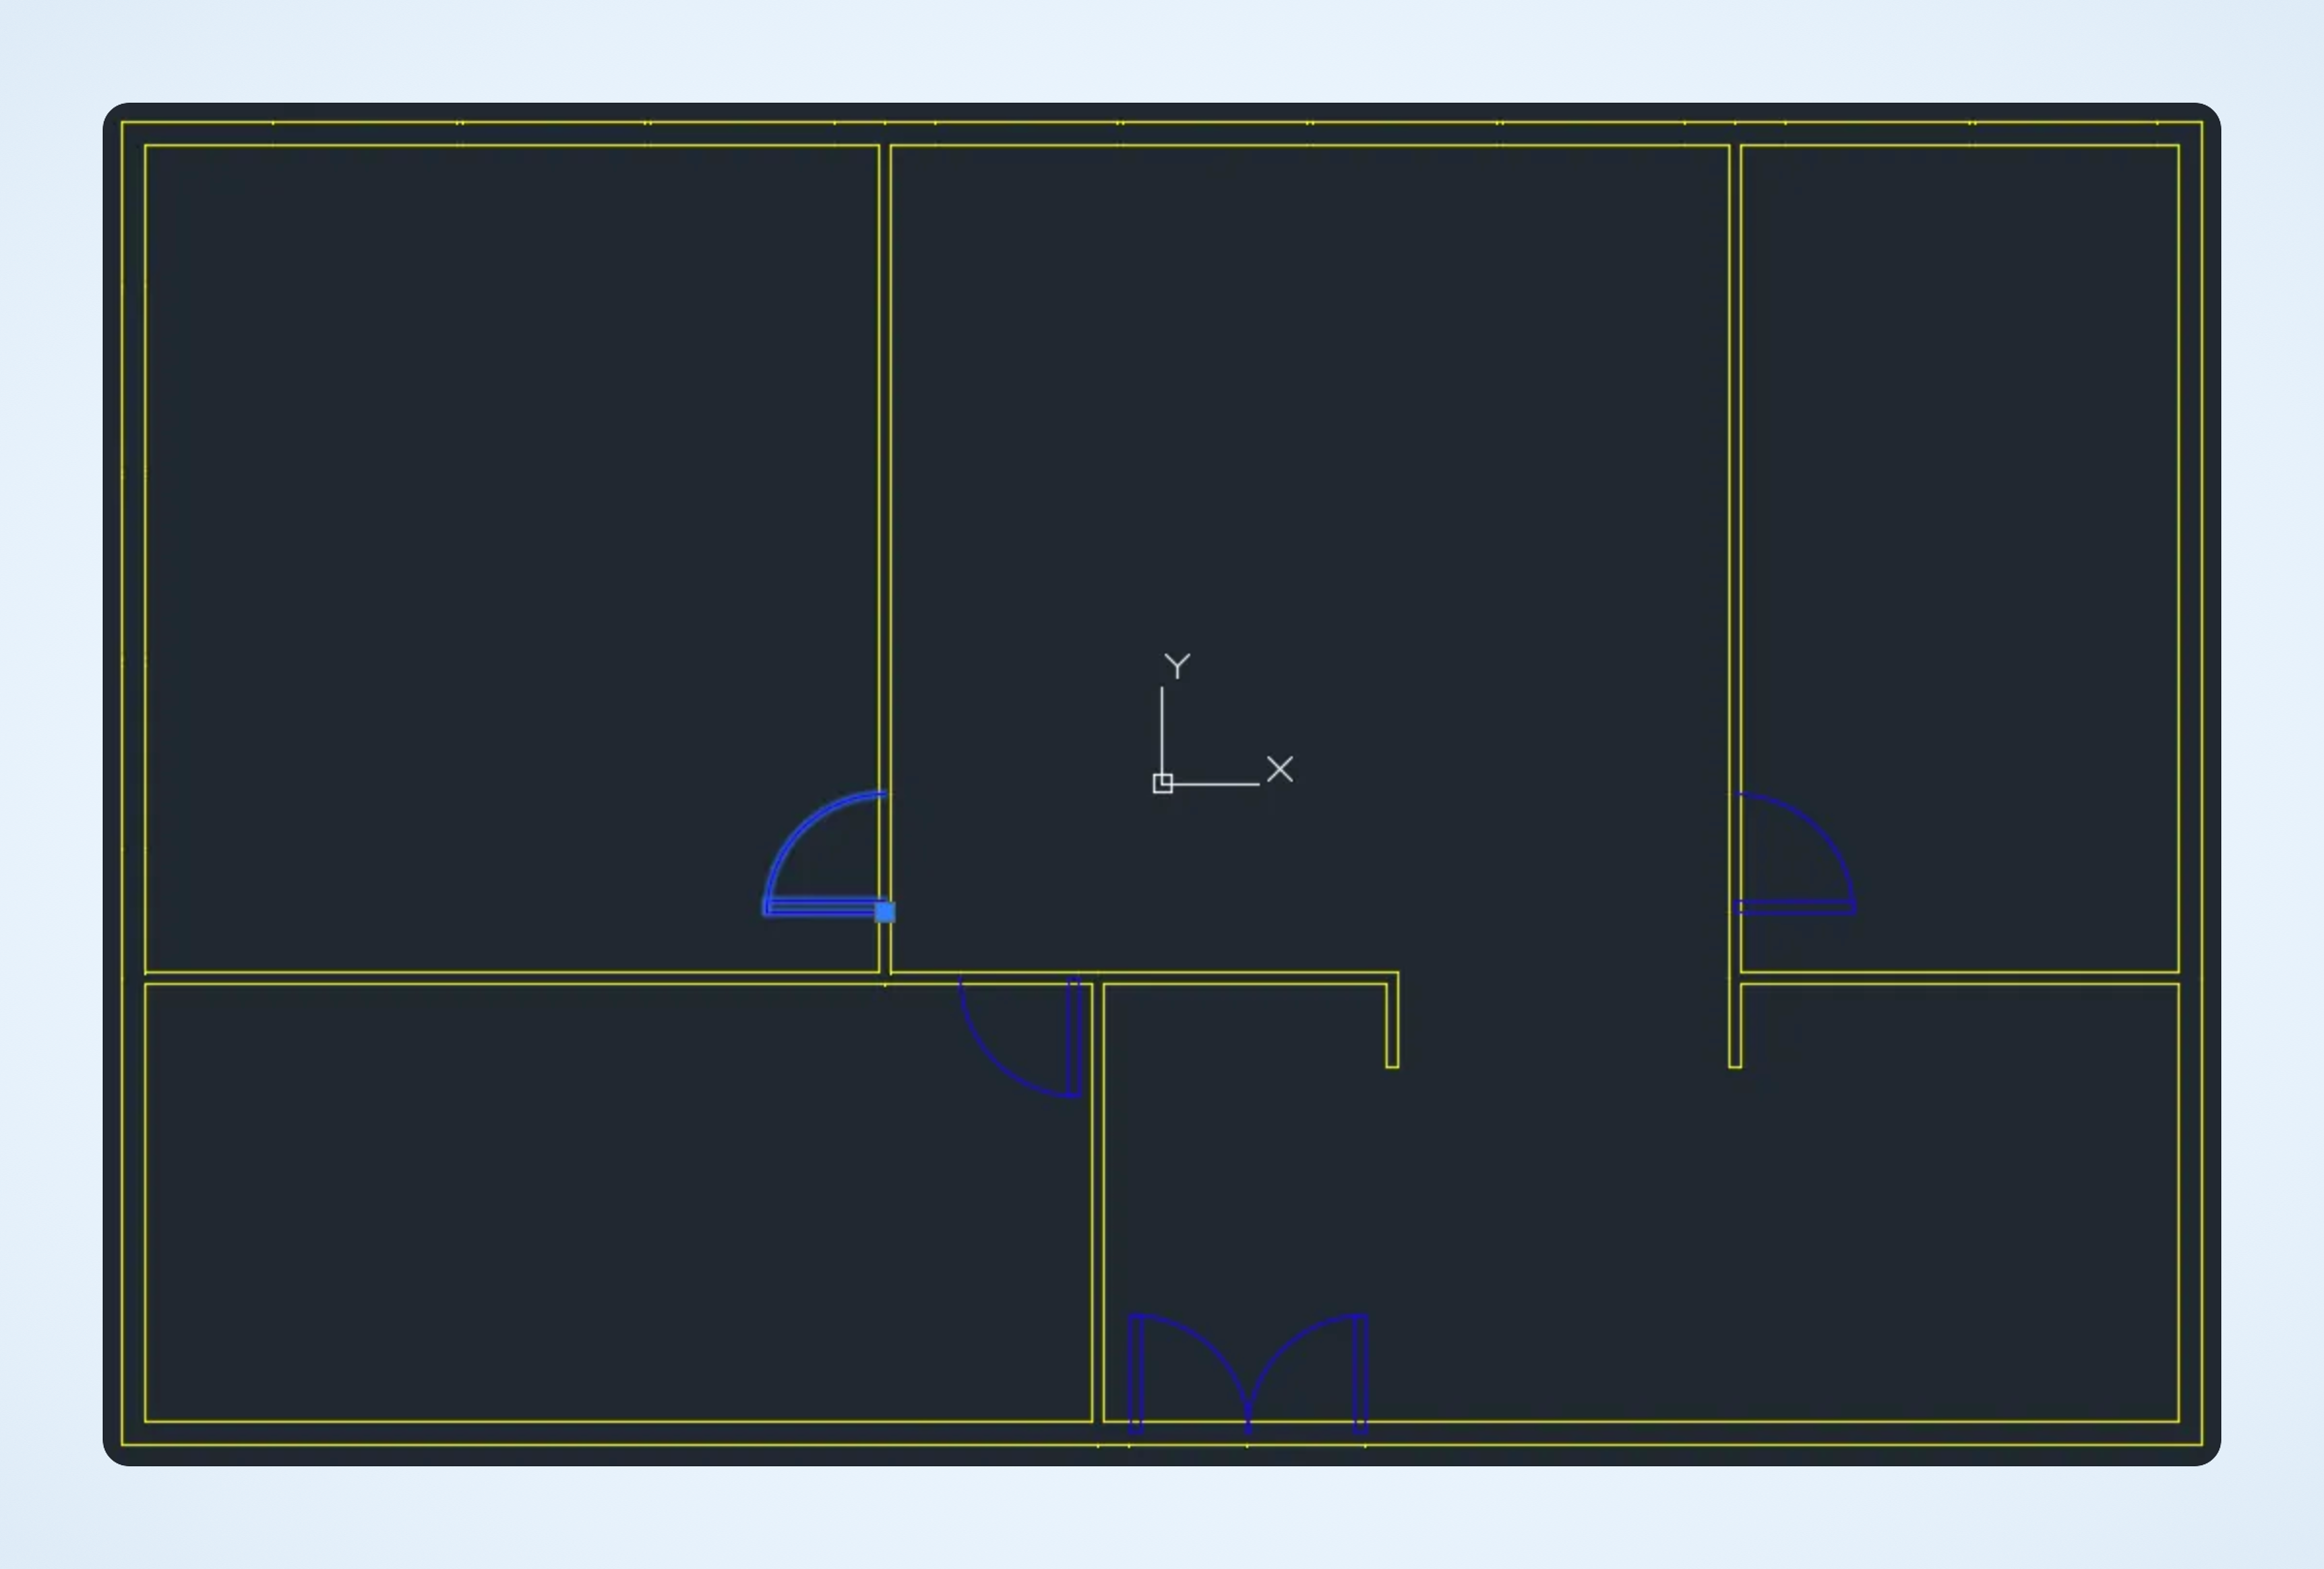
### Walls
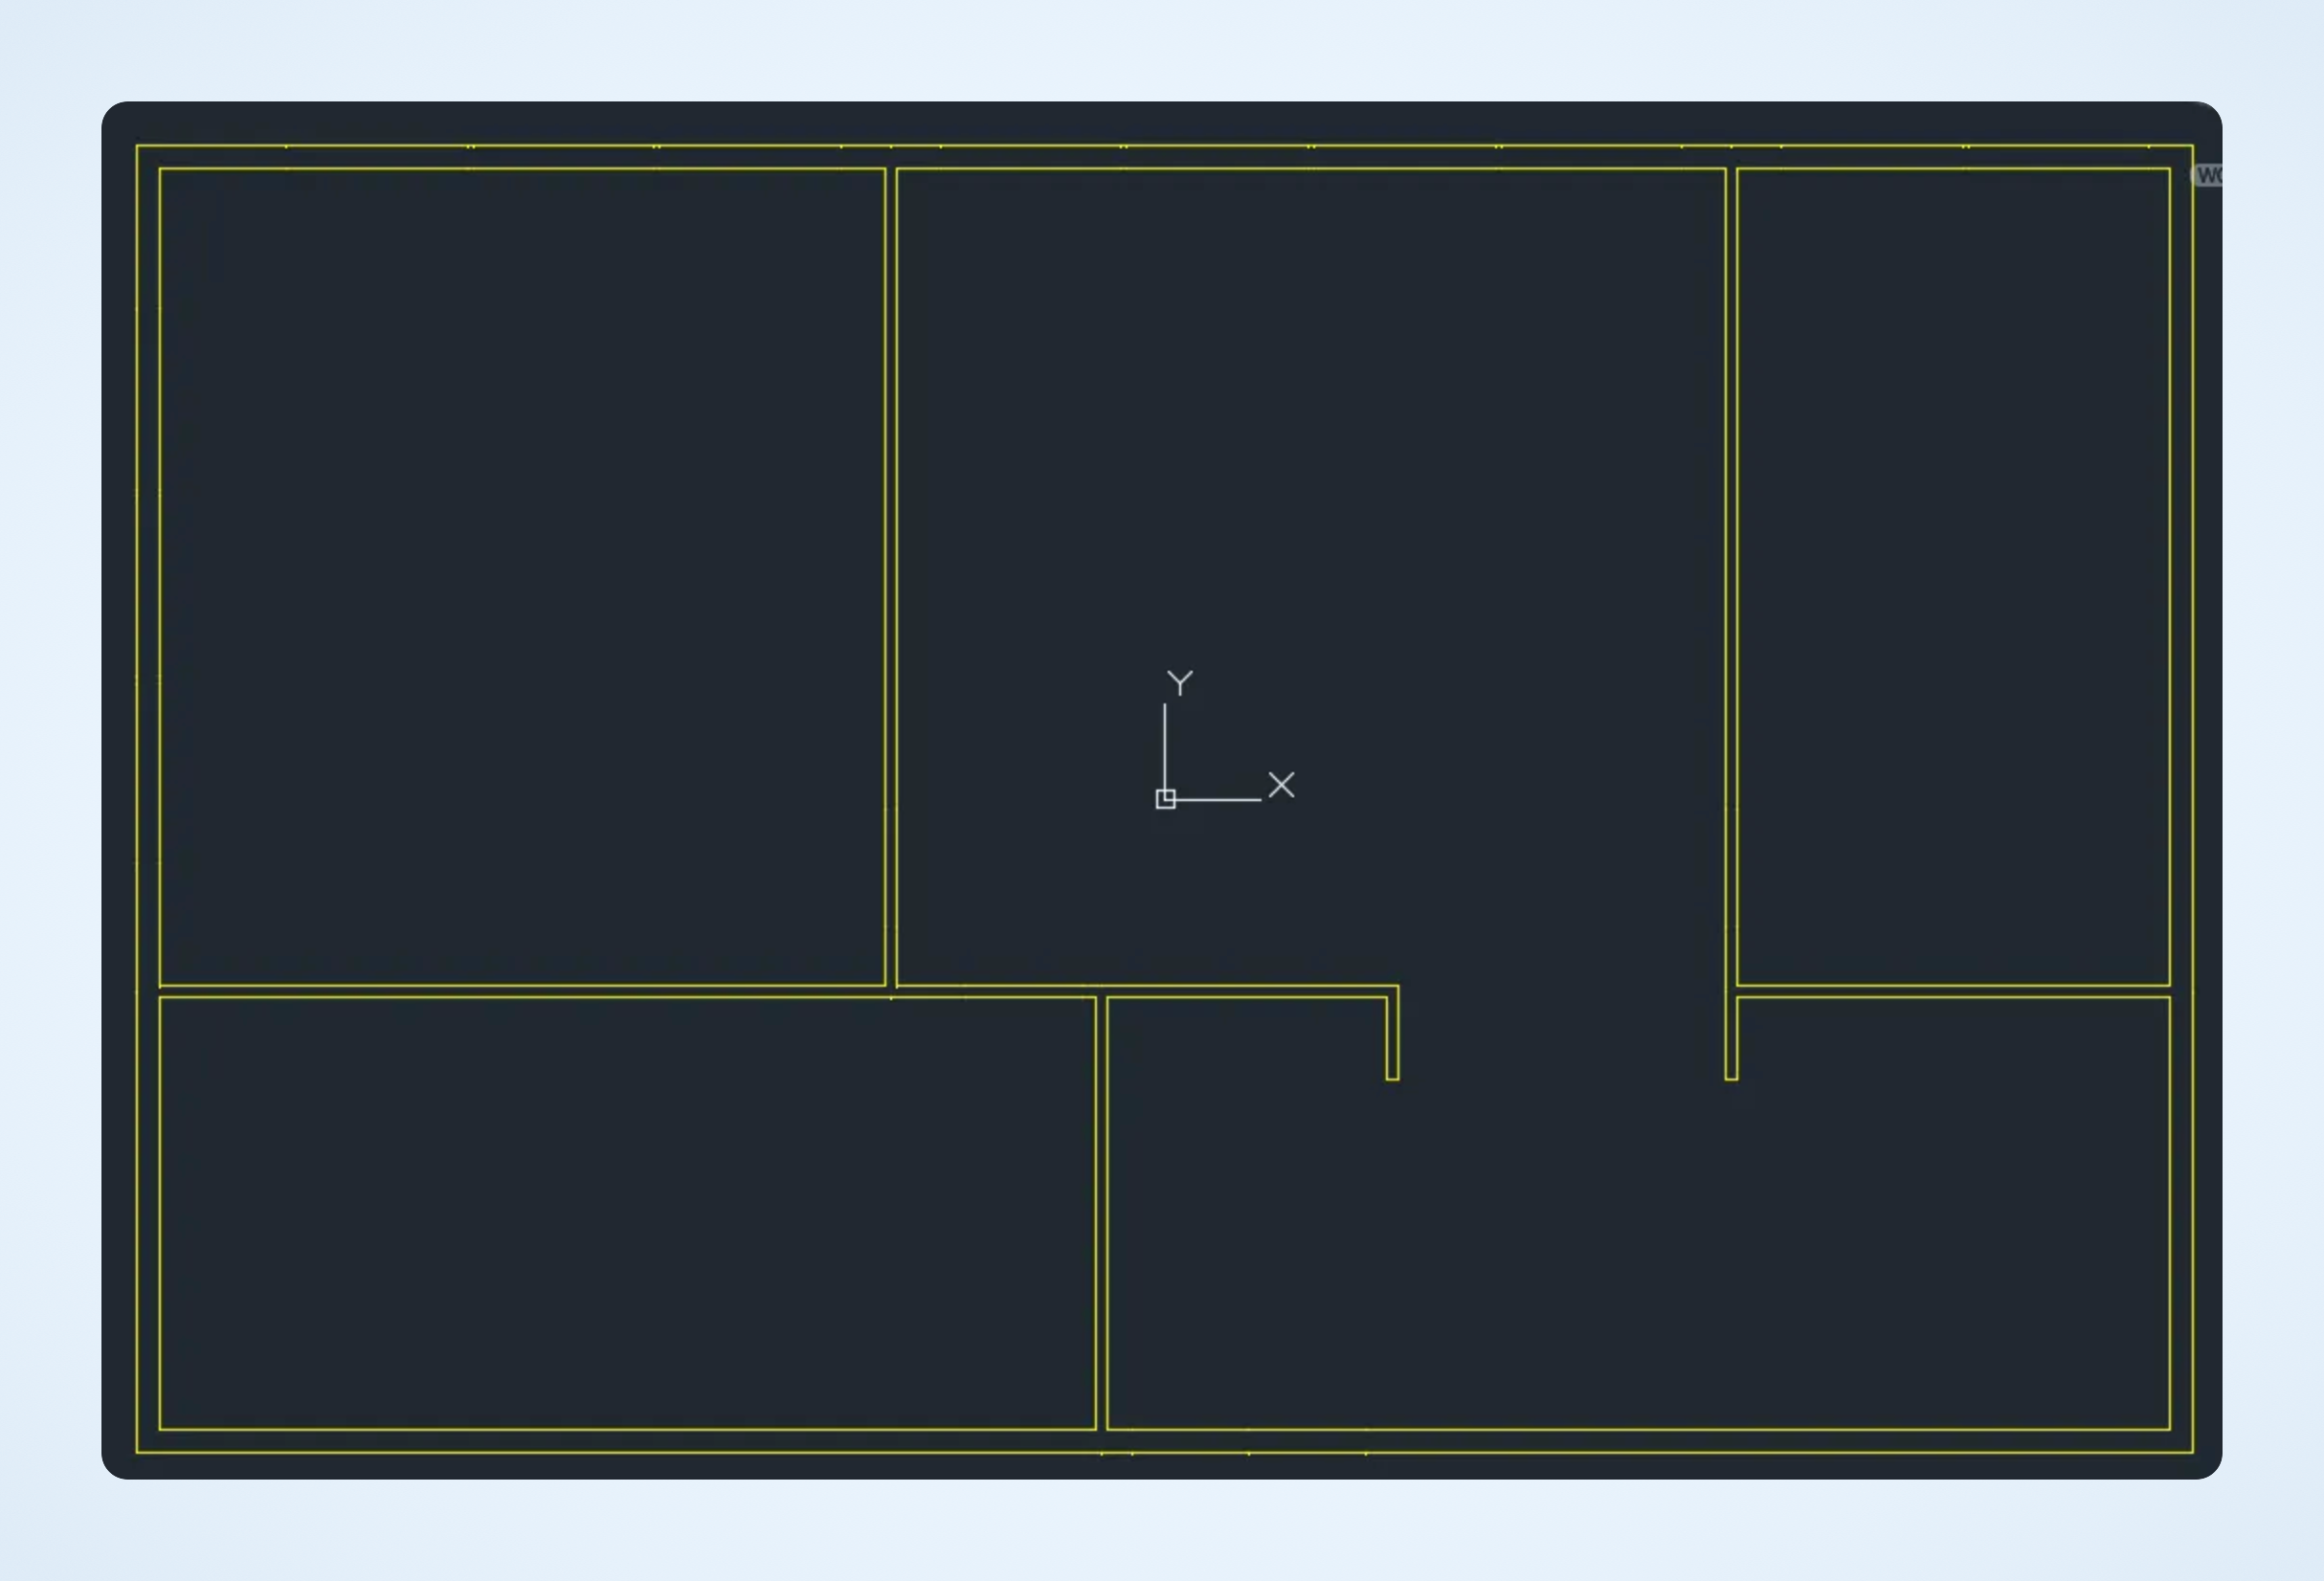
Set the layer name to wall and draw the walls as shown below.
{% hint style="warning" %}
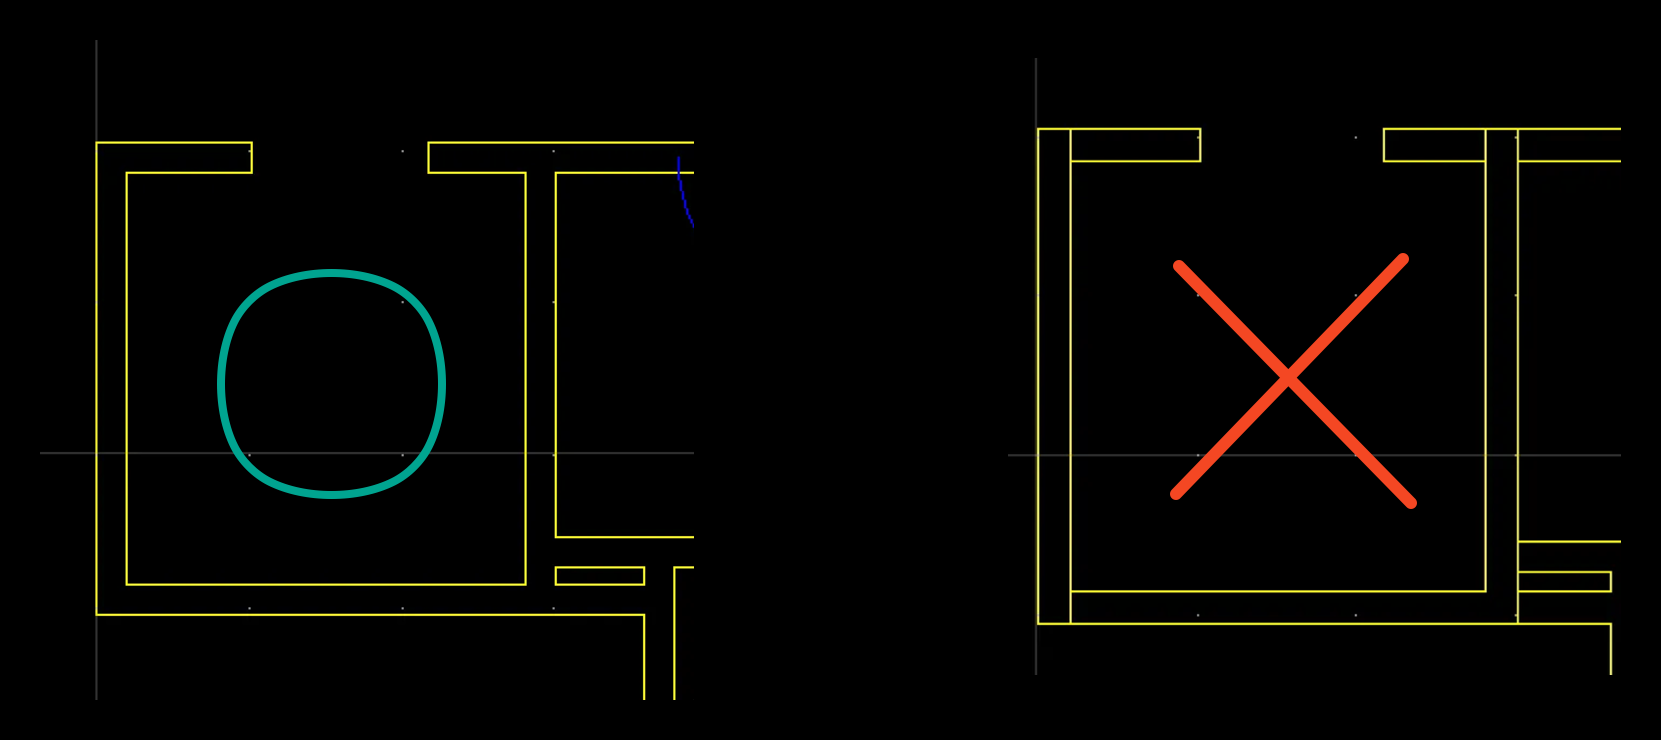
Caution) The lines of the wall must touch each other exactly. Otherwise, wall detection will not work properly.
Caution) Spaces between walls must not be closed.
Caution) Curved walls are not supported.
{% endhint %}
{% hint style="info" %}
If it is hard to tell whether the wall is broken, try applying Hatch!
If one Hatch is applied cleanly, the wall line organization is complete!
{% endhint %}
**Additional features**
* You can predefine the wall height in CAD!\
If you set the layer name like wall\_2800, the wall height will automatically be applied as 2800mm in the Archisketch editor.
### Doors
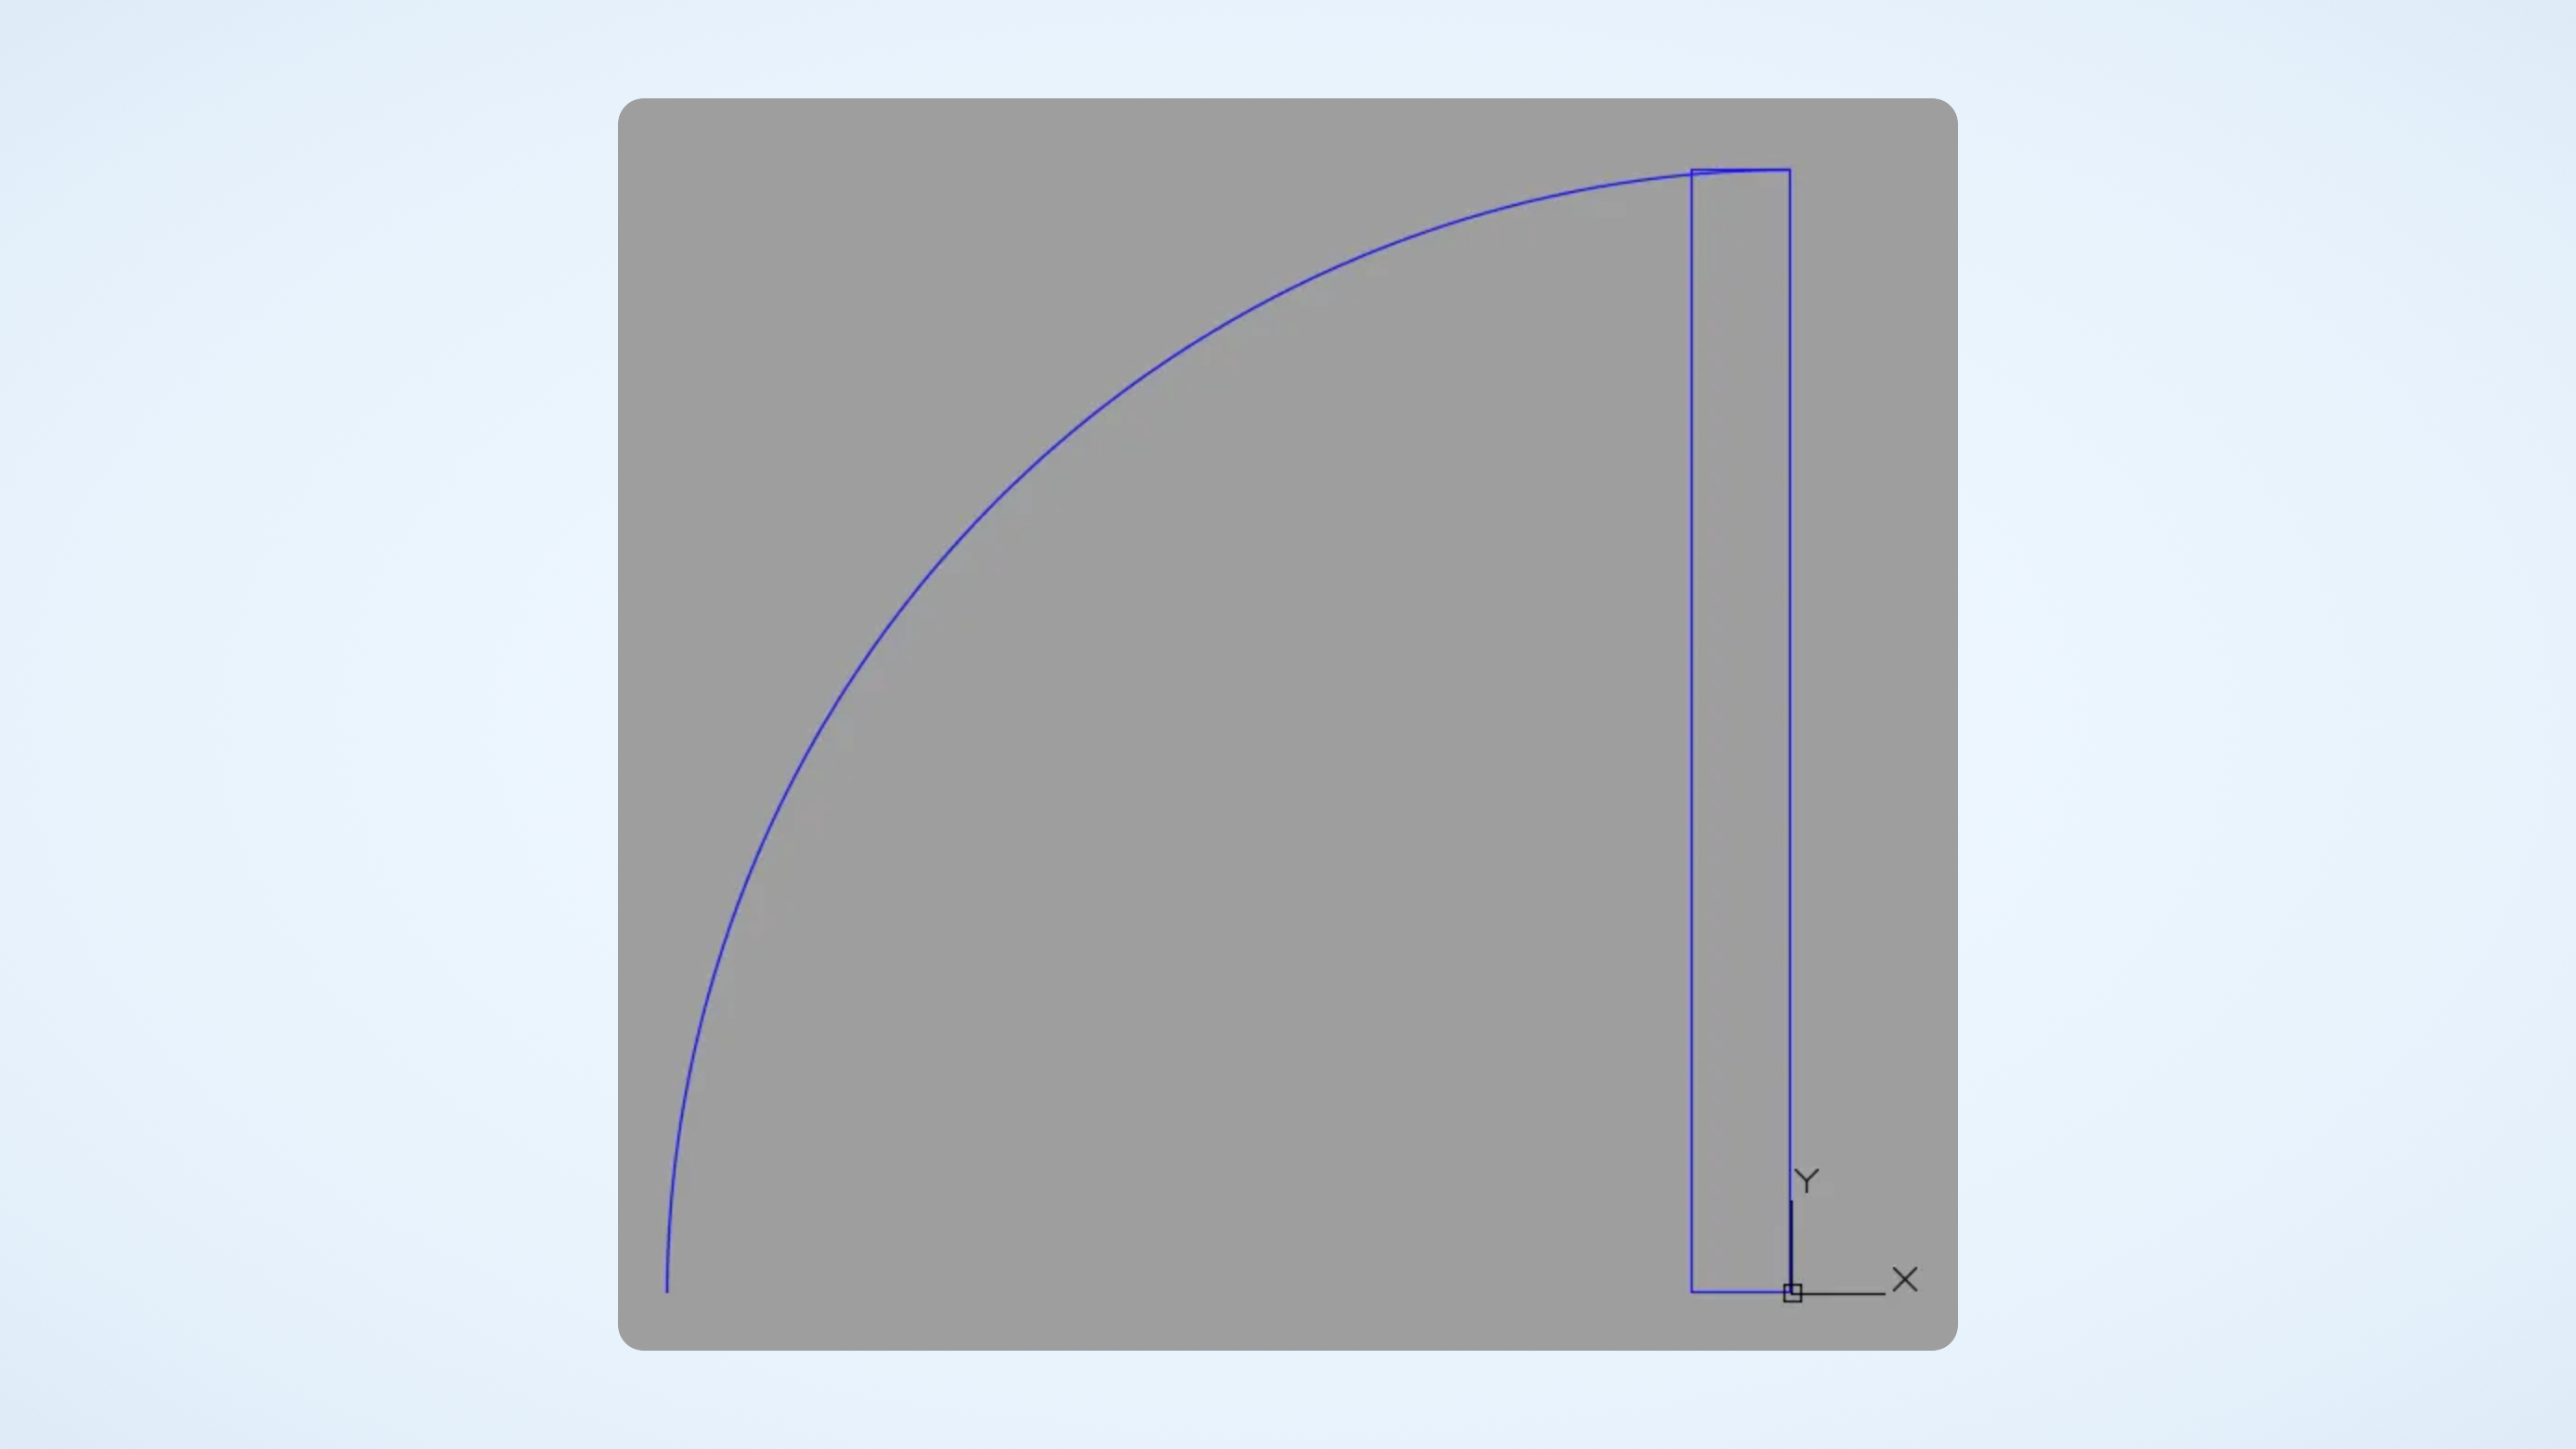
* Create doors as blocks as shown below.
* Set the layer name to door and place the block at the door location.
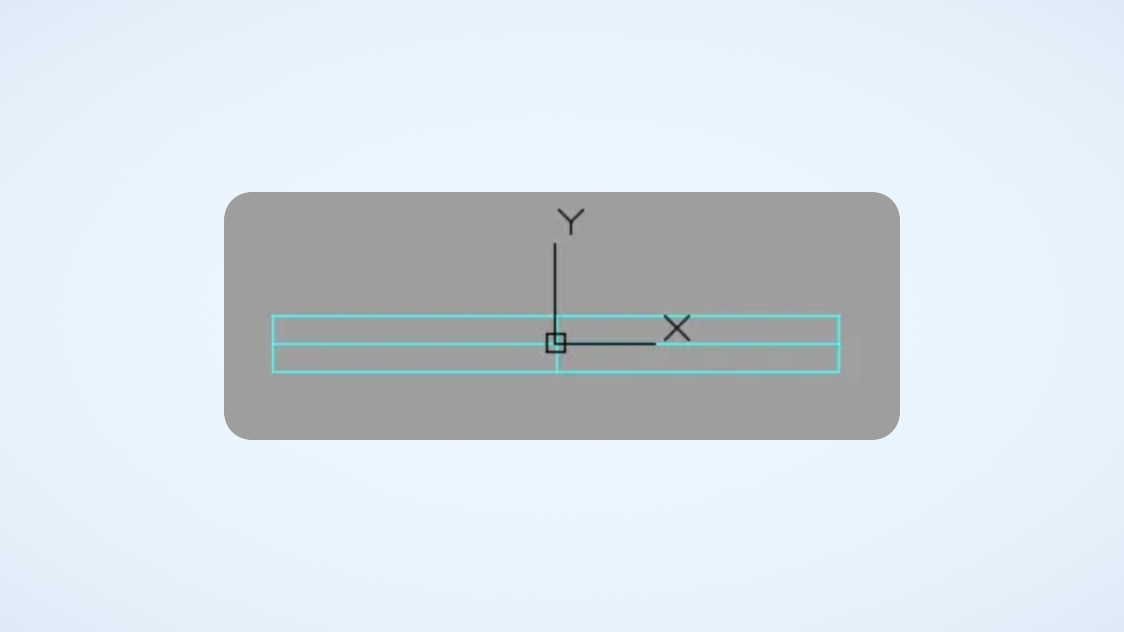
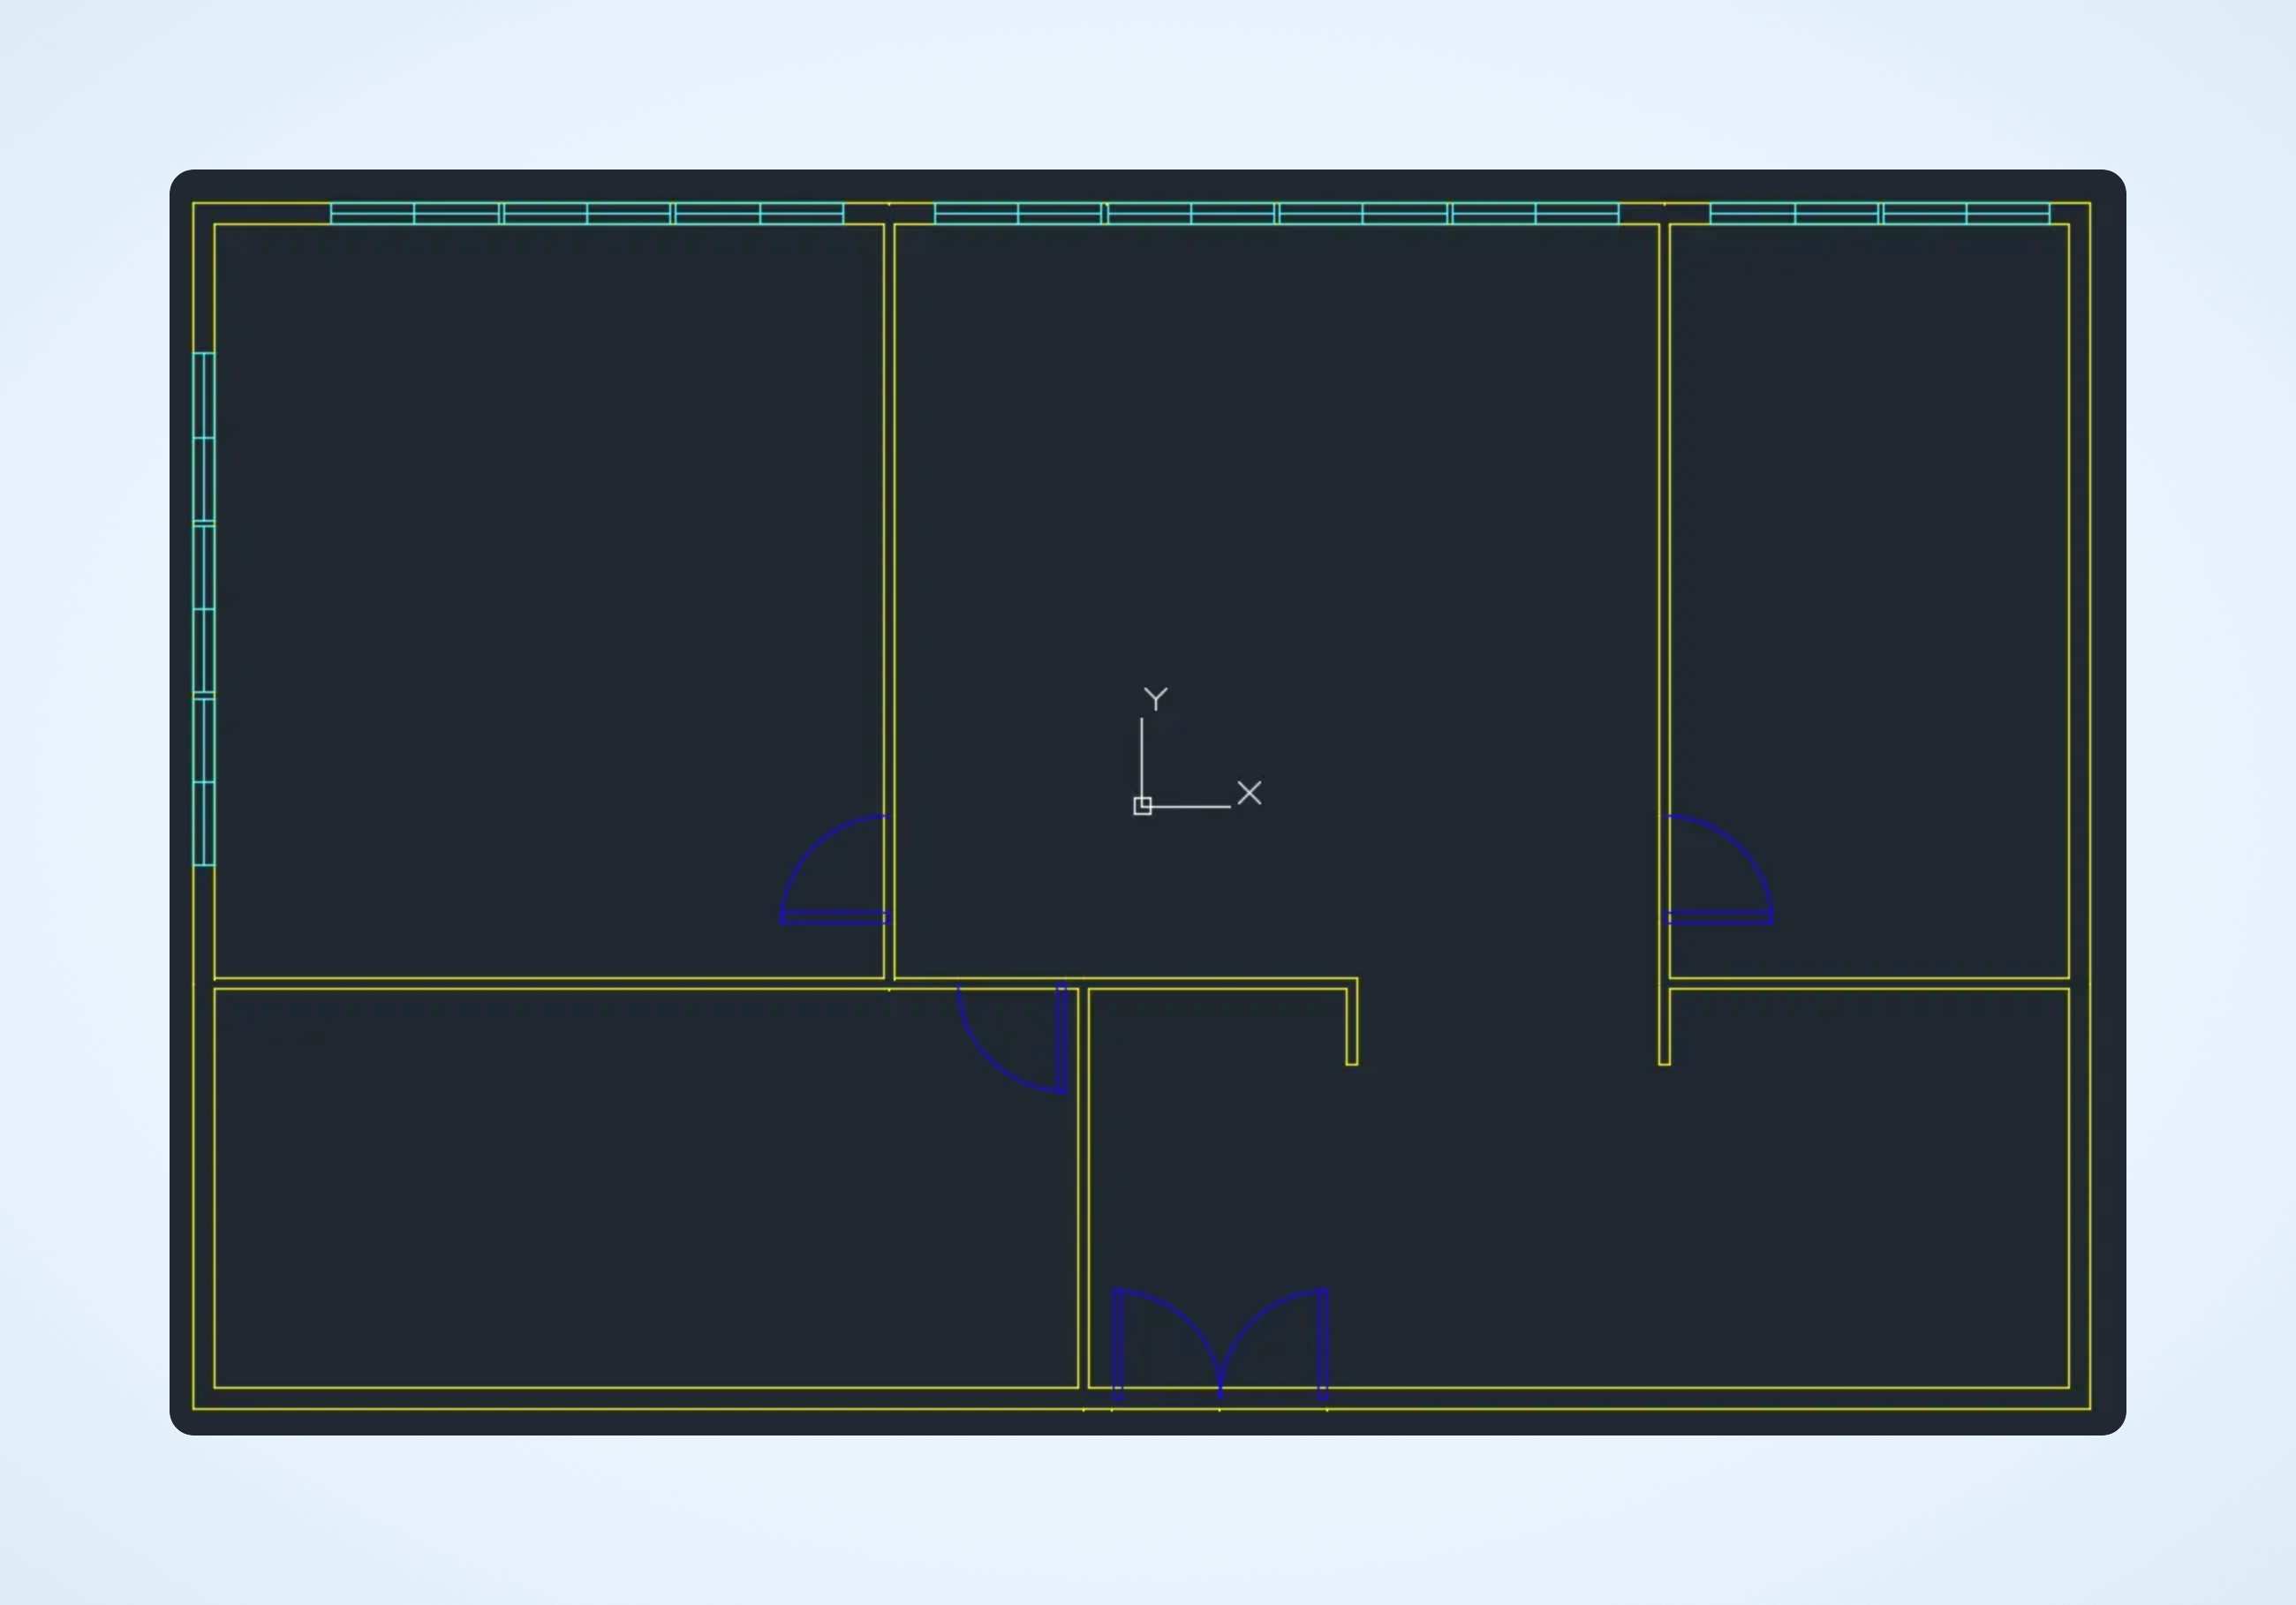
### Windows
* Create windows as blocks as shown below.
* After setting the layer name to window, insert it at the desired location as shown below.
{% hint style="warning" %}
Caution) Windows that are not blockified cannot be imported into the Archisketch editor.
{% endhint %}
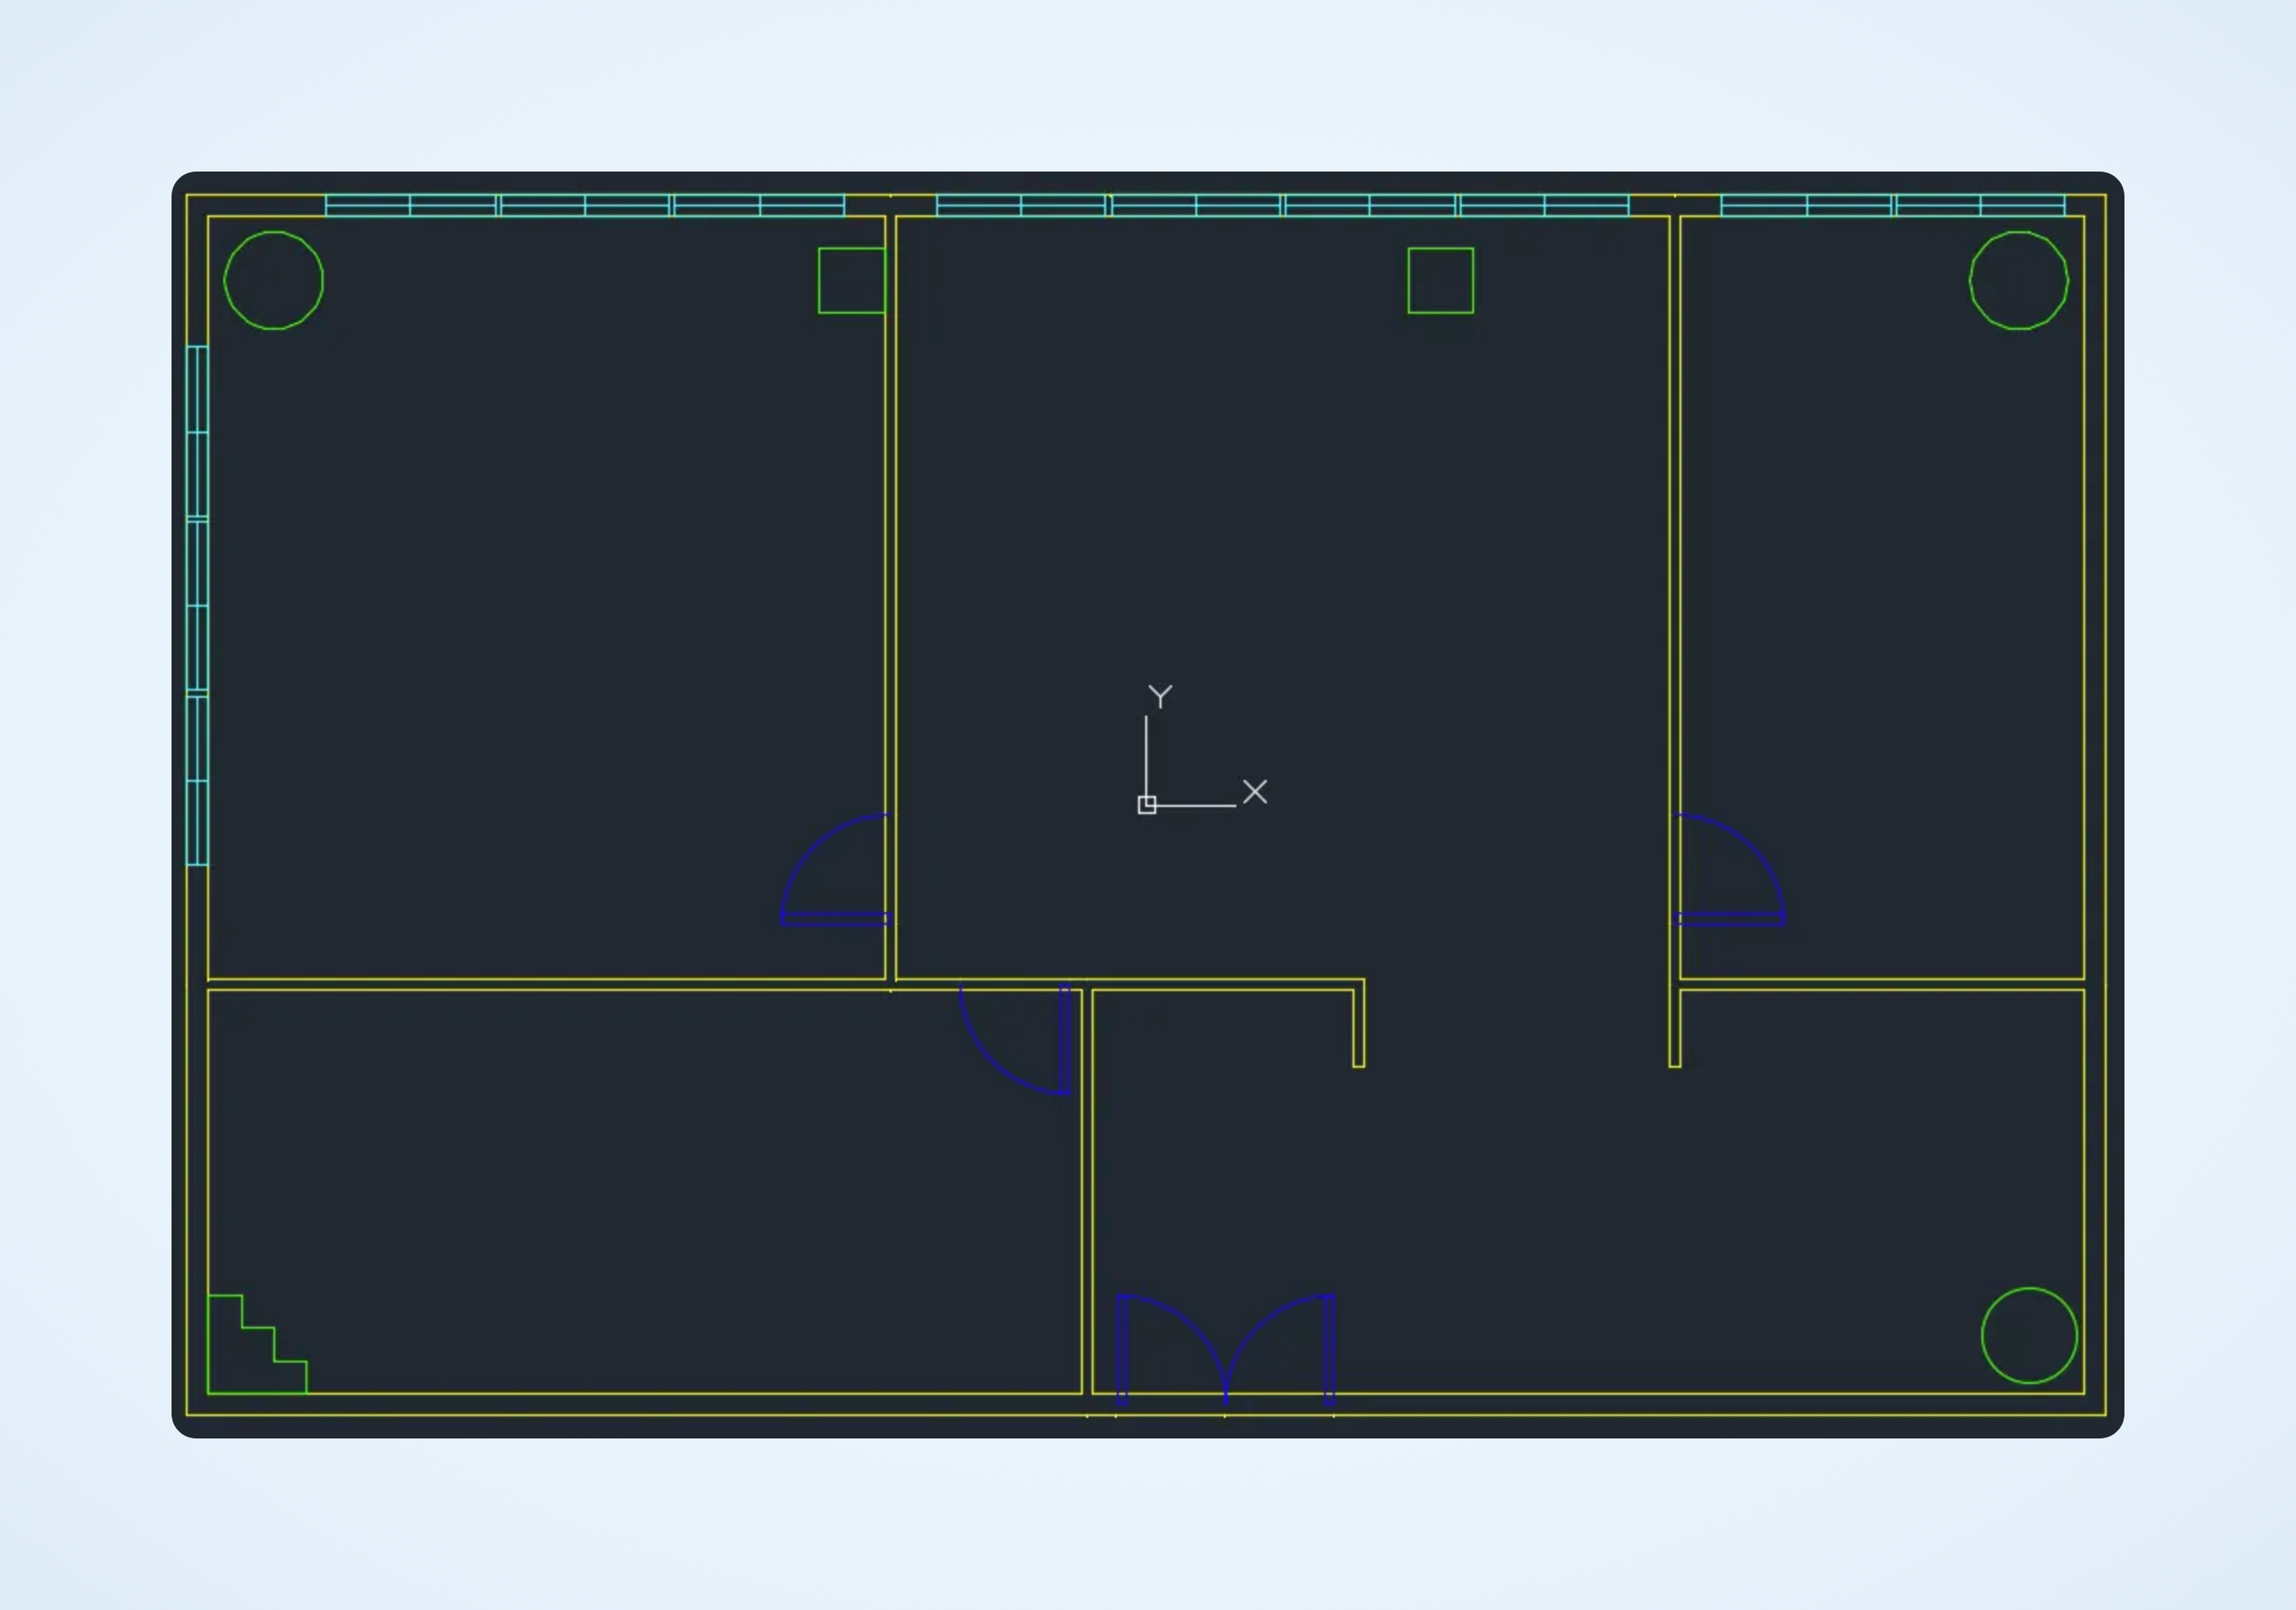
### Columns
Set the layer name to line or column and draw a polygon.
{% hint style="warning" %}
Caution) The polygon must be made of straight lines or circles, and it must be a shape whose start and end are connected.
{% endhint %}
Column creation requirements
* Round column
* When the number of points is 20 or more in a polygon
* Converted to \[round column]
* Square column
* When the number of points is 4 and it is a rectangle
* Converted to \[square column]

* Other shapes
* When the polygon has 5 to 19 points
* Converted to \[Design Library > Architecture/Material Editor]
Notes
If a layer contains shapes that do not meet the requirements, it will not be uploaded properly.

### Save the file
* Please make sure to save the file format as dxf. Other formats do not support the upload function.
## Upload in Archisketch
How to upload a drawing
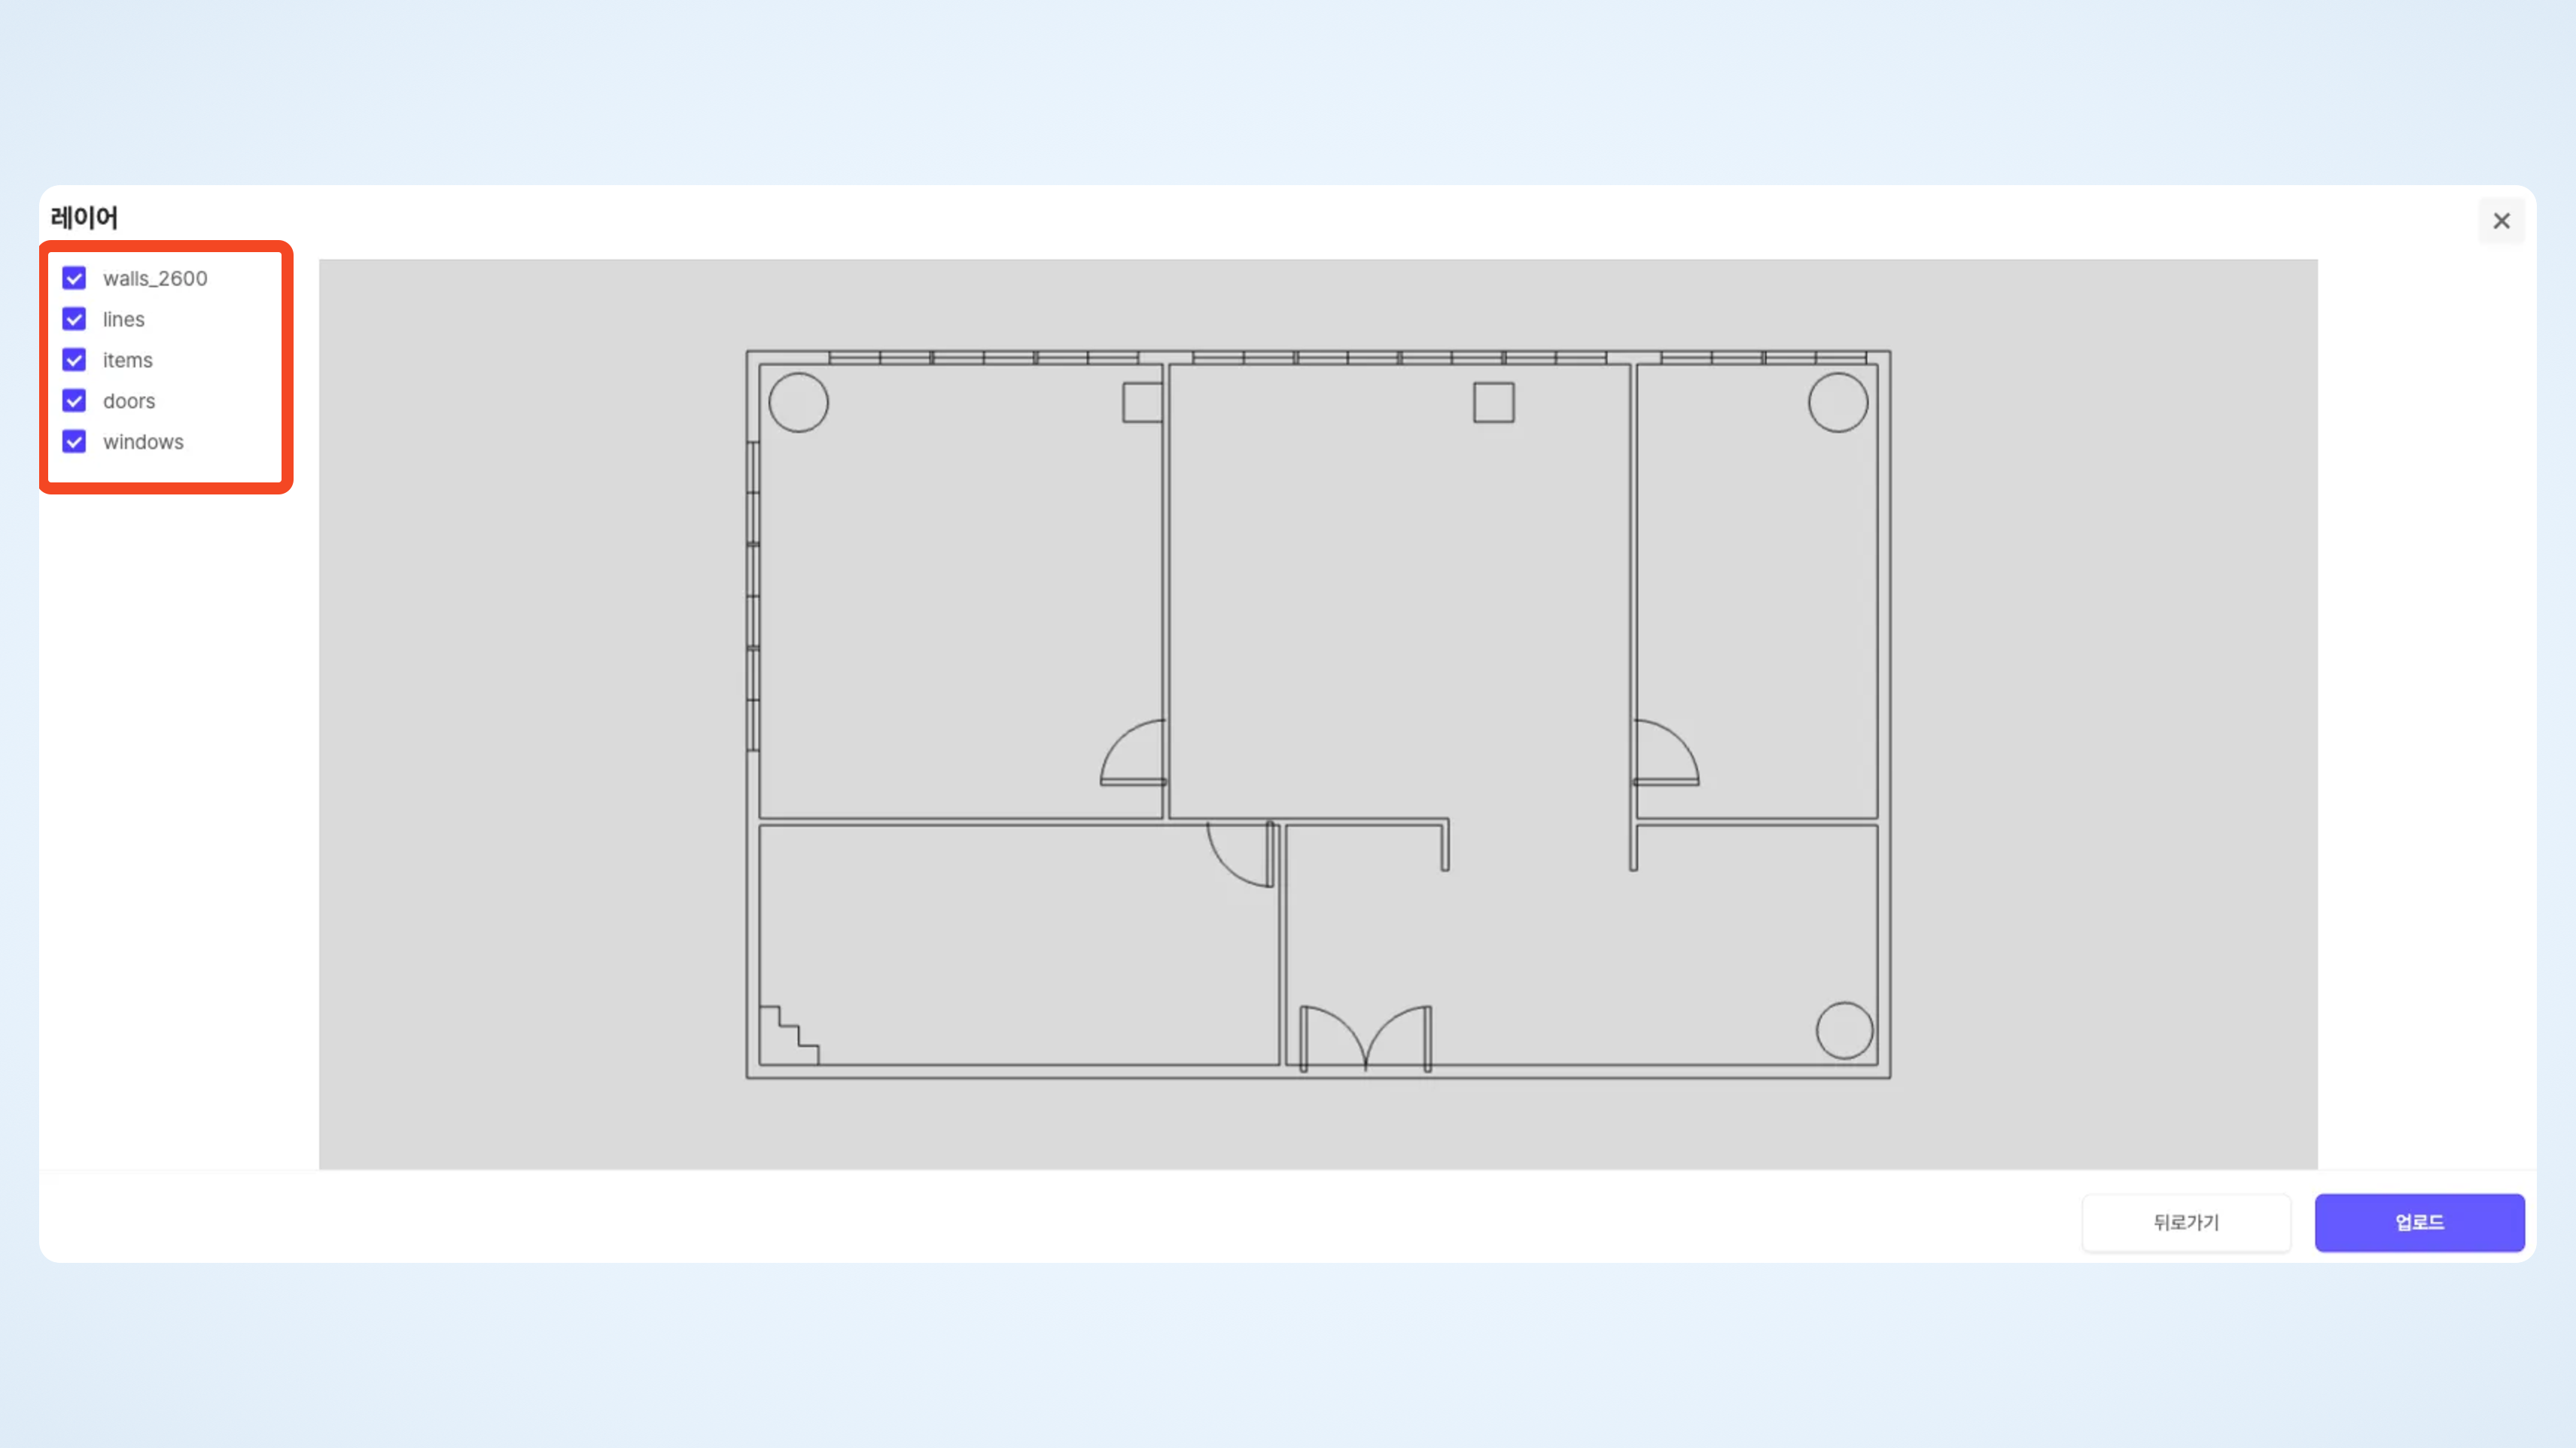
* Proceed in the following order: \[Drawing Upload] → \[CAD Upload] → \[Select File].
* After that, a window for selecting layers will appear.
* You can turn only the layers you want on or off.
* Once the selection is complete, click the \[Upload] button at the bottom right.
## Edit in the editor
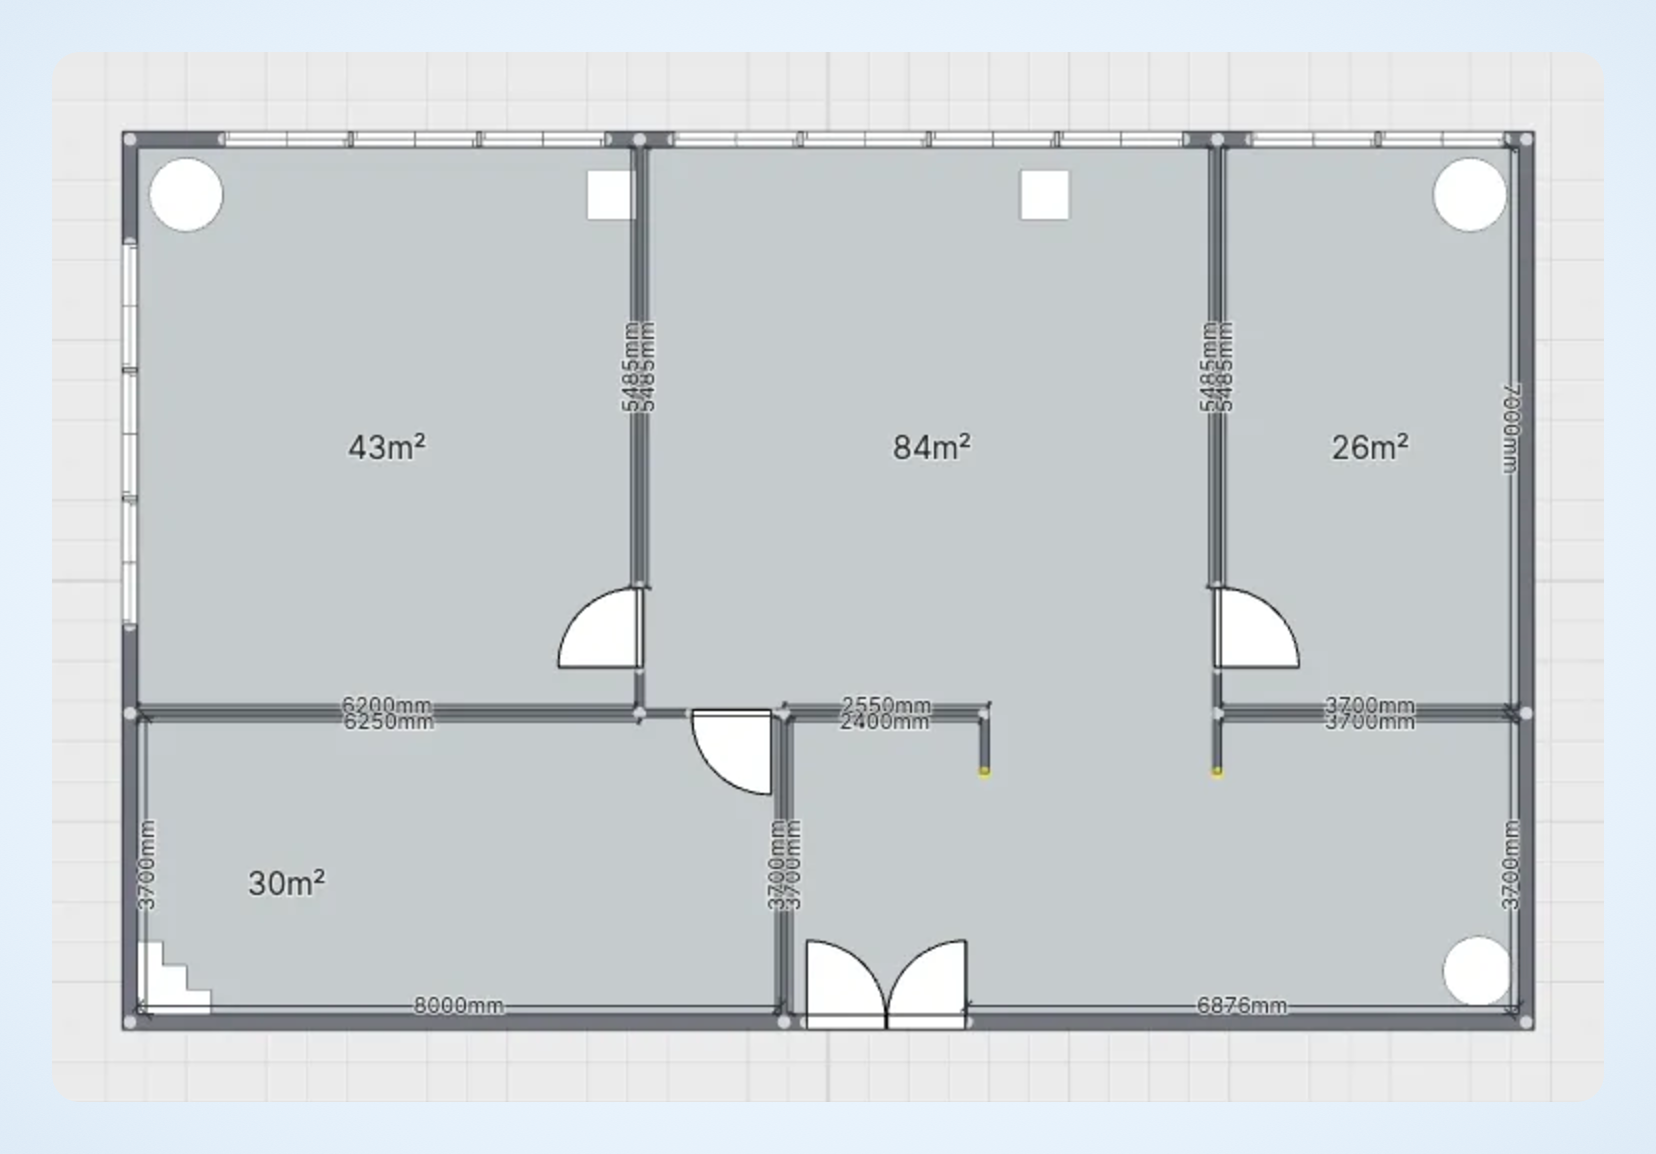
Uploaded drawings are converted into Archisketch format, allowing you to use various Archisketch features such as wall editing, product placement, and rendering.
## Edit columns
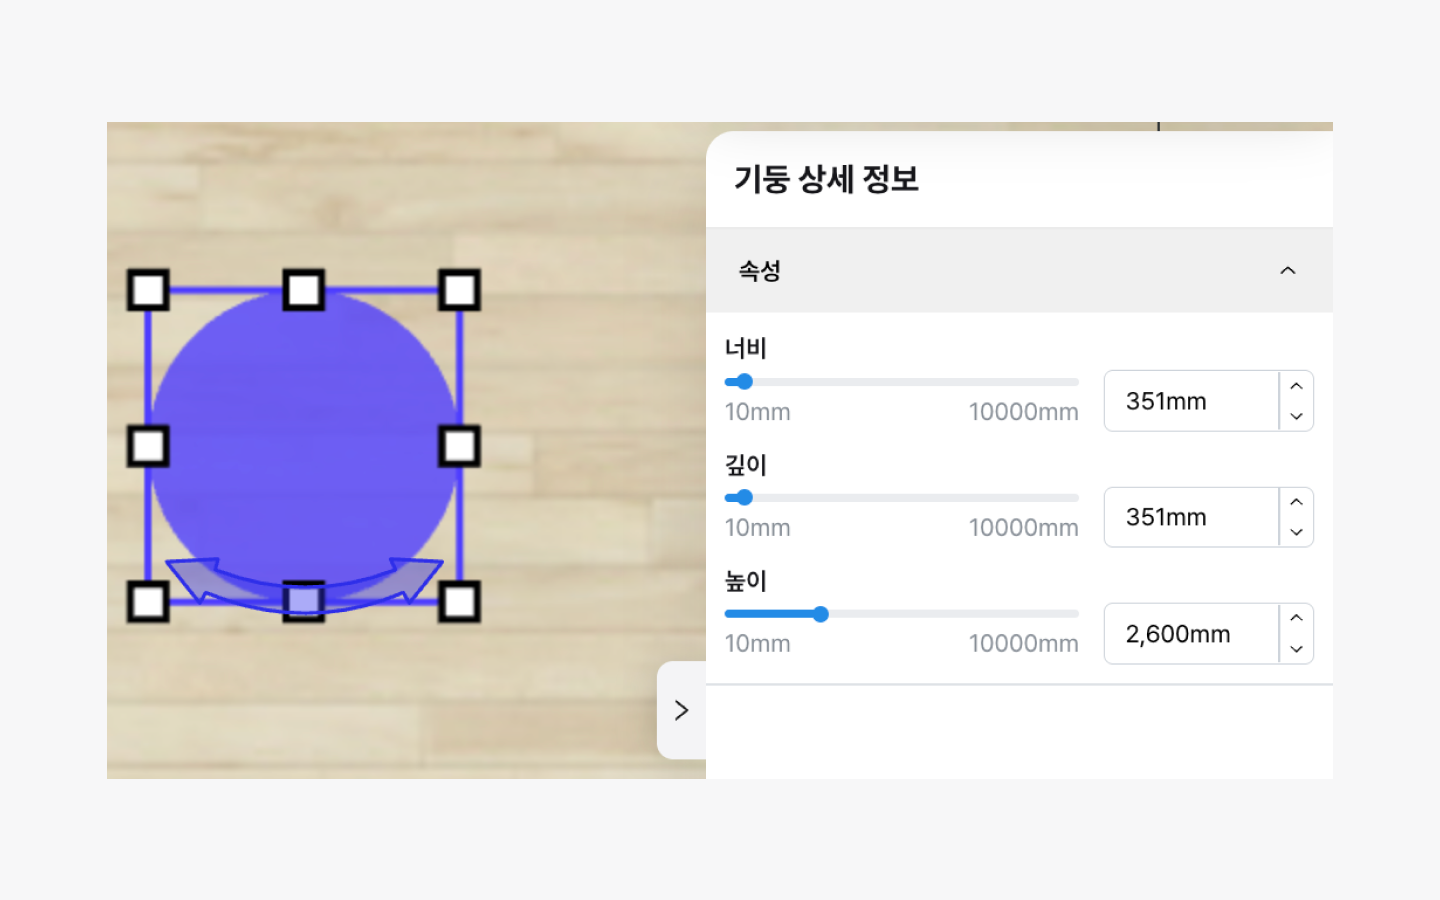
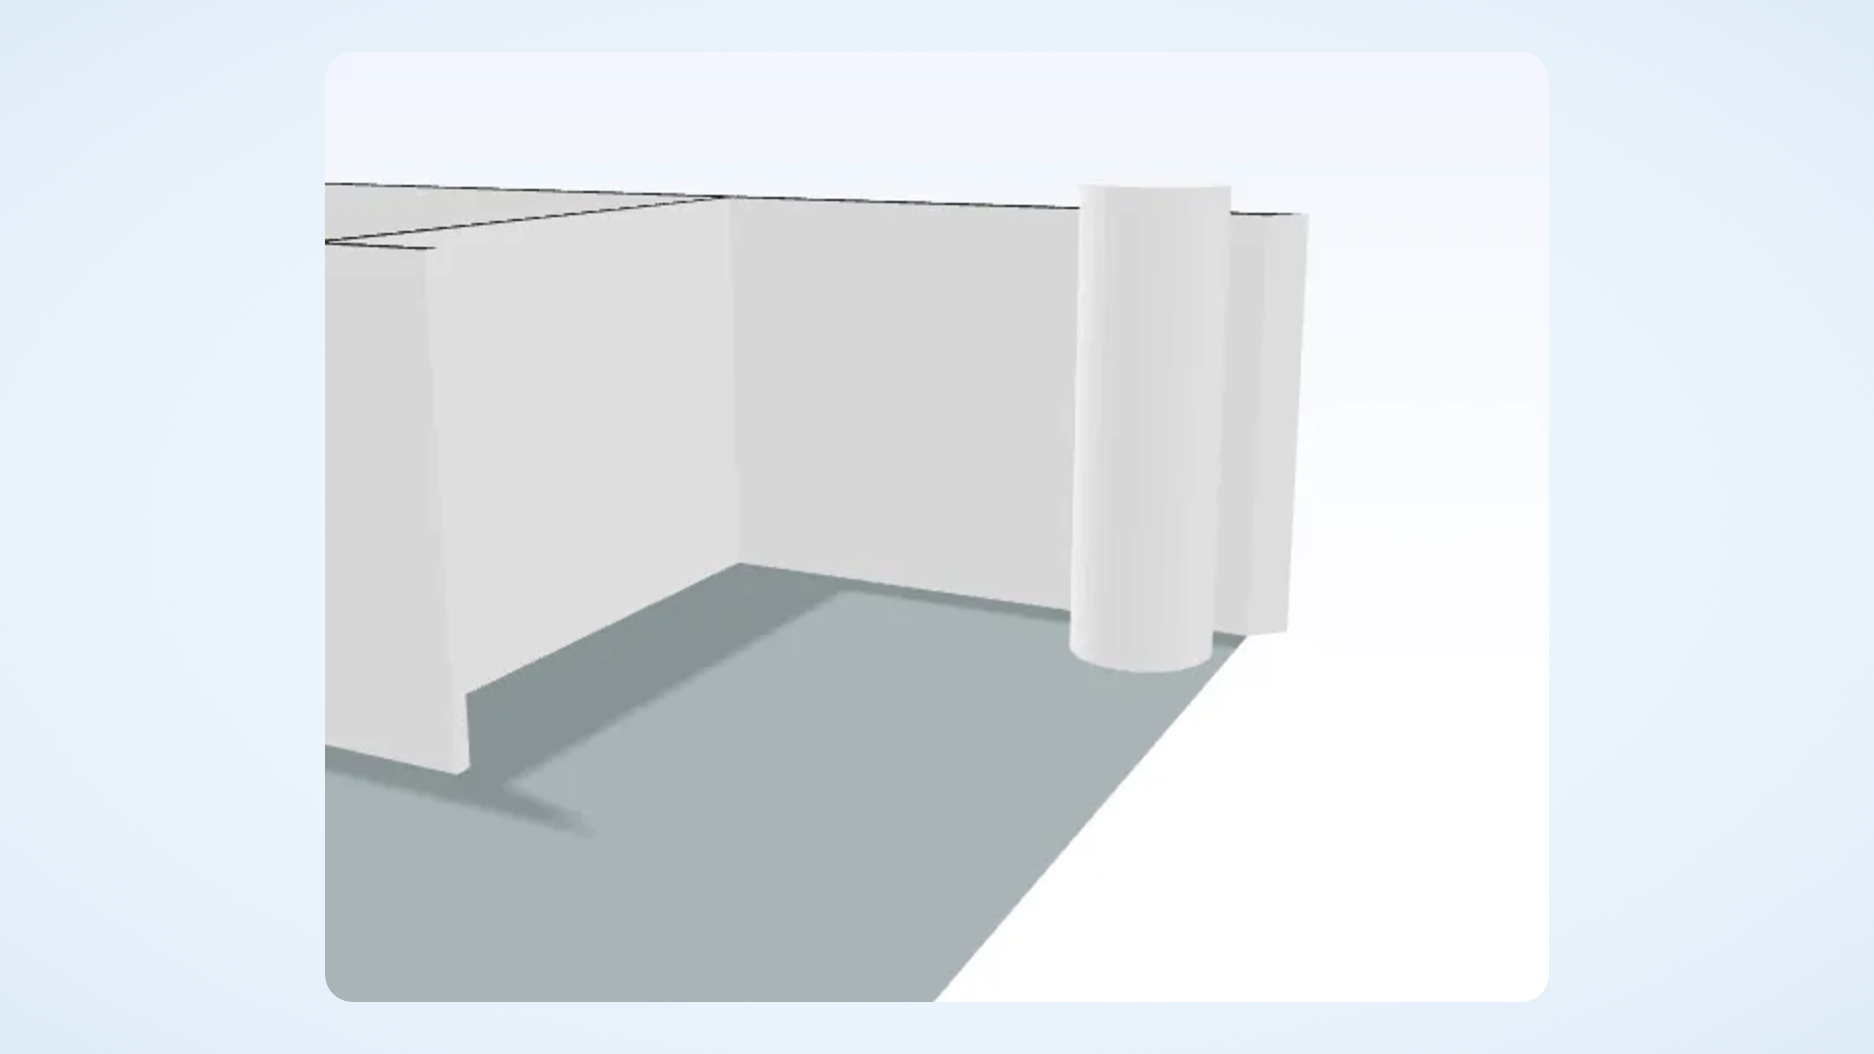
Once the upload is complete, you can select a column and adjust it to the desired height by changing 'Properties > Height'.
---
# Agent Instructions
This documentation is published with GitBook. GitBook is the documentation platform designed so that both humans and AI agents can read, navigate, and reason over technical content effectively. Learn more at gitbook.com.
## Querying This Documentation
If you need additional information that is not directly available in this page, you can query the documentation by asking a question.
Perform an HTTP GET request on the following URL with the `ask` and `goal` query parameters:
```
GET https://docs.archisketch.com/guide/user-en/expert-feature/cad-upload.md?ask=&goal=
```
`ask` is the immediate question: it should be specific, self-contained, and written in natural language.
`goal` is what the user is ultimately trying to achieve, the reason they need the answer. Sharing it helps GitBook give you a better, more relevant answer. A goal is most helpful when it describes the outcome the user wants rather than restating the question. For example, with `ask=how do I create an API token`, a goal like `automate deployments from our CI pipeline` lets GitBook tailor the answer to that use case.
The response will contain a direct answer to the question and relevant excerpts and sources from the documentation.
Use this mechanism when the answer is not explicitly present in the current page, you need clarification or additional context, or you want to retrieve related documentation sections.