> For the complete documentation index, see [llms.txt](https://docs.archisketch.com/llms.txt). Markdown versions of documentation pages are available by appending `.md` to page URLs; this page is available as [Markdown](https://docs.archisketch.com/guide/user-en/archisketch-ai/ai-furniture-swap.md).
# AI Furniture Swap
> **AI Furniture Swap**is a feature that lets you place new furniture in your space from a single photo, swap it with products you like, and even generate a rendered final image. If you follow this guide step by step, you'll be able to use it easily even if it's your first time.
>
> Paid feature notice: 'AI Furniture Swap' is a paid feature. Please check the plan and usage terms before using it.
### Before You Begin
* **What you need** — One photo of the space you want to change (a front-facing photo that clearly shows the interior is recommended)
* **Credits** — You can check your remaining credits and language at the top right of the screen.
* **Access path** — From the left menu, **AI Studio → AI Furniture Swap**select.
### At a glance
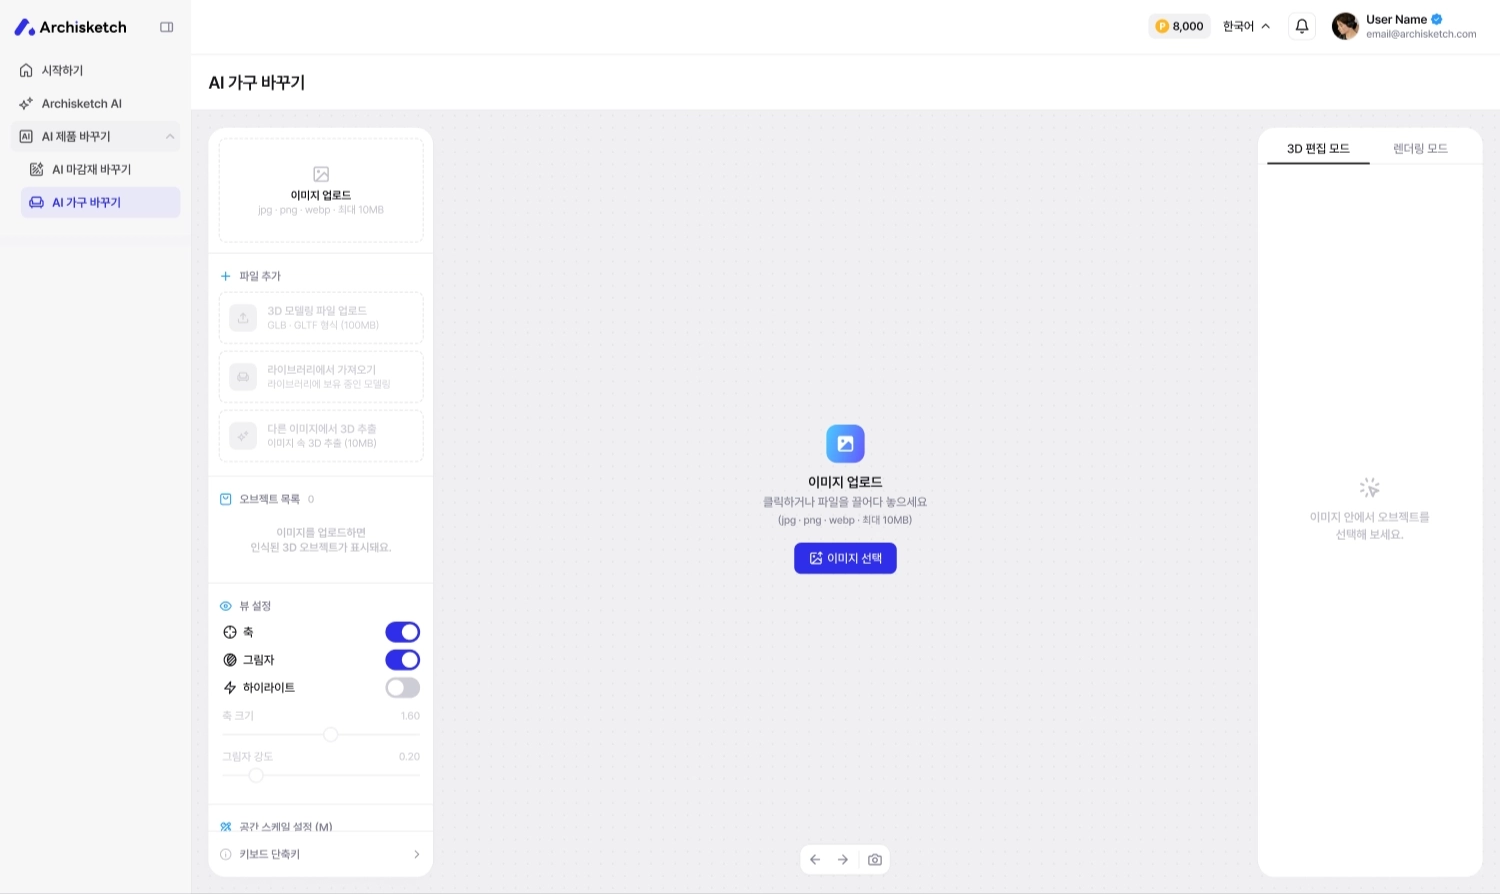
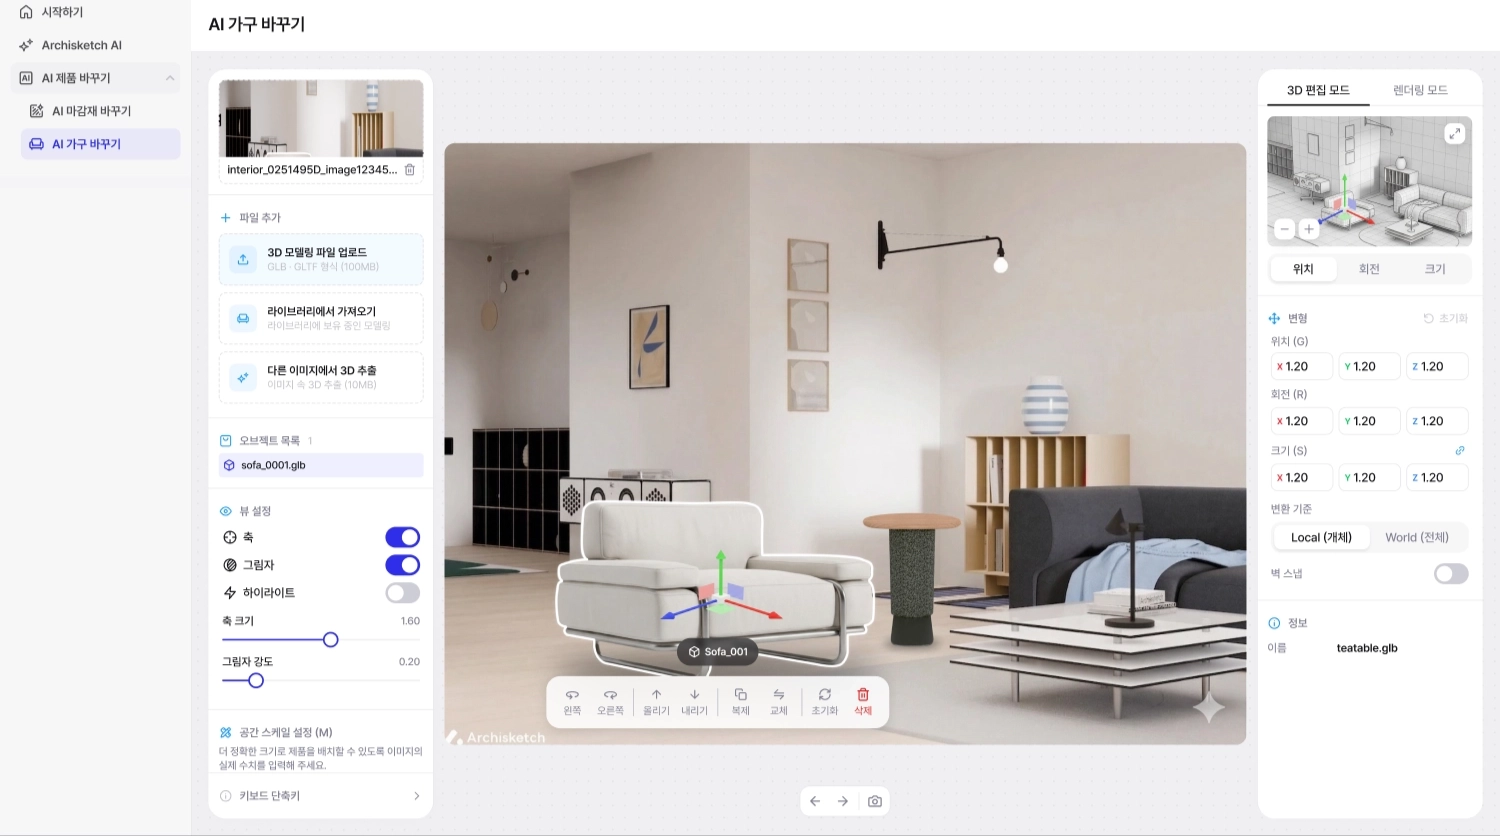
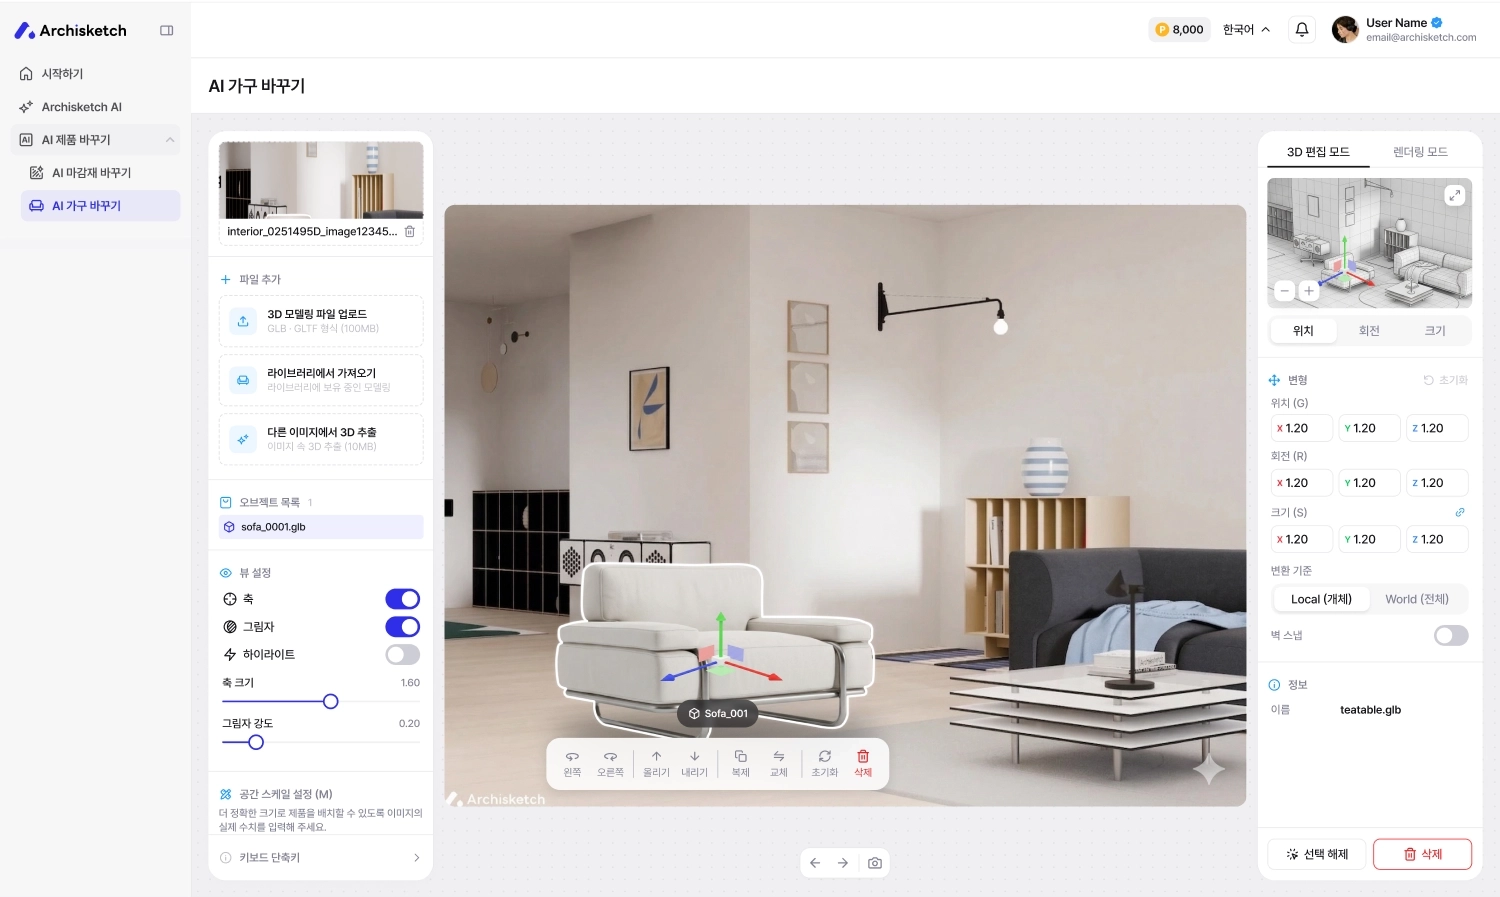
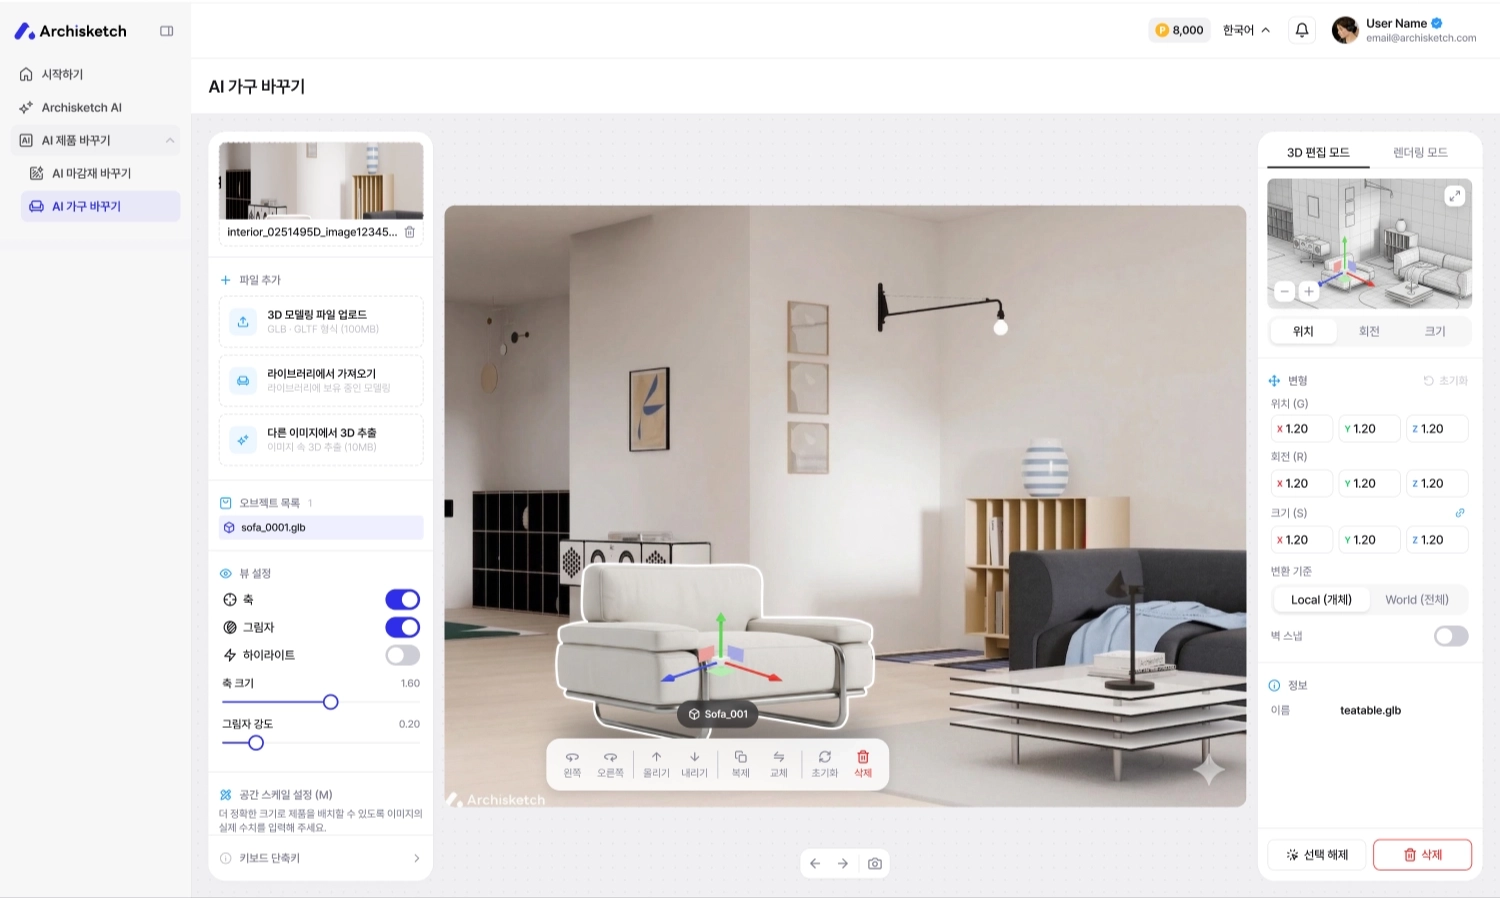
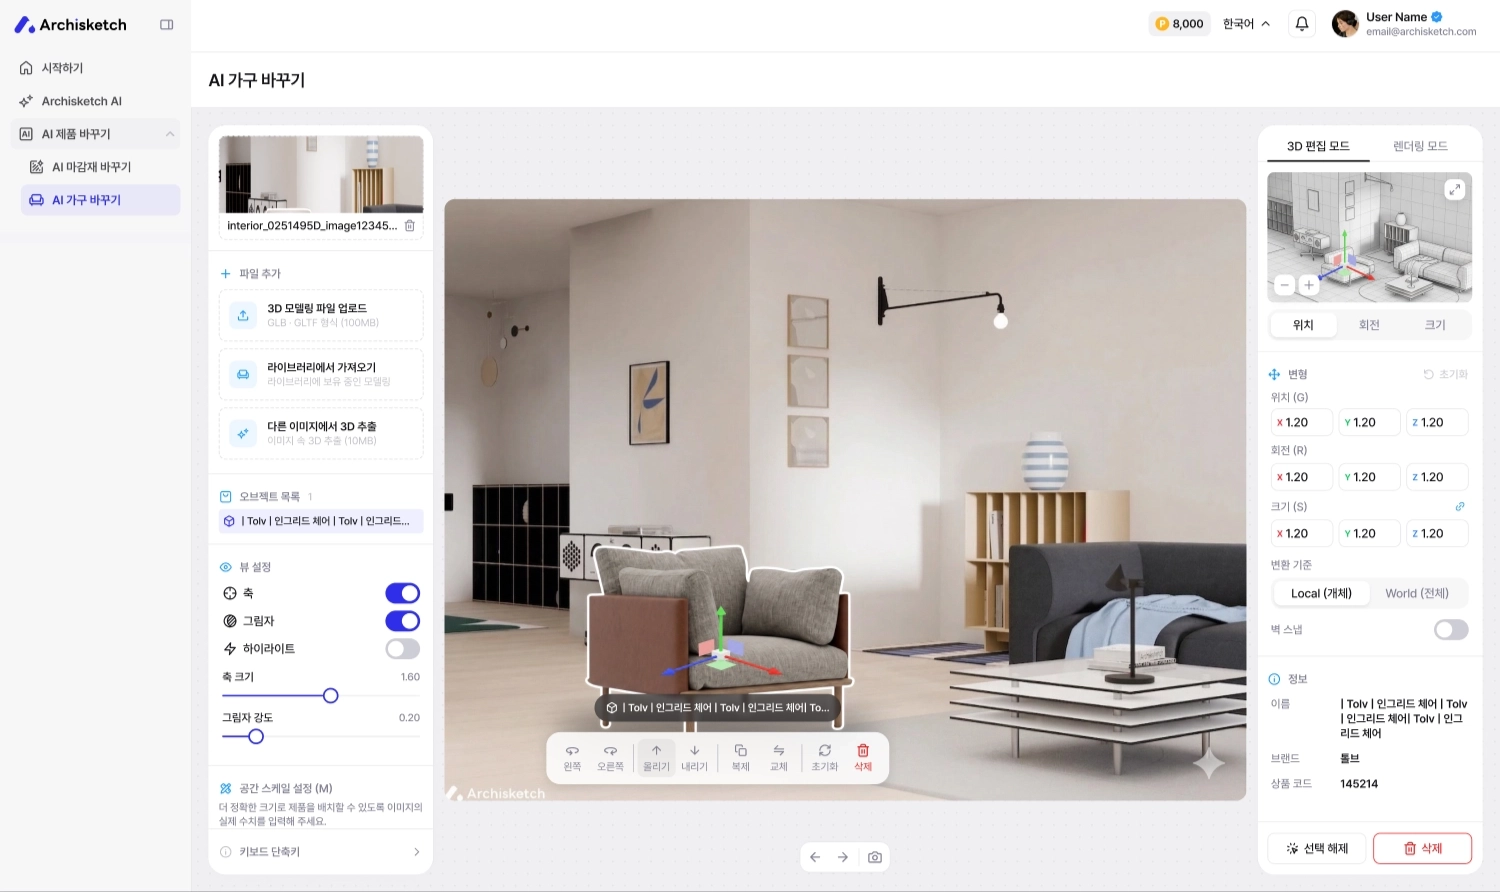
The AI Furniture Swap screen is broadly divided into three areas.
* **① Left panel** — Image, add file, object list, view settings, space scale settings
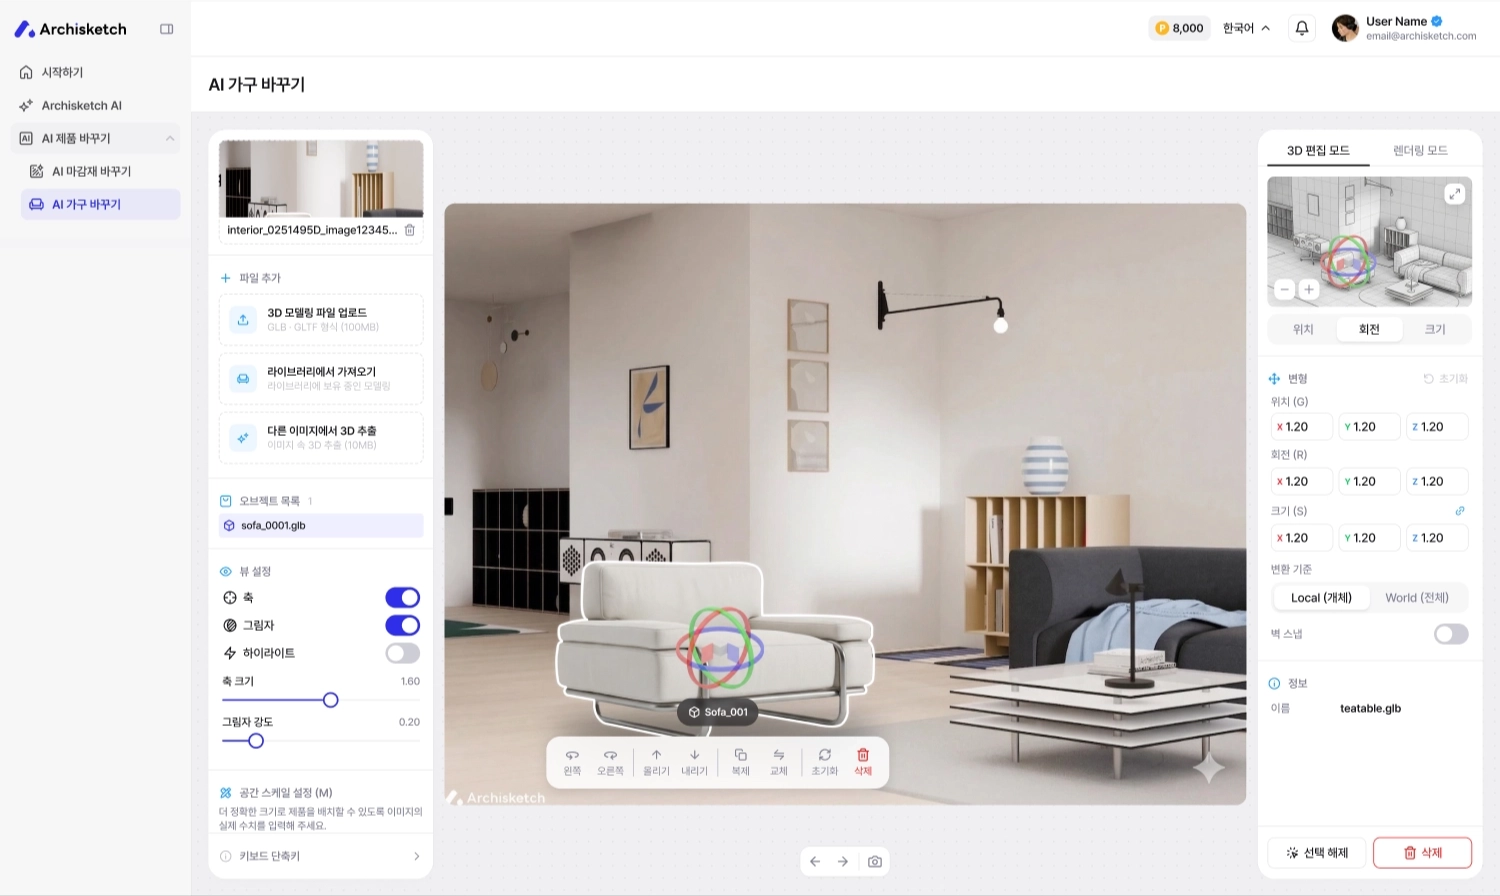
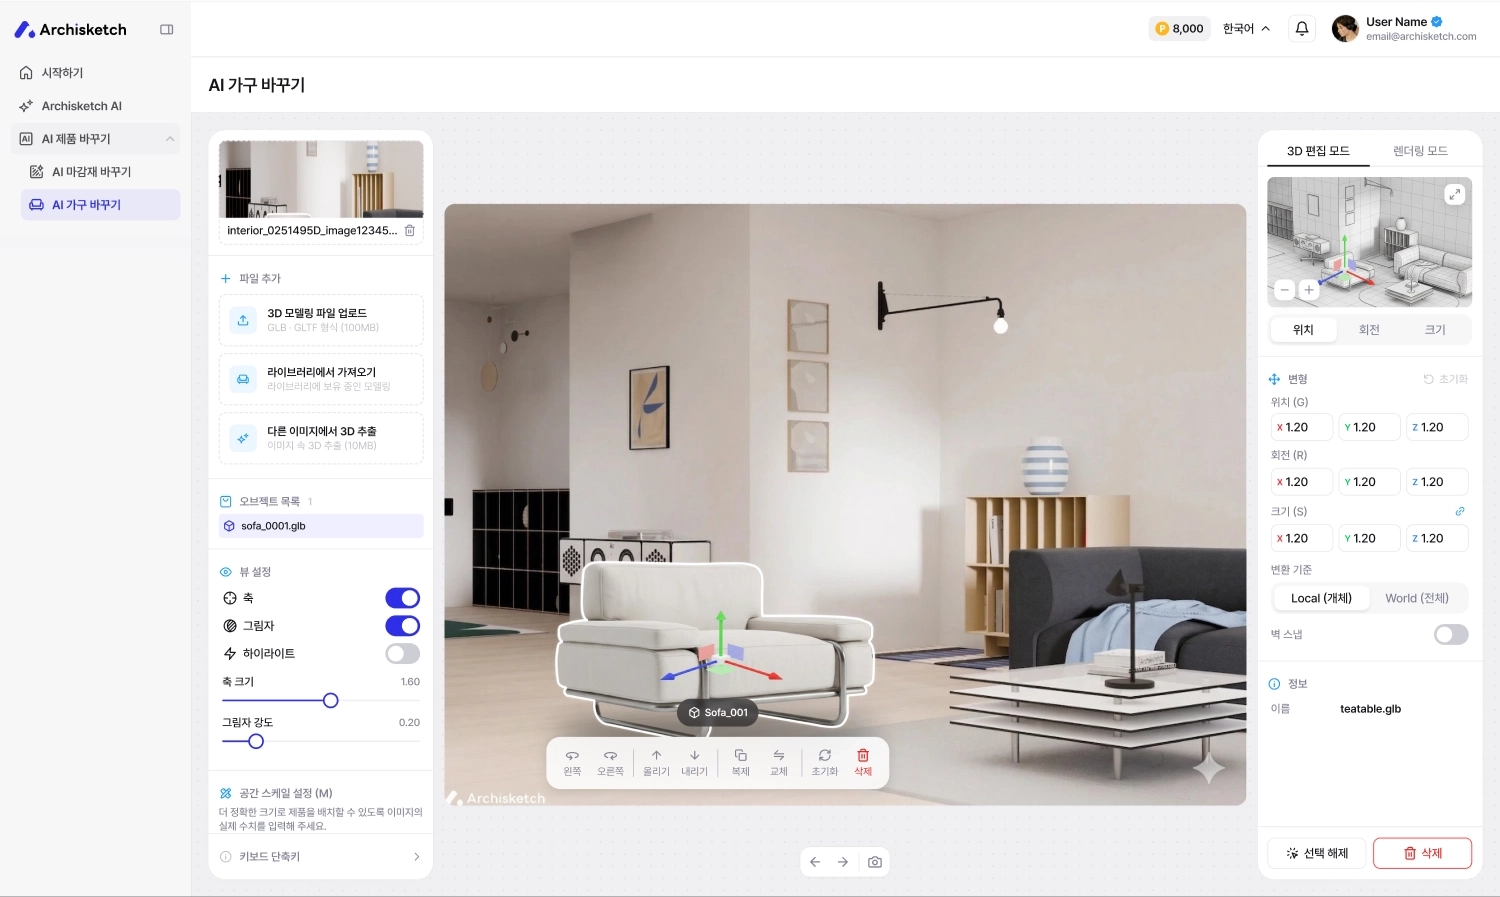
* **② Center canvas** — This is the 3D editing space. Handles for move, rotate, and resize appear on the selected furniture, and the editing toolbar is below.
* **③ Right panel** — Switch between 3D editing mode / rendering mode, enter position, rotation, and size values
### STEP 1. Upload a space image
First, upload a photo of the space you want to change. You can select a file on PC or upload from mobile.
When uploaded, AI automatically recognizes the structure of the space and the furniture.
💡 For smoother recognition, images under 100 MB are recommended.
### STEP 2. Set up the 3D image
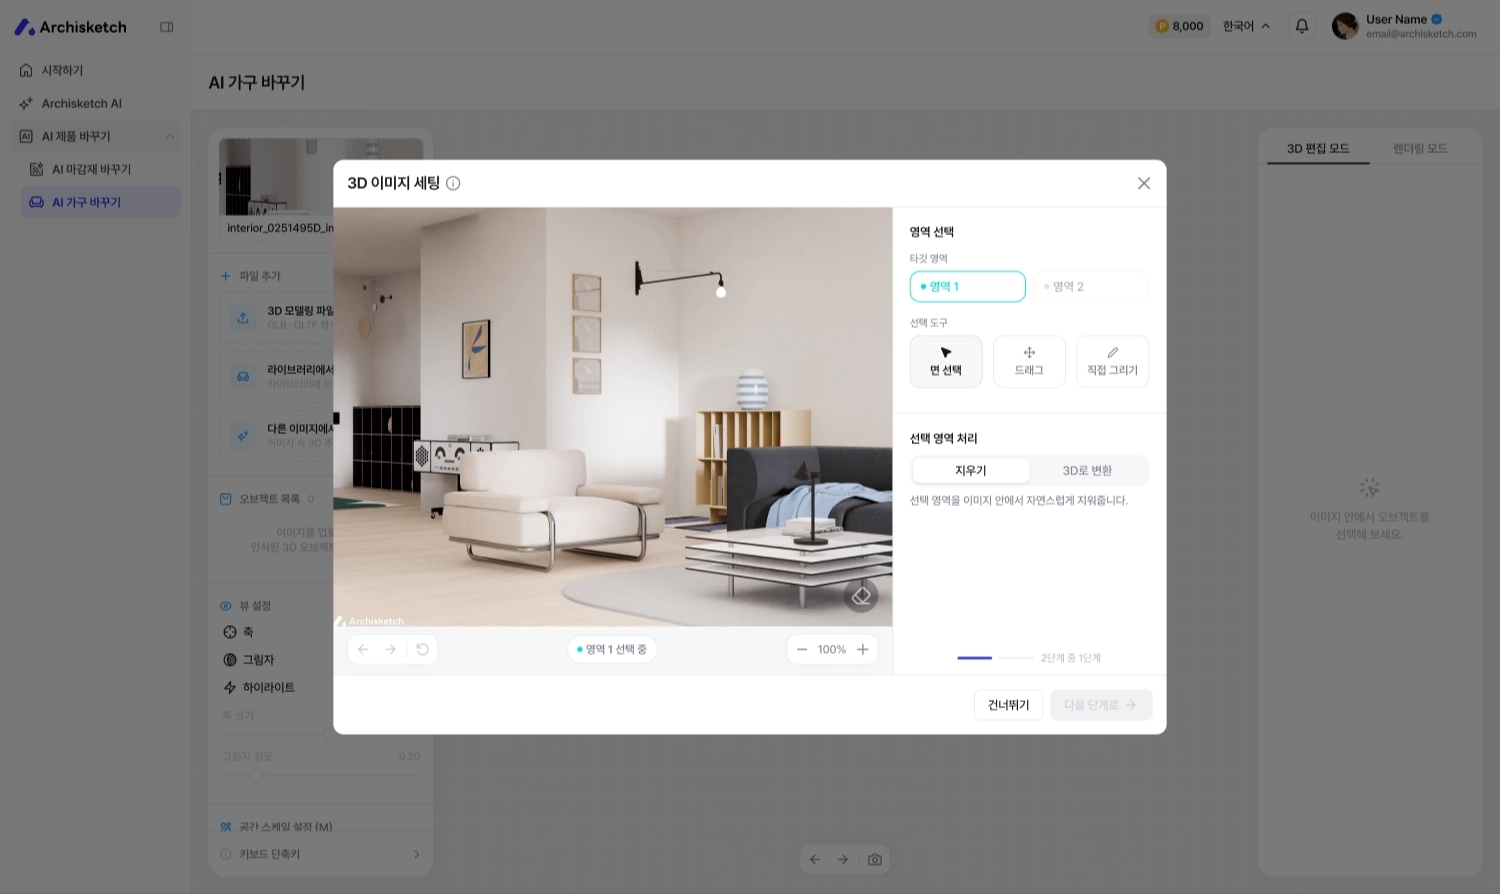
This is the step of refining the uploaded photo into a state that's easy to edit.
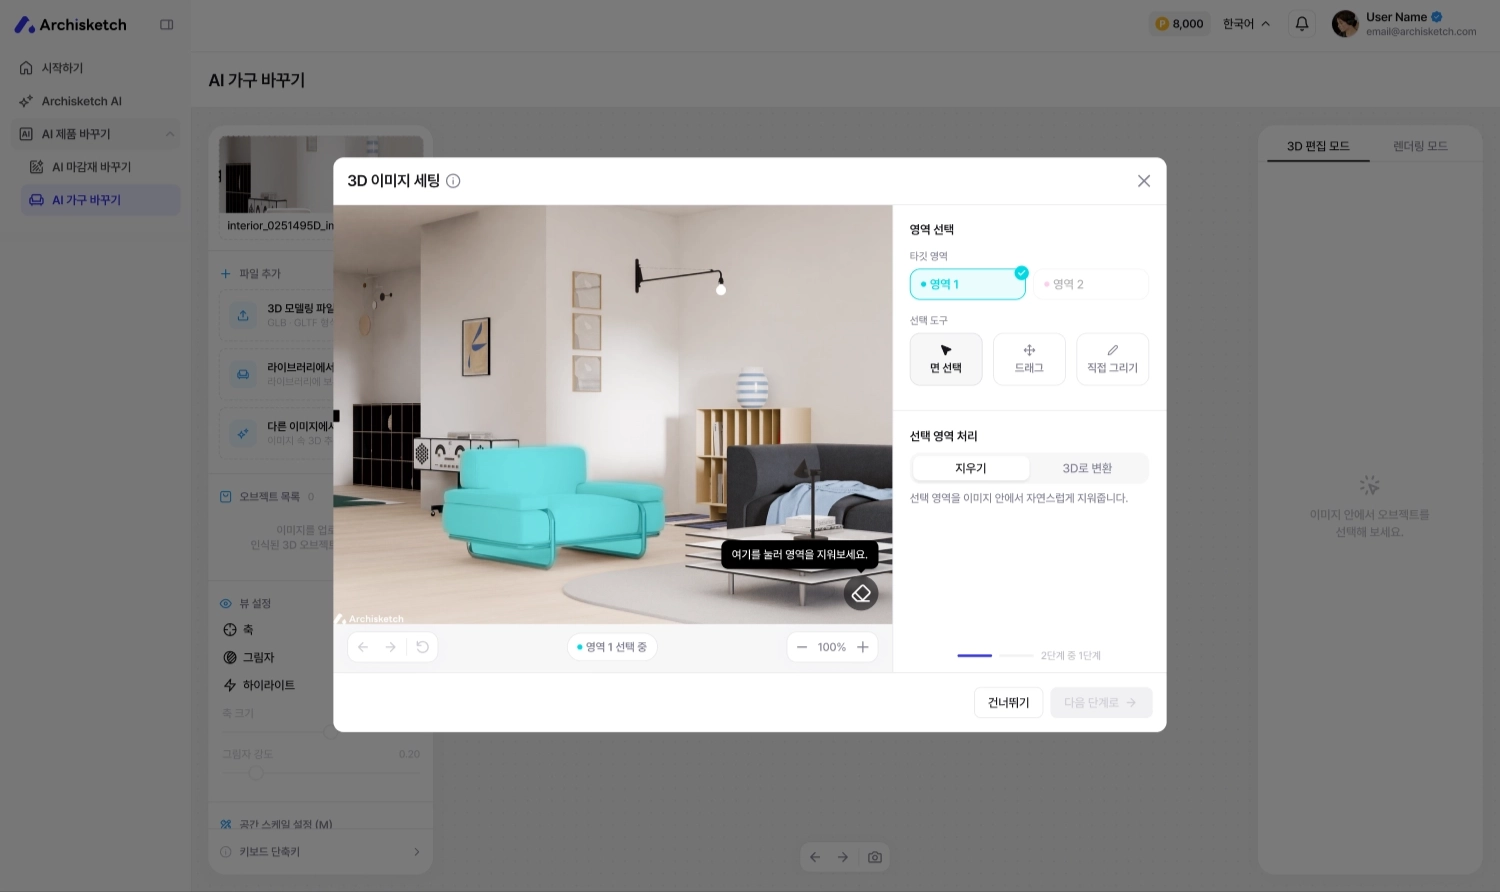
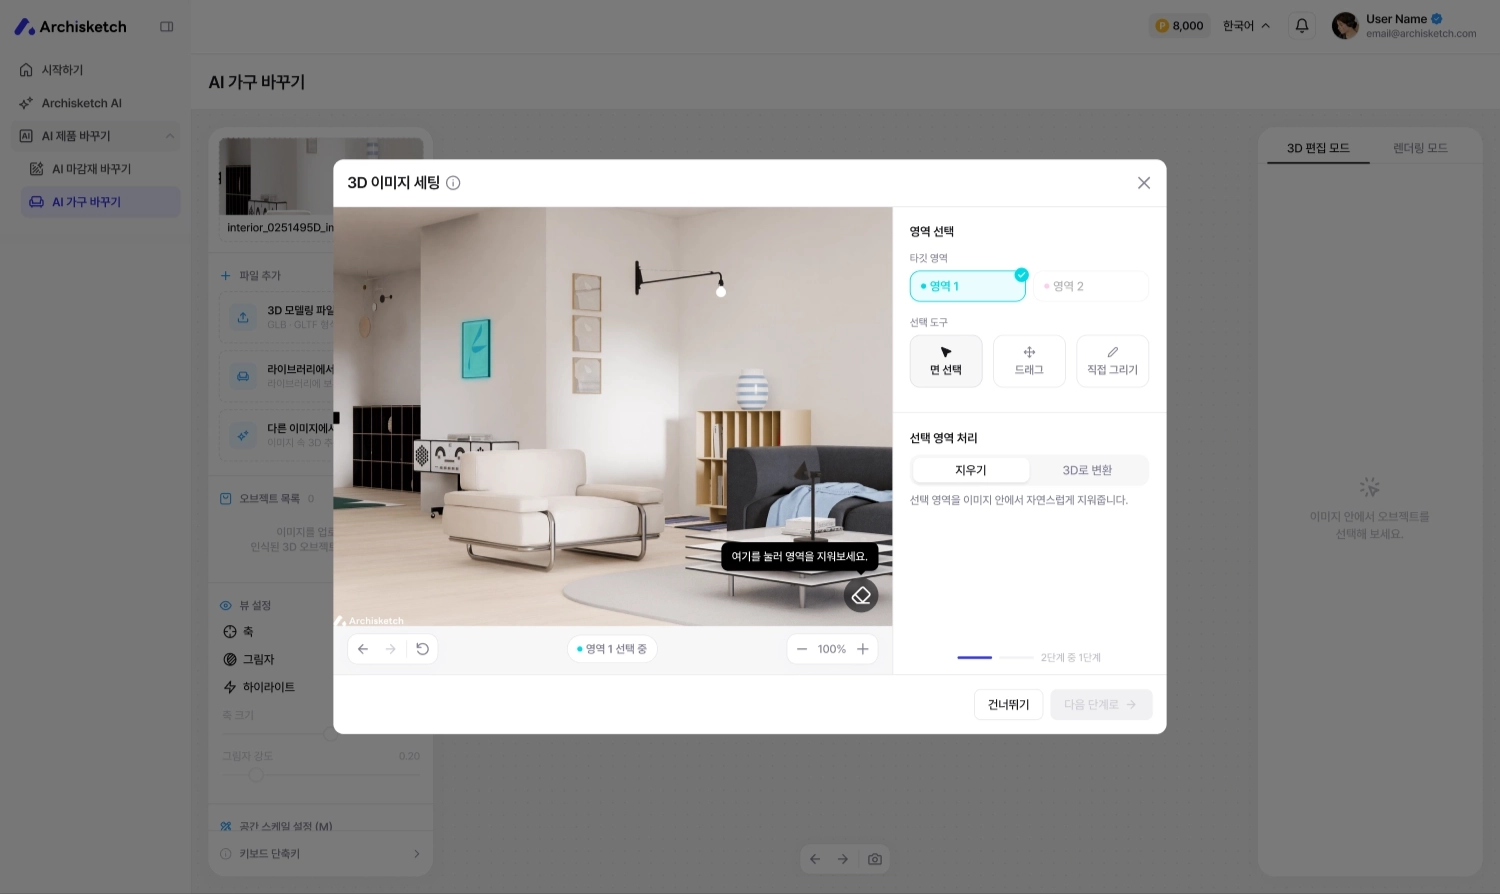
#### 2-1. Select the area to edit
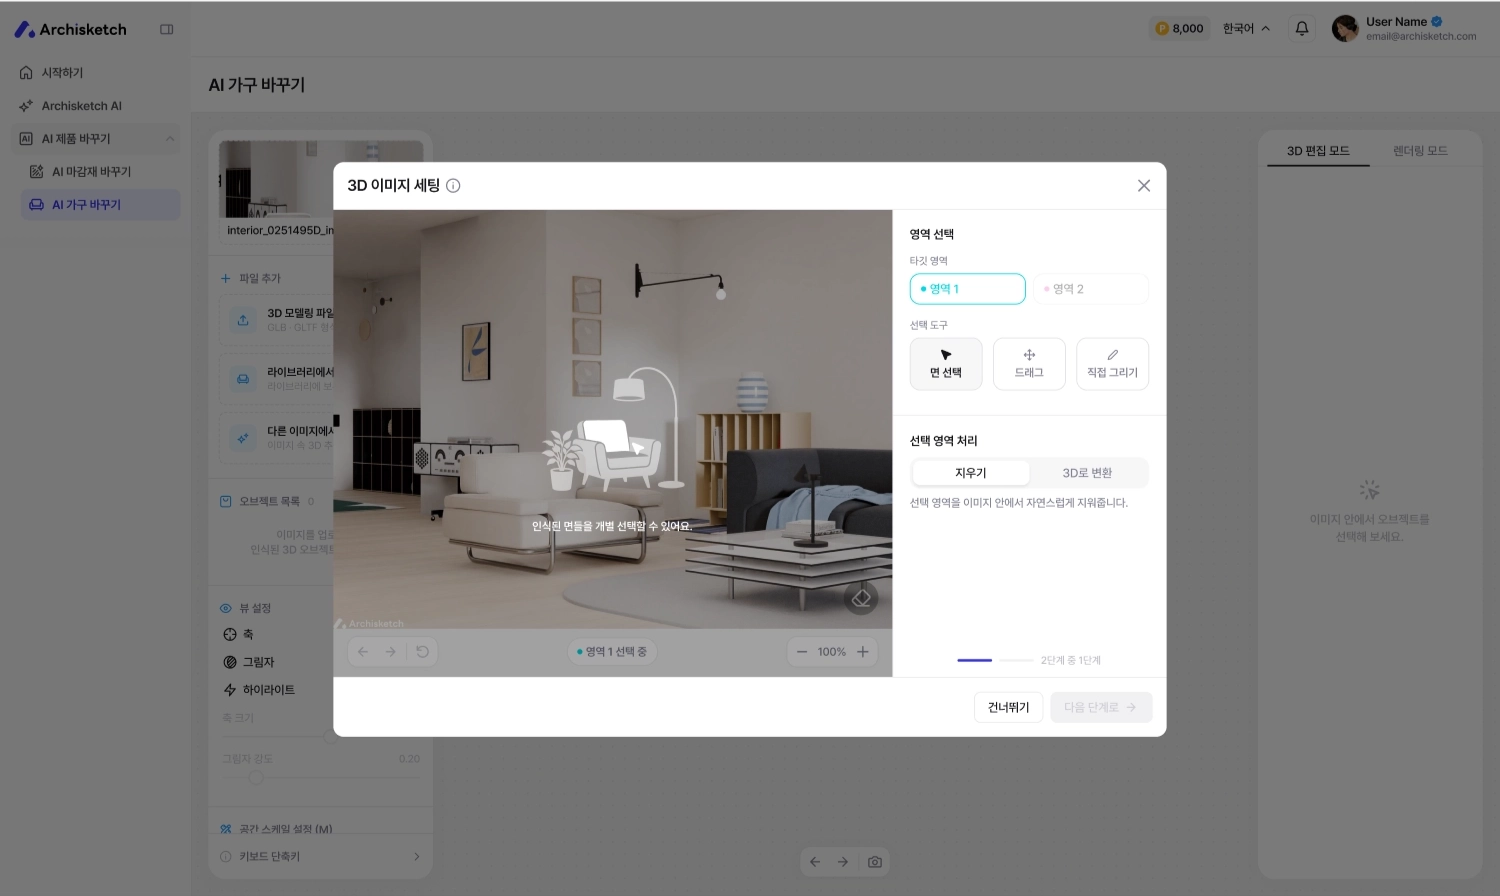
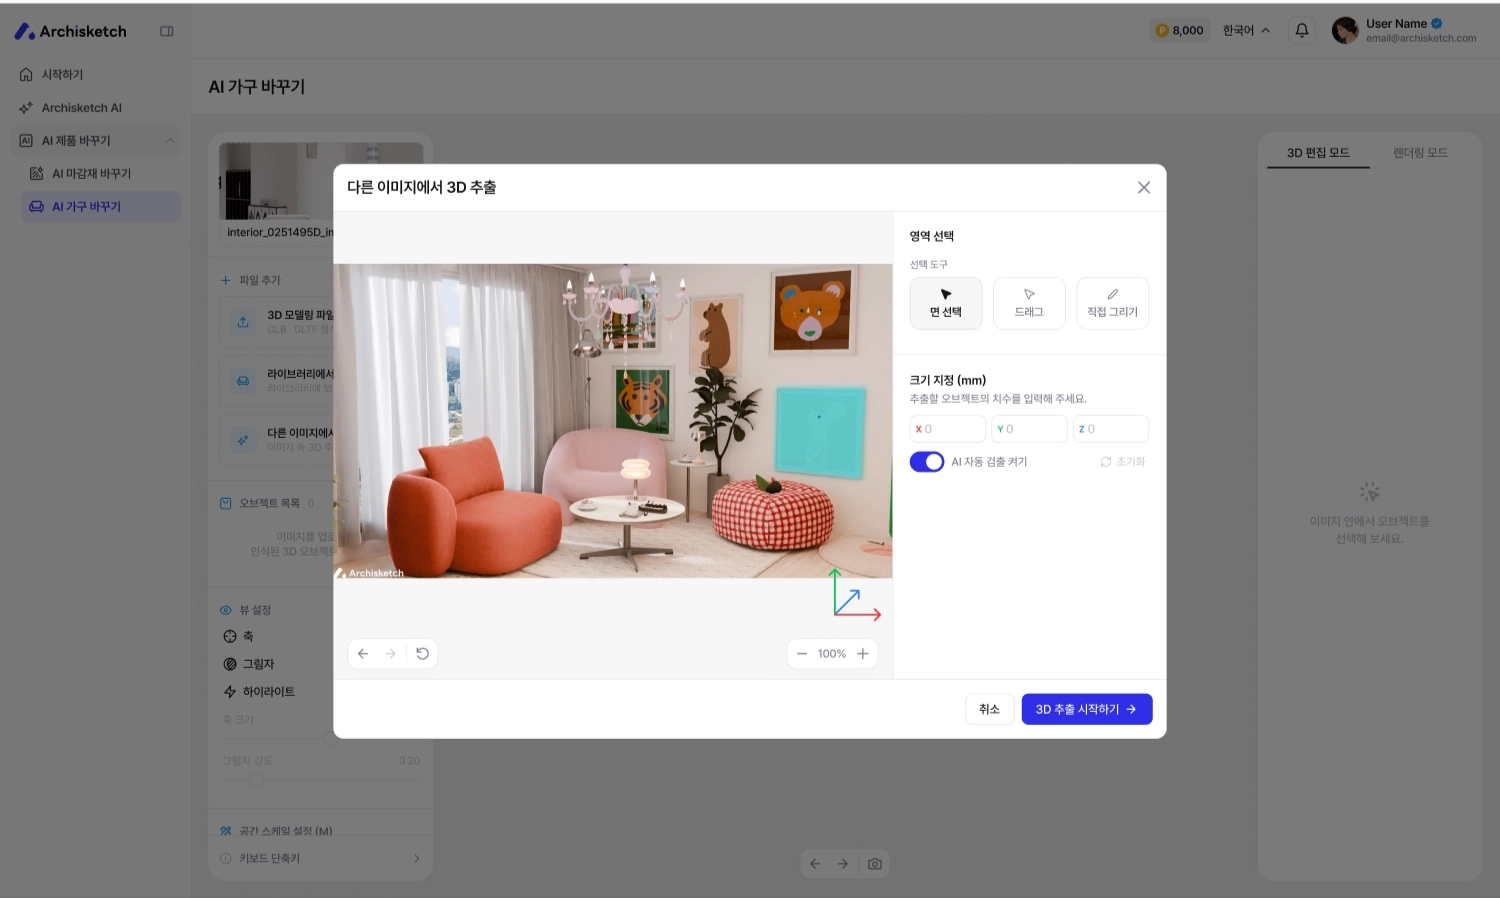
First specify the parts you want to change or remove. Three selection tools are provided.
* **Surface** — Select by surface units such as walls and floors
* **Drag** — Drag a rectangle to select an area
* **Free** — Select freely in whatever shape you want
When selection is complete, the selected area is shown on the screen.
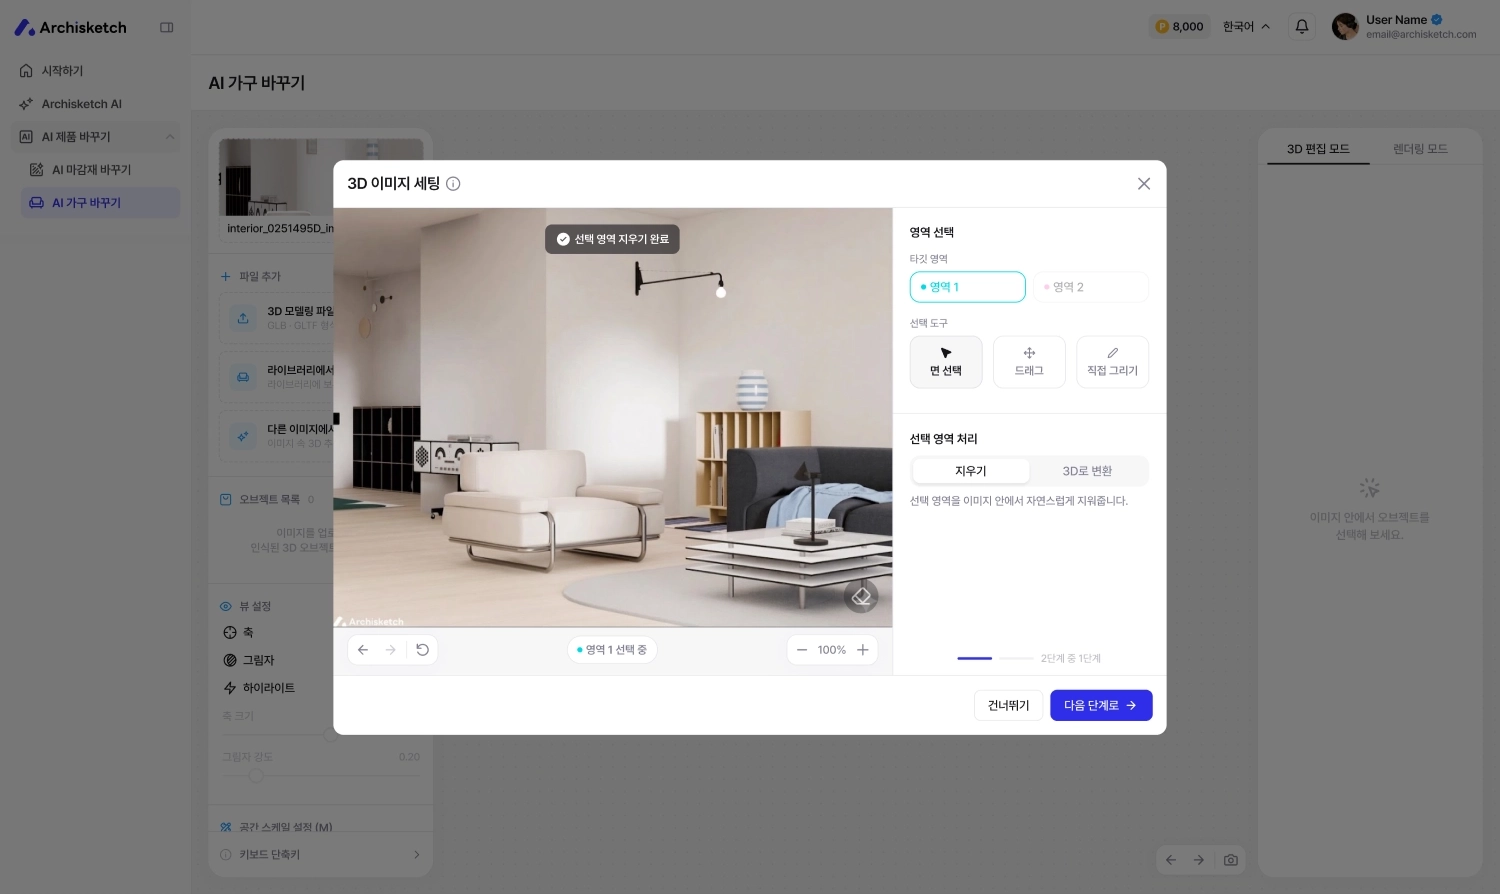
#### 2-2. Remove unnecessary elements
You can select existing furniture or items you want to remove and cleanly delete them from the image.
When you run erase, AI naturally fills in the removed part.
💡 Currently, **partial erase**is supported. (Full erase will be available later)
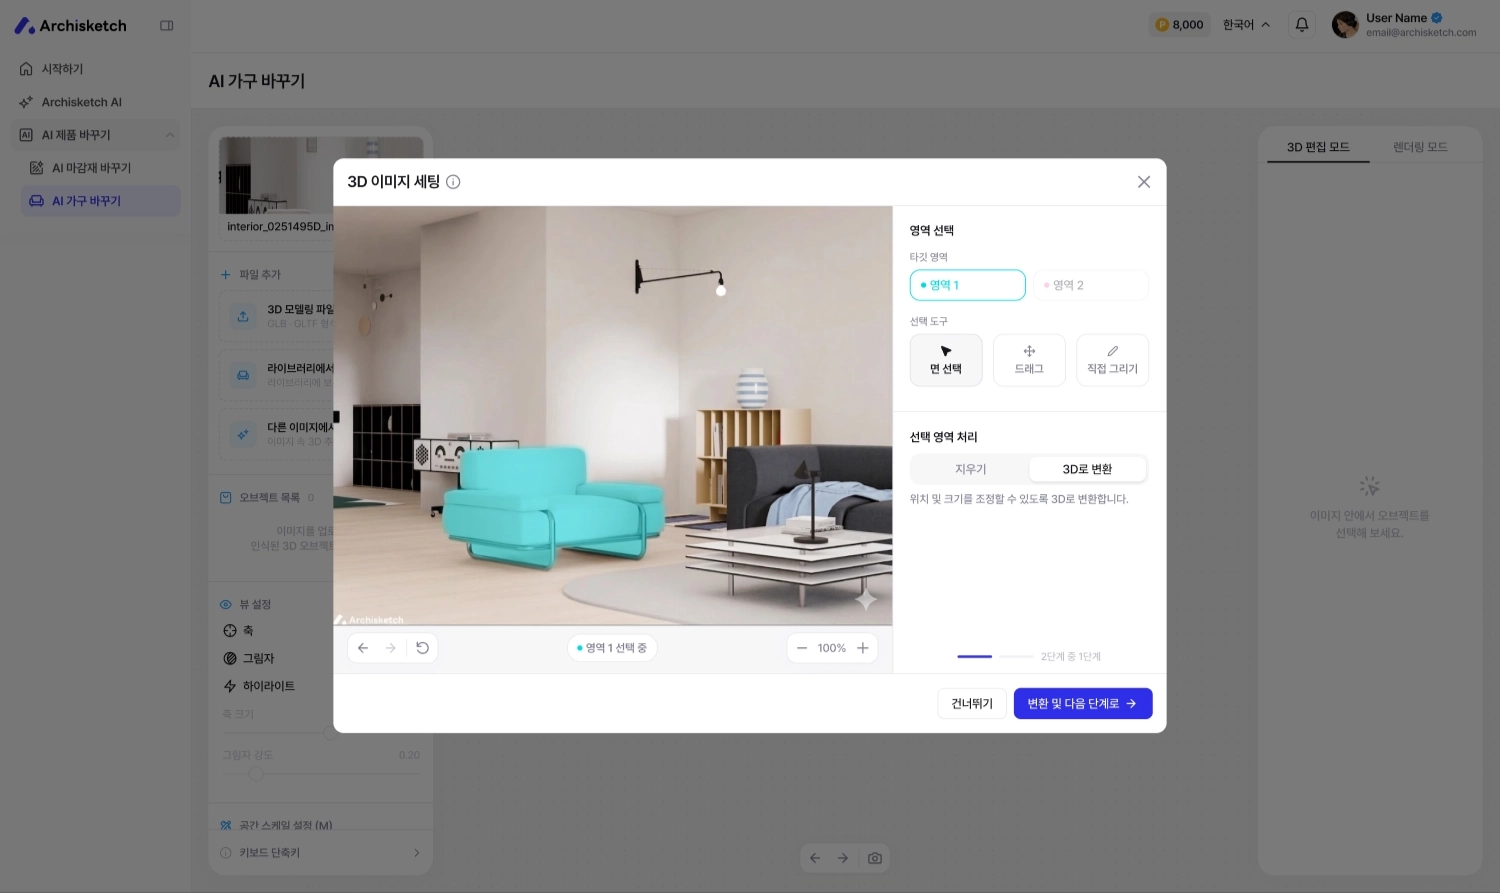
#### 2-3. Convert furniture in the image to 3D
If you convert furniture in the photo into 3D objects, you can freely move, rotate, and edit them.
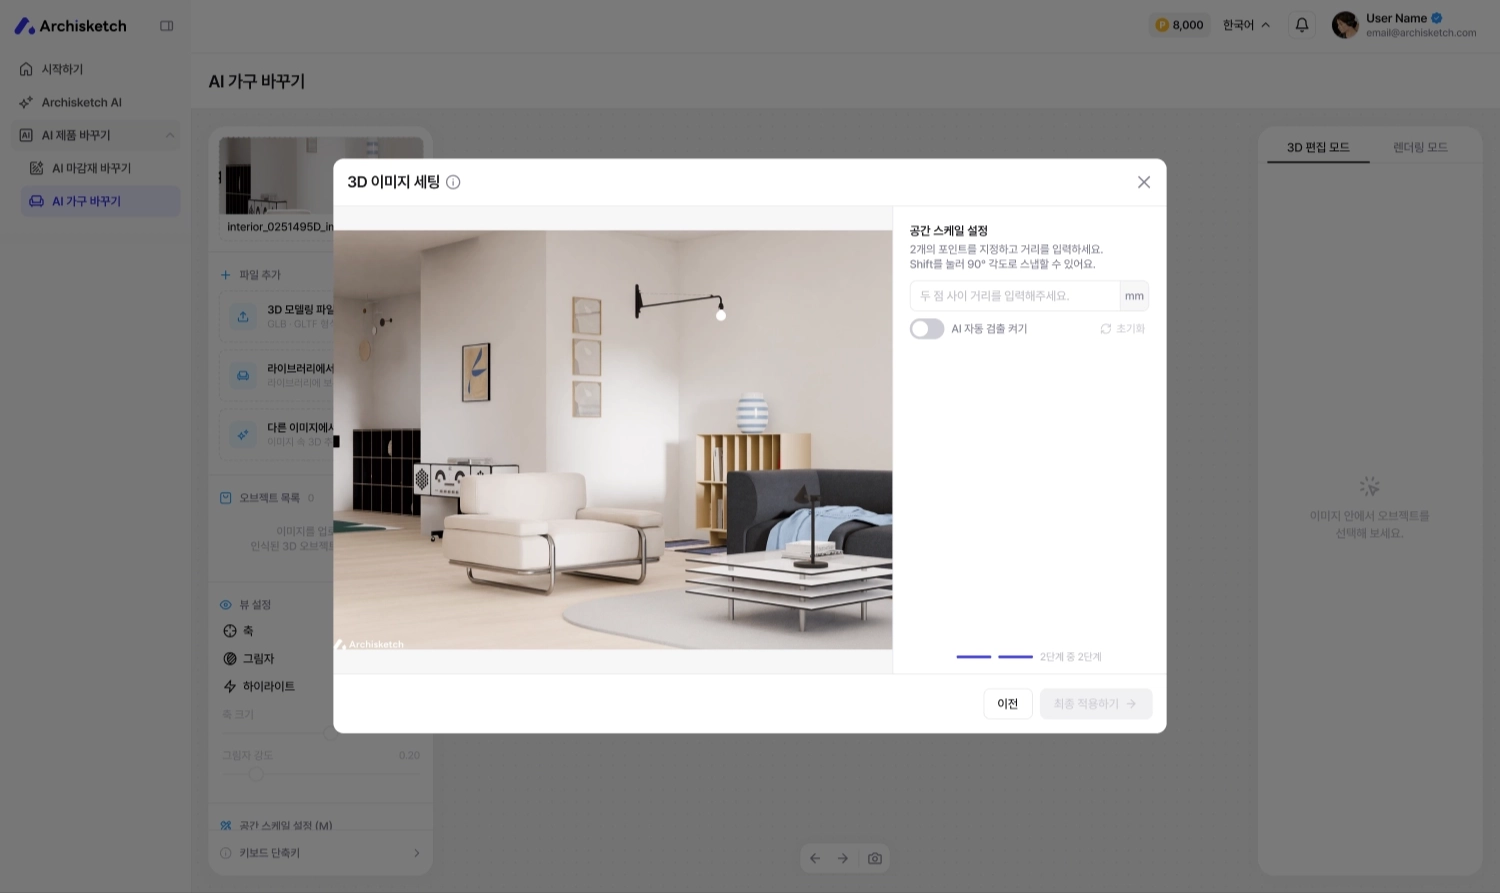
#### 2-4. Set the space scale
If you enter the actual dimensions, the product you place will be **shown at its actual measured size** , allowing for much more accurate simulation.
### STEP 3. Load new furniture (Add file)
Left **+ Add file**you can load furniture in three ways.
#### 3-1. Upload a 3D modeling file
Directly upload your own 3D file. (GLTF·GLB formats, under 100 MB)
#### 3-2. Import from the library
Search for products registered in the Archisketch library and place them immediately.
#### 3-3. Extract 3D from another image
Extract a favorite piece of furniture from another photo into 3D and apply it to your space.
💡 Applying to your personal library is currently in preparation.
The loaded furniture can be managed in the left **object list**with show/hide and selection, etc.
### STEP 4. Place and adjust furniture (3D editing mode)
Adjust the placed furniture to the desired position and size.
#### 4-1. Adjust position, rotation, and size
Drag the handles on the center canvas, or in the right panel **Position (G) · Rotation (R) · Size (S)** enter the values directly.
The basis can be switched **Local (object)** or \*\*World (global)\*\*, and with box snapping you can make it fit the floor or wall exactly.
#### 4-2. View settings
**Axes, shadows, highlights** can be toggled on and off, and you can adjust axis size and shadow intensity to view it more realistically.
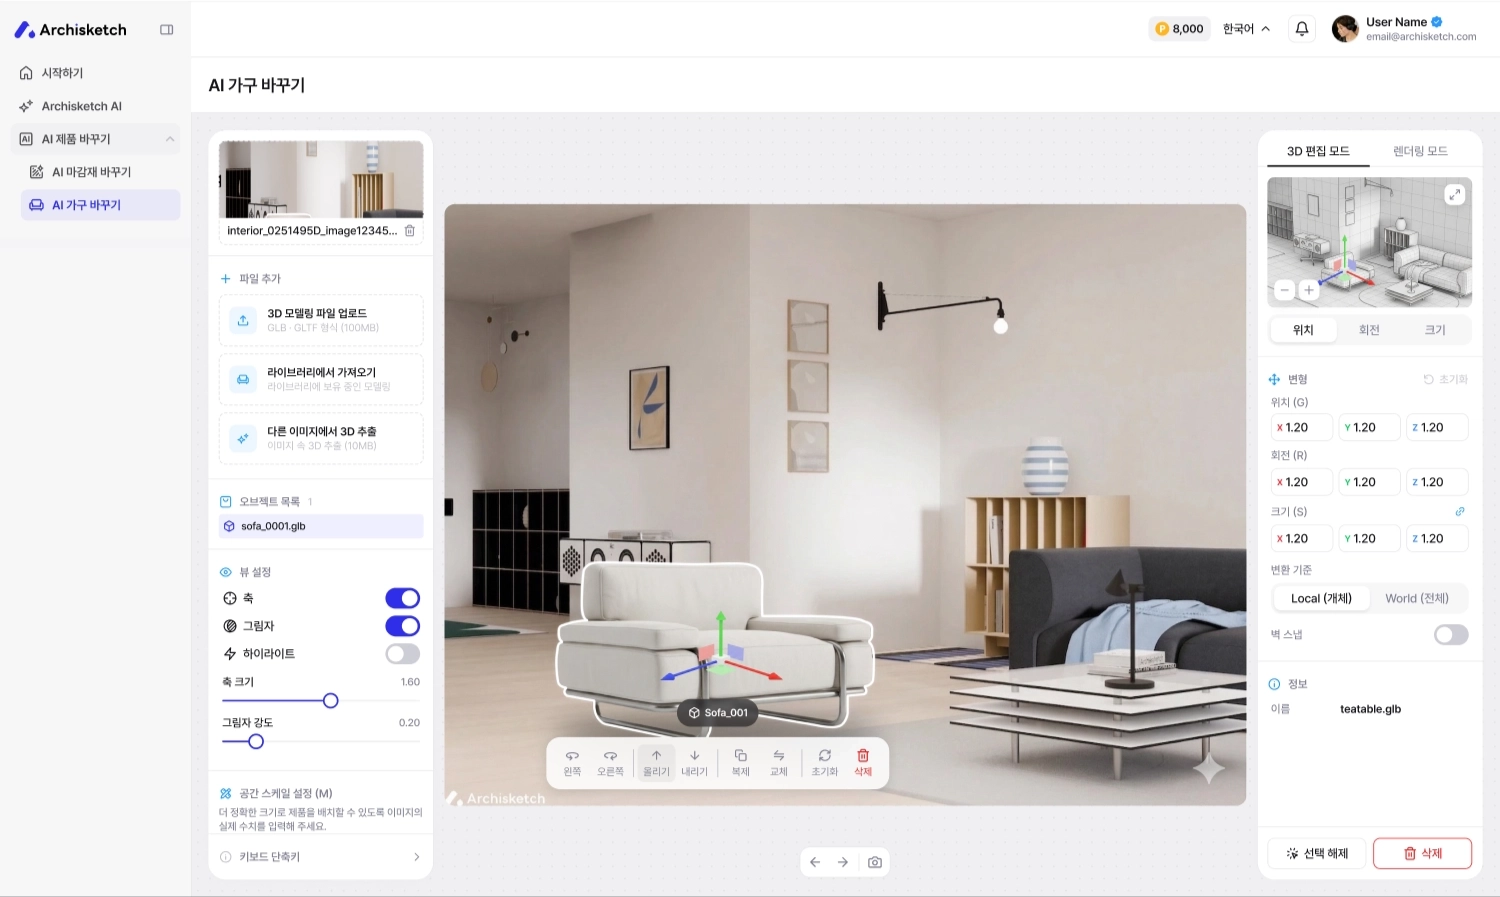
#### 4-3. Editing toolbar
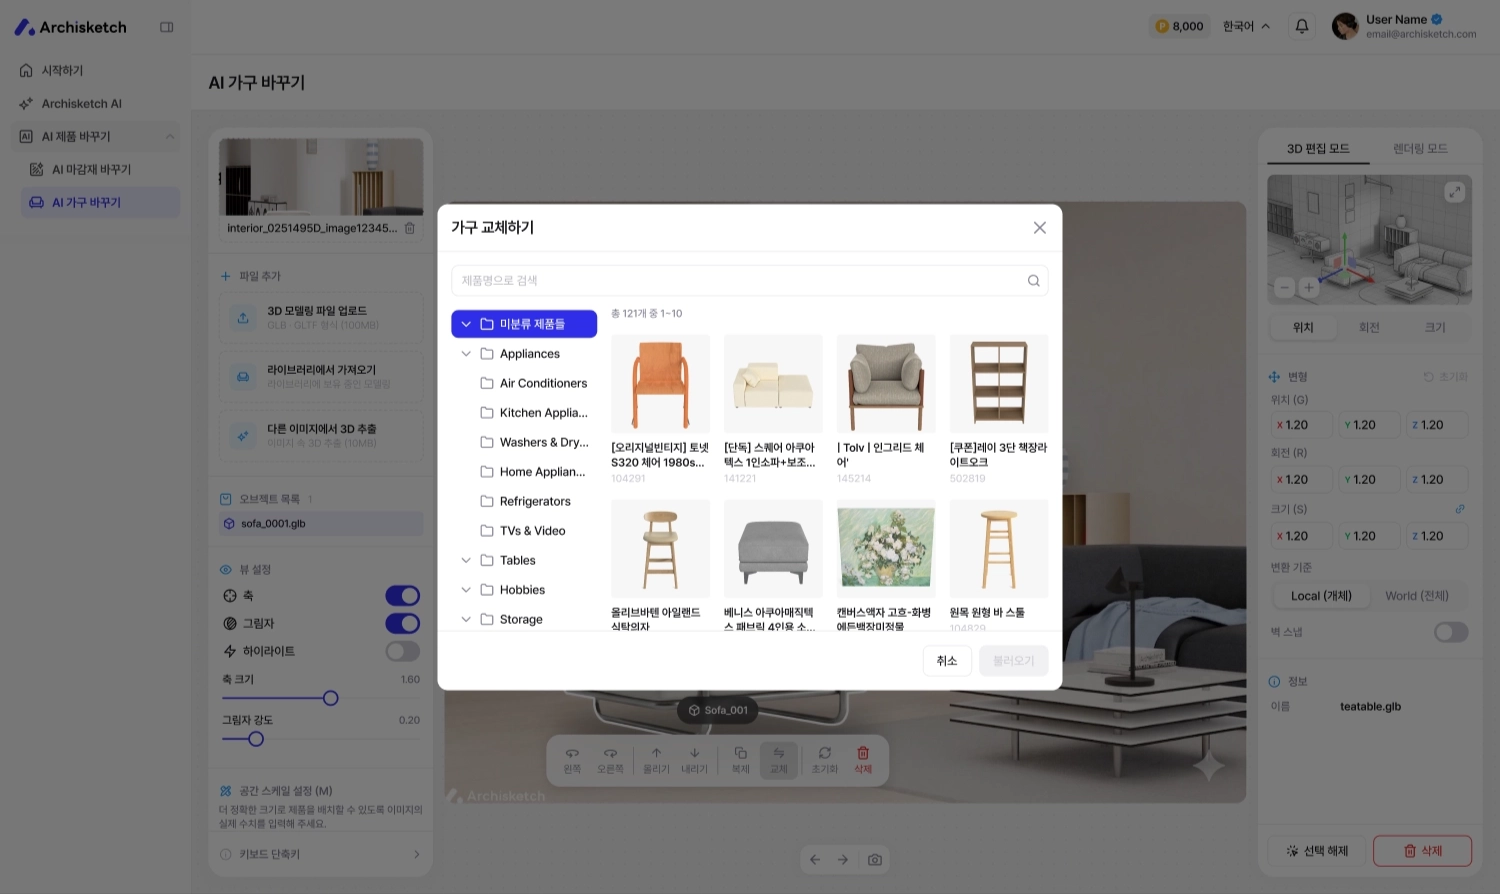
Edit quickly with the toolbar at the bottom center — **Select / Raise / Lower / Duplicate / Replace / Reset / Delete**
### STEP 5. Replace furniture
You can easily swap the placed furniture with another product. In the toolbar, **Replace**and then select the product you want from the list.
When selected, the new furniture is applied in the same spot.
### STEP 6. Rendering
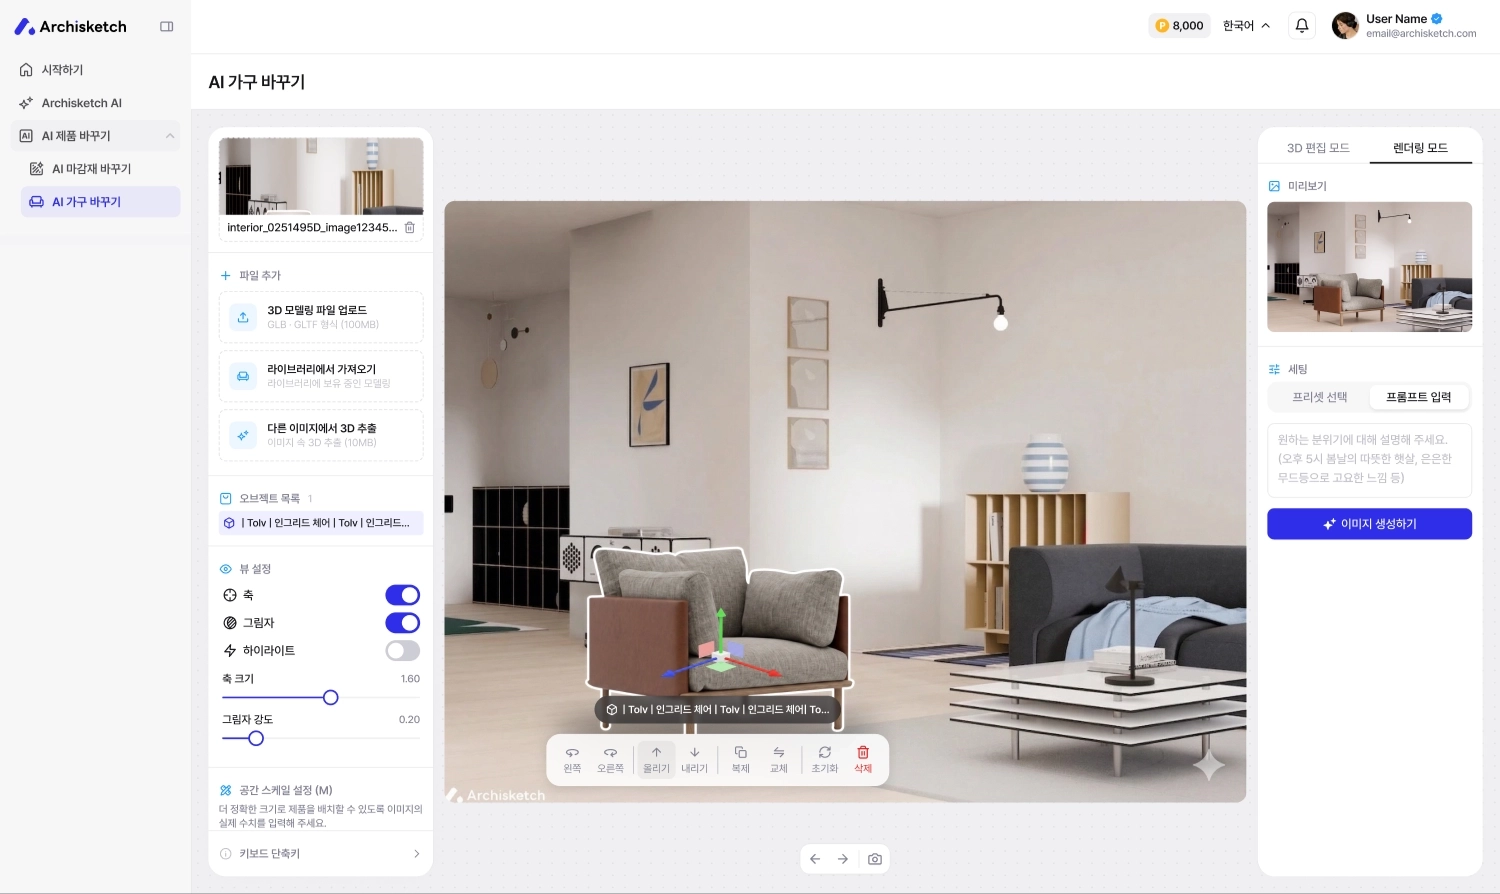
When editing is finished, switch to the top right **rendering mode**to create the final image.
Enter the desired mood as a prompt, run rendering, and then save the completed image.
---
# Agent Instructions
This documentation is published with GitBook. GitBook is the documentation platform designed so that both humans and AI agents can read, navigate, and reason over technical content effectively. Learn more at gitbook.com.
## Querying This Documentation
If you need additional information that is not directly available in this page, you can query the documentation by asking a question.
Perform an HTTP GET request on the following URL with the `ask` and `goal` query parameters:
```
GET https://docs.archisketch.com/guide/user-en/archisketch-ai/ai-furniture-swap.md?ask=&goal=
```
`ask` is the immediate question: it should be specific, self-contained, and written in natural language.
`goal` is what the user is ultimately trying to achieve, the reason they need the answer. Sharing it helps GitBook give you a better, more relevant answer. A goal is most helpful when it describes the outcome the user wants rather than restating the question. For example, with `ask=how do I create an API token`, a goal like `automate deployments from our CI pipeline` lets GitBook tailor the answer to that use case.
The response will contain a direct answer to the question and relevant excerpts and sources from the documentation.
Use this mechanism when the answer is not explicitly present in the current page, you need clarification or additional context, or you want to retrieve related documentation sections.