> For the complete documentation index, see [llms.txt](https://docs.archisketch.com/llms.txt). Markdown versions of documentation pages are available by appending `.md` to page URLs; this page is available as [Markdown](https://docs.archisketch.com/guide/user-en/advanced-design-features/ceiling-editor.md).
# Ceiling editor
What is the Ceiling Editor?
## What is the Ceiling Editor?
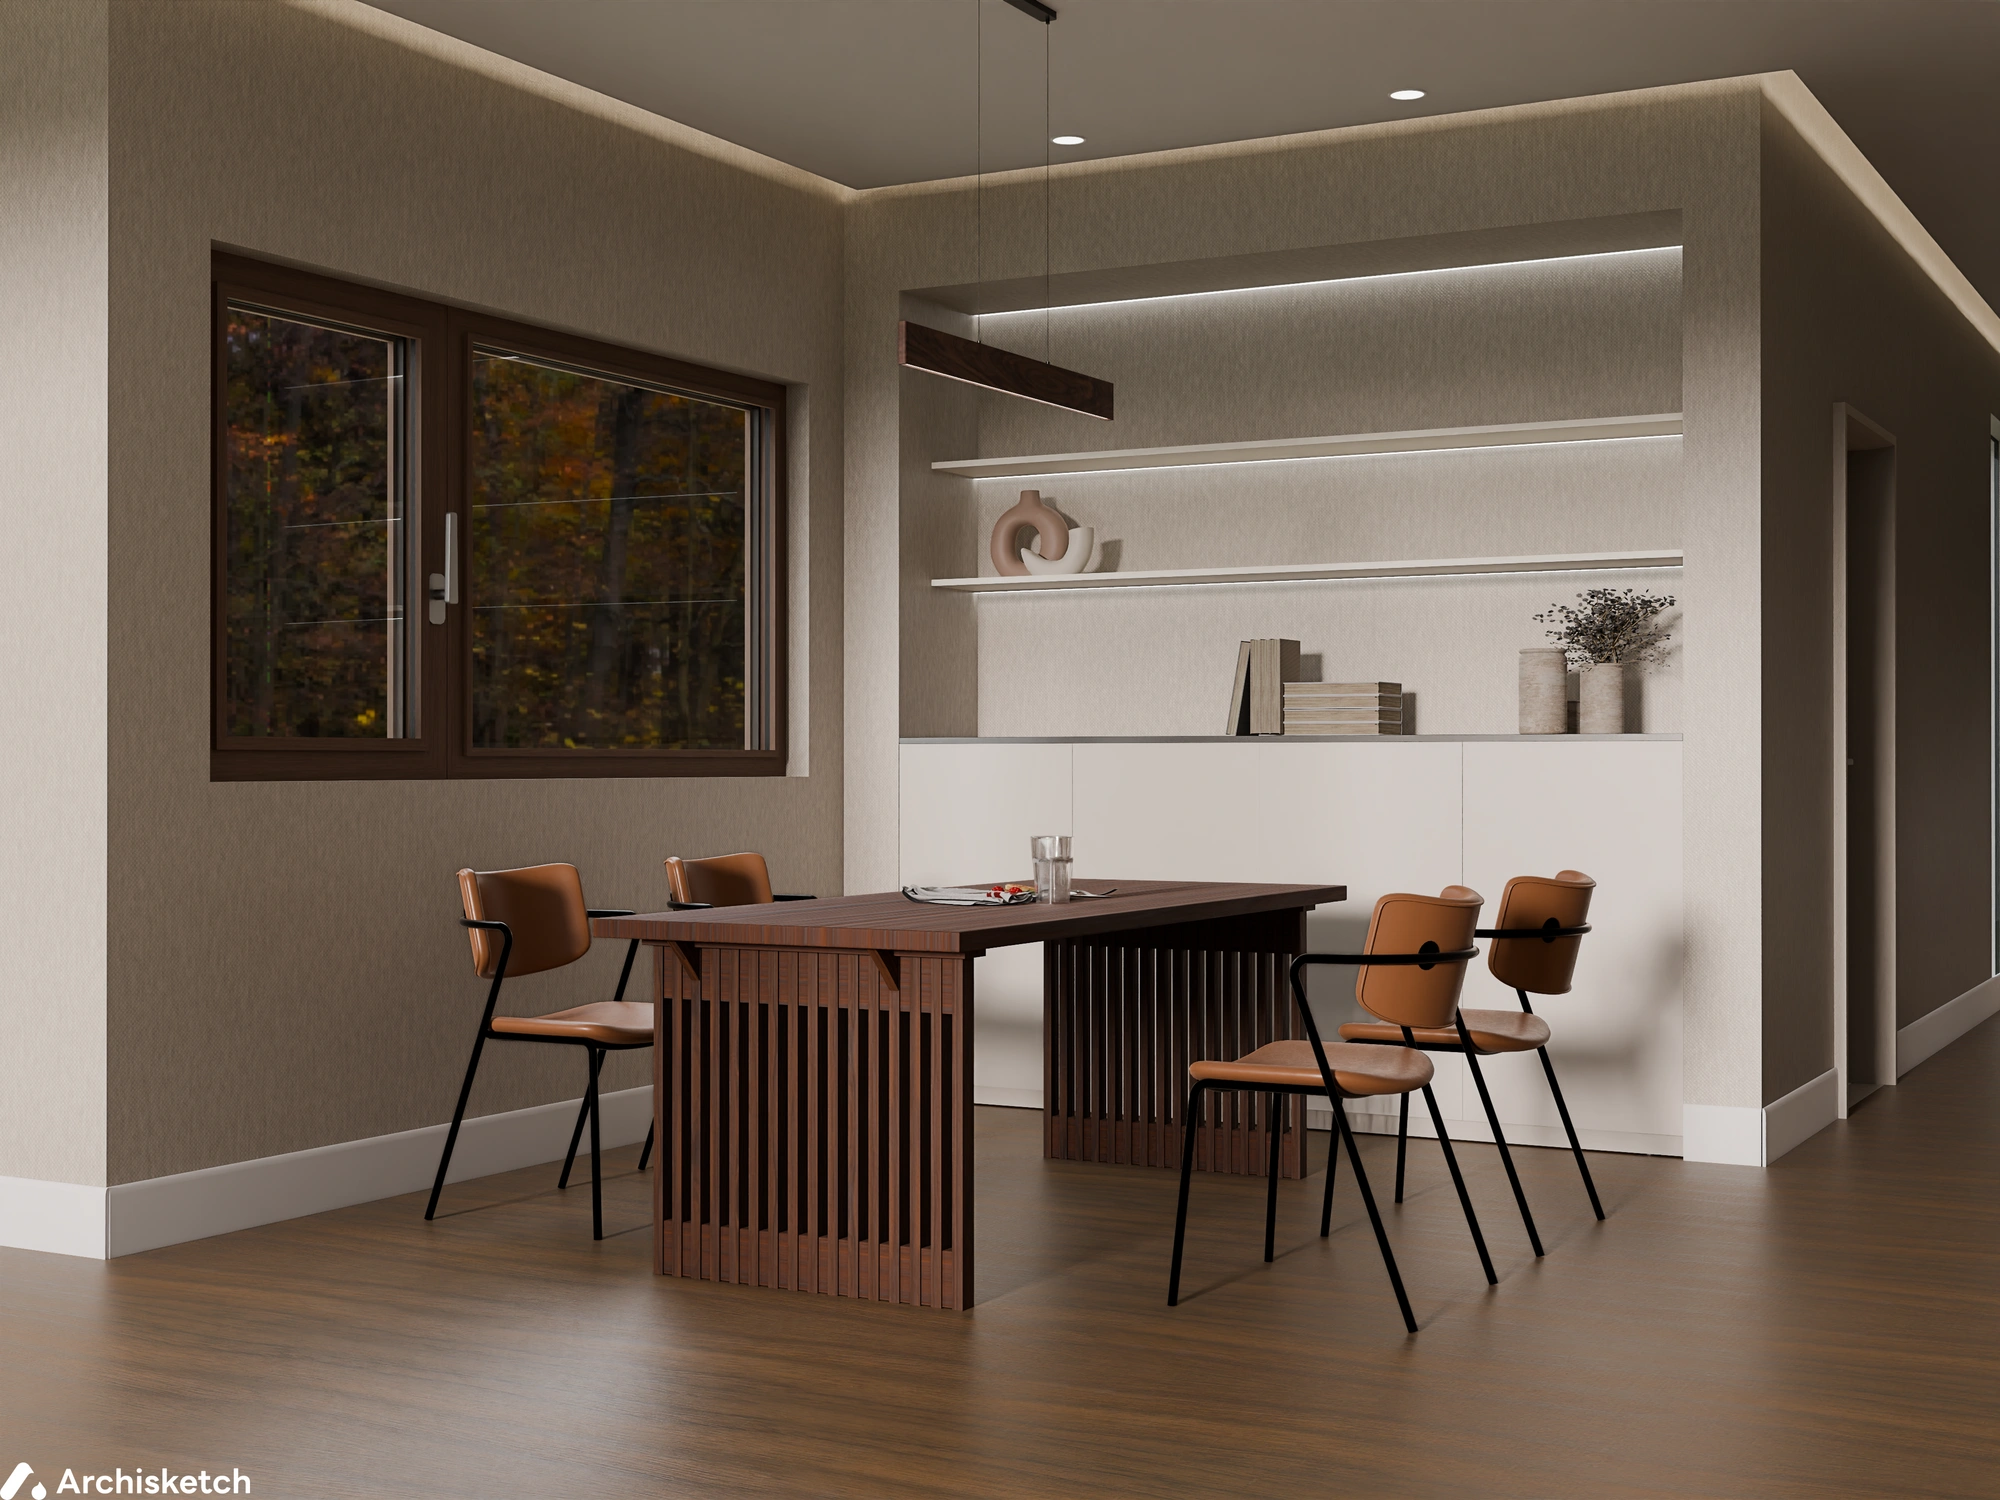
The Ceiling Editor is a feature that helps you create a variety of interior designs, such as tray ceilings, curtain boxes, indirect lighting installations, and ceiling moldings.\
If you want to make your space feel more lively and realistic, be sure to use the Ceiling Editor!\
If you render it, you'll be able to create beautiful results. 🌟
## Entering the Ceiling Editor
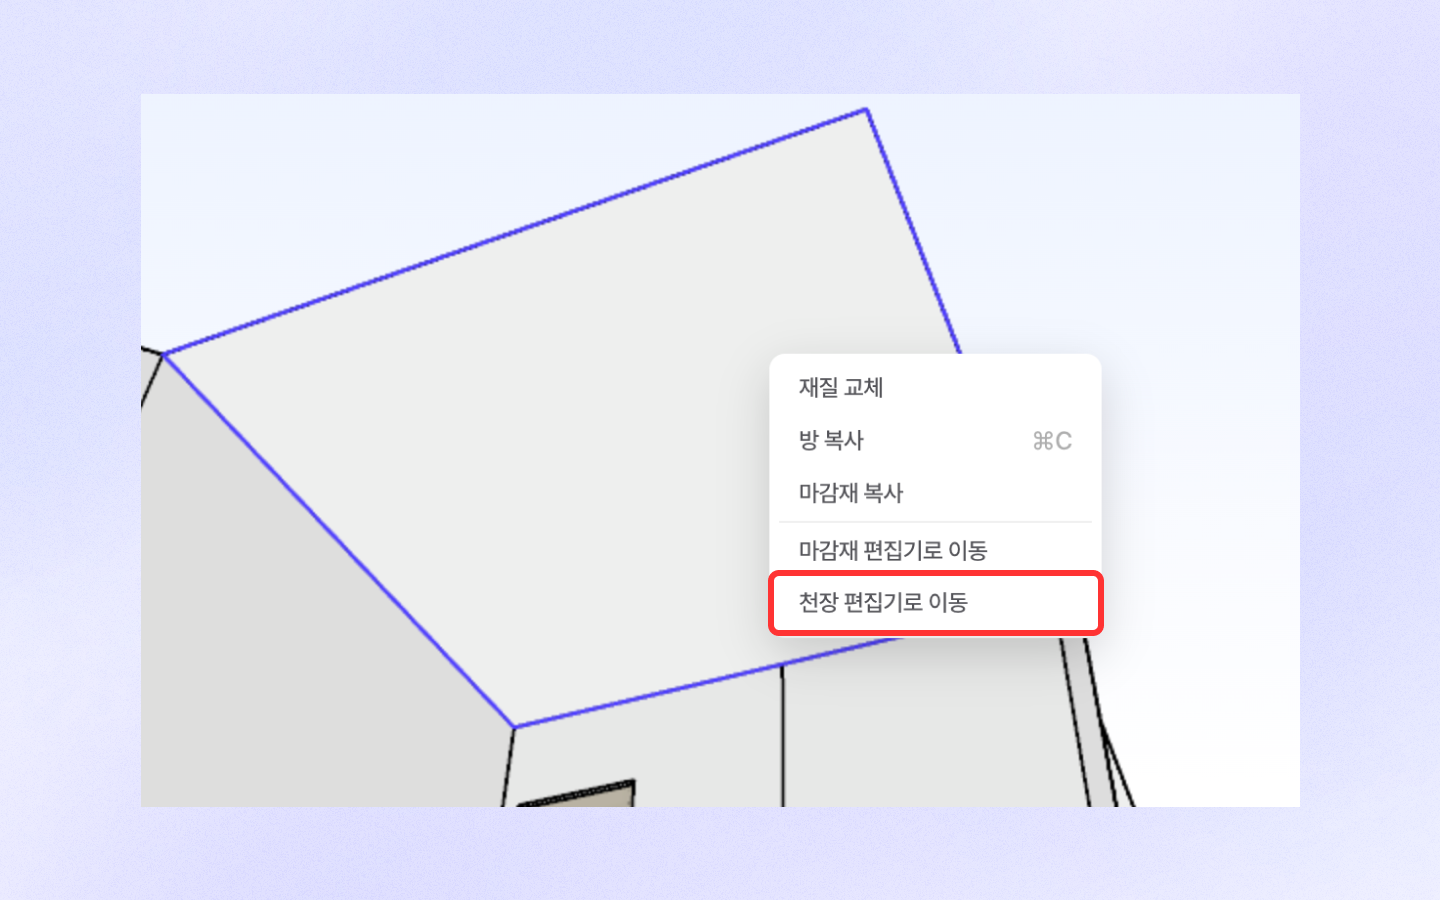
Here's how to enter the Ceiling Editor.
* In the 3D view, click the ceiling surface, then right-click and select Ceiling Editor
## Ceiling Editor Layout
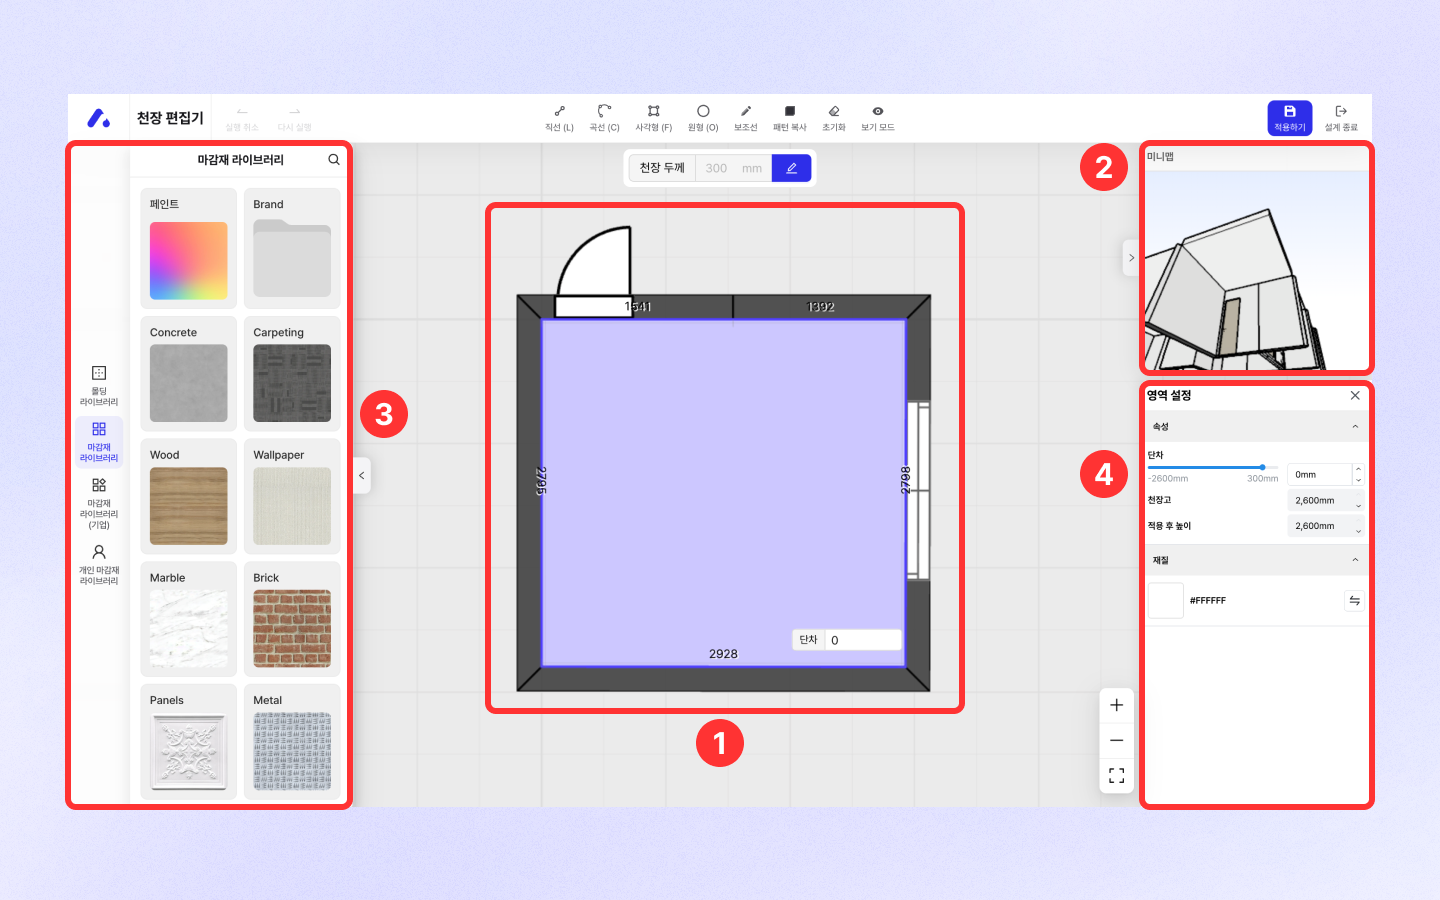
When you open the Ceiling Editor, the screen is laid out like this.
* Floor plan: the editor screen where you can edit the ceiling surface in 2D
* 3D viewer: an area where you can see the applied result in 3D in real time
* Using the mouse wheel, you can zoom in/out and pan in both the 2D and 3D screens.
* Library panel: a library where you can apply finishing materials and moldings
* Area settings: the section for configuring level changes, materials, indirect lighting, and more.
## Drawing a Tray Ceiling
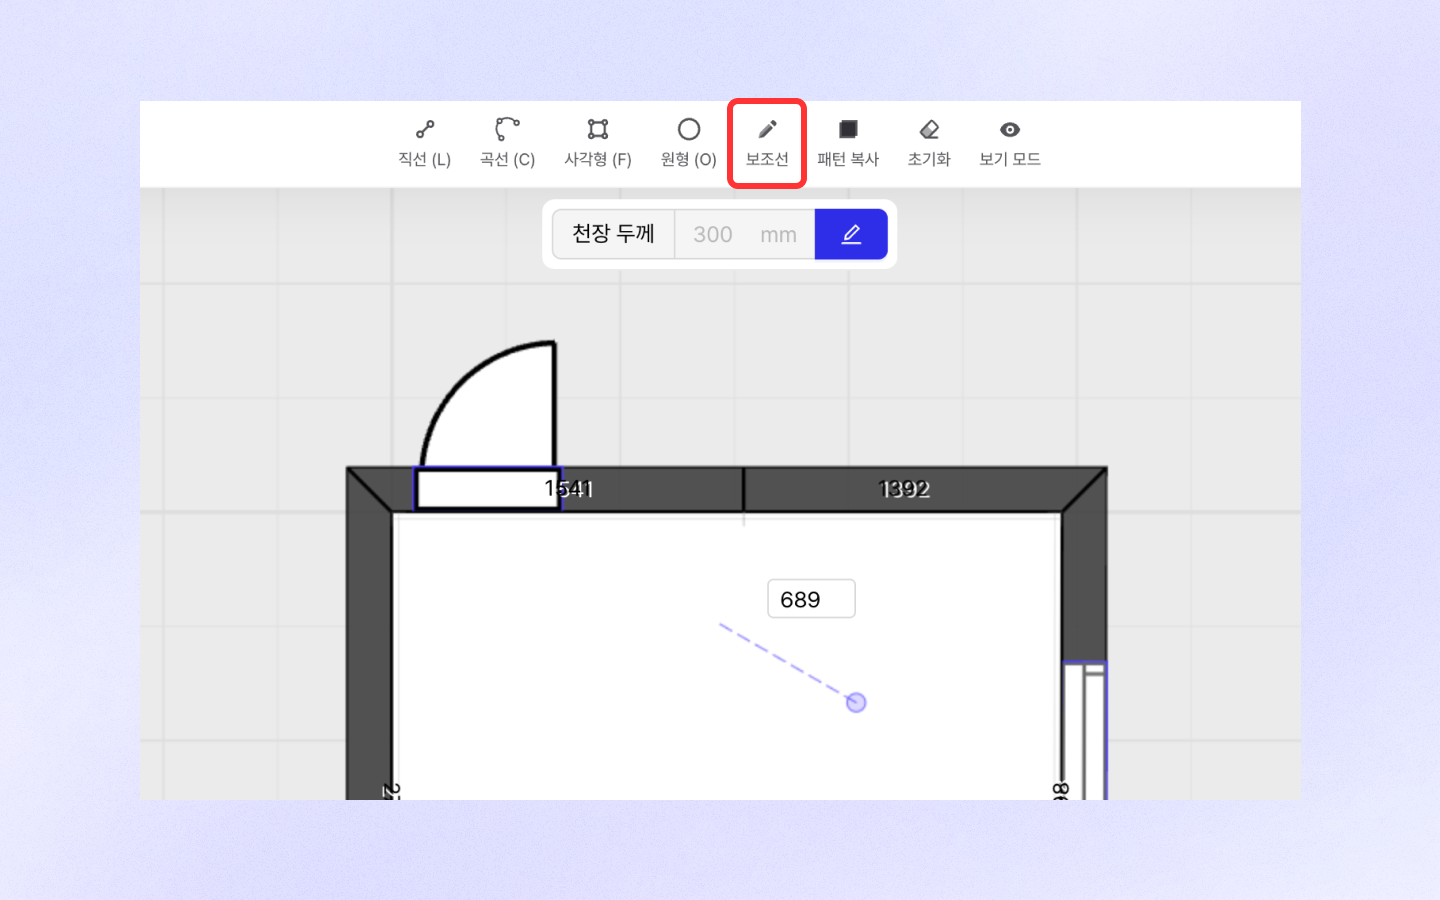
#### Step 1. Draw guide lines (Shortcut: T)
You can easily draw a tray ceiling area using guide lines.
* Click near a wall, then move the mouse to the desired position.
* After entering a number and pressing Enter, you can draw a guide line accurately.
* Click a guide line to copy or delete it. Press Esc to exit guide line drawing mode.
#### Step 2. Set the area
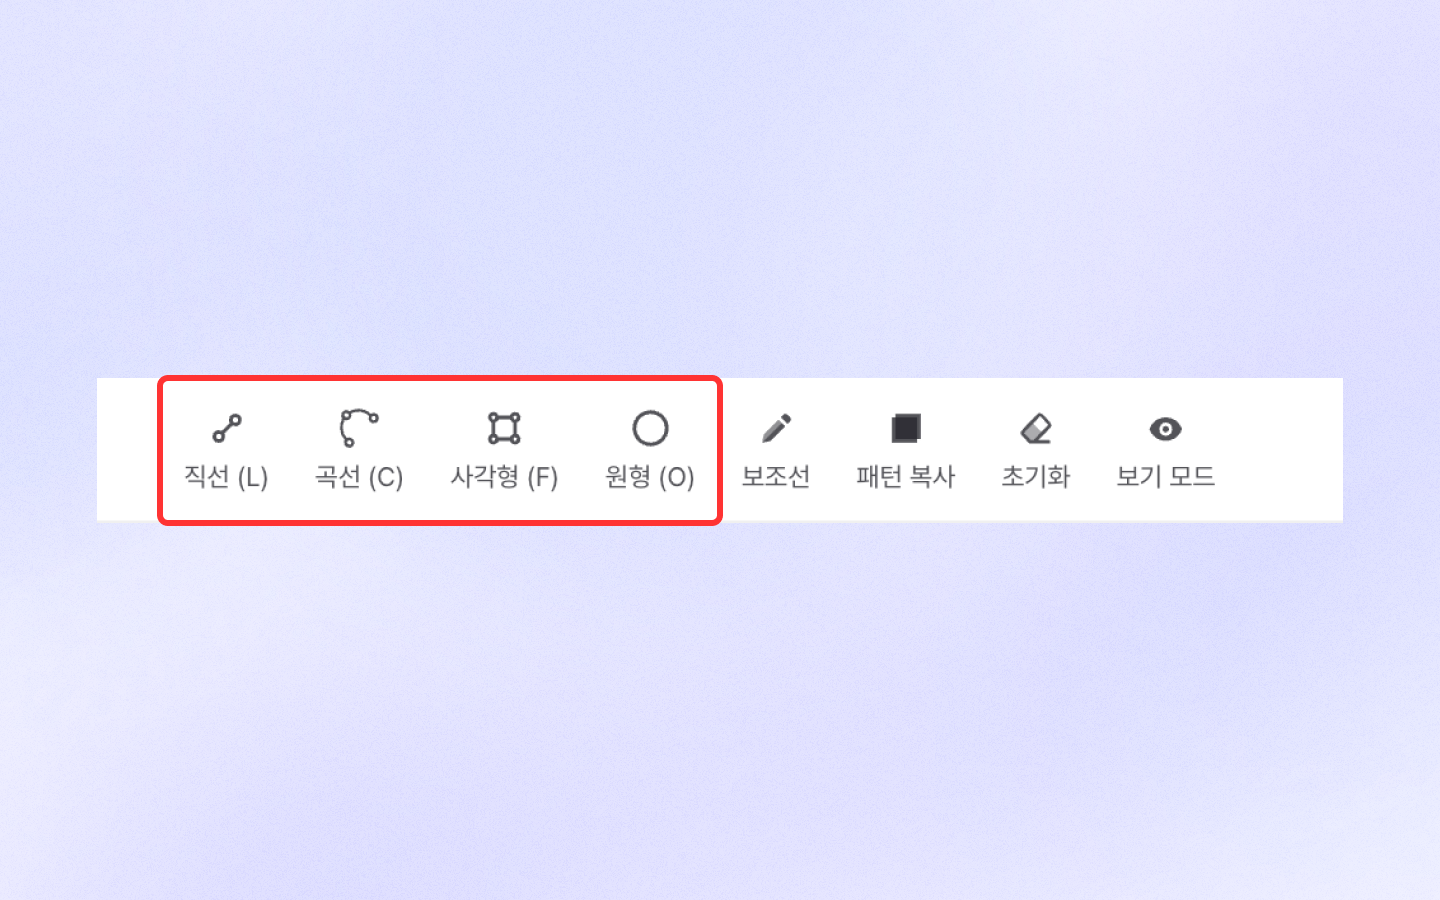
You can set the area using the line, curve, rectangle, and circle tools.
* Line: a closed area is created when lines meet.
* Curve: specify the first point and second point, then set the radius length to draw a curve.
* Rectangle: click the first point and second point to adjust the size. You can also press the Tab key to enter the width and height numerically.
* Circle: if you set the center point and the radius length, a perfect circle is drawn.
**Drawing tool shortcuts**
| Feature | Shortcut |
| --------- | -------- |
| Line | L |
| Curve | C |
| Rectangle | F |
| Circle | O |
#### Step 3. Apply curvature (rounding)
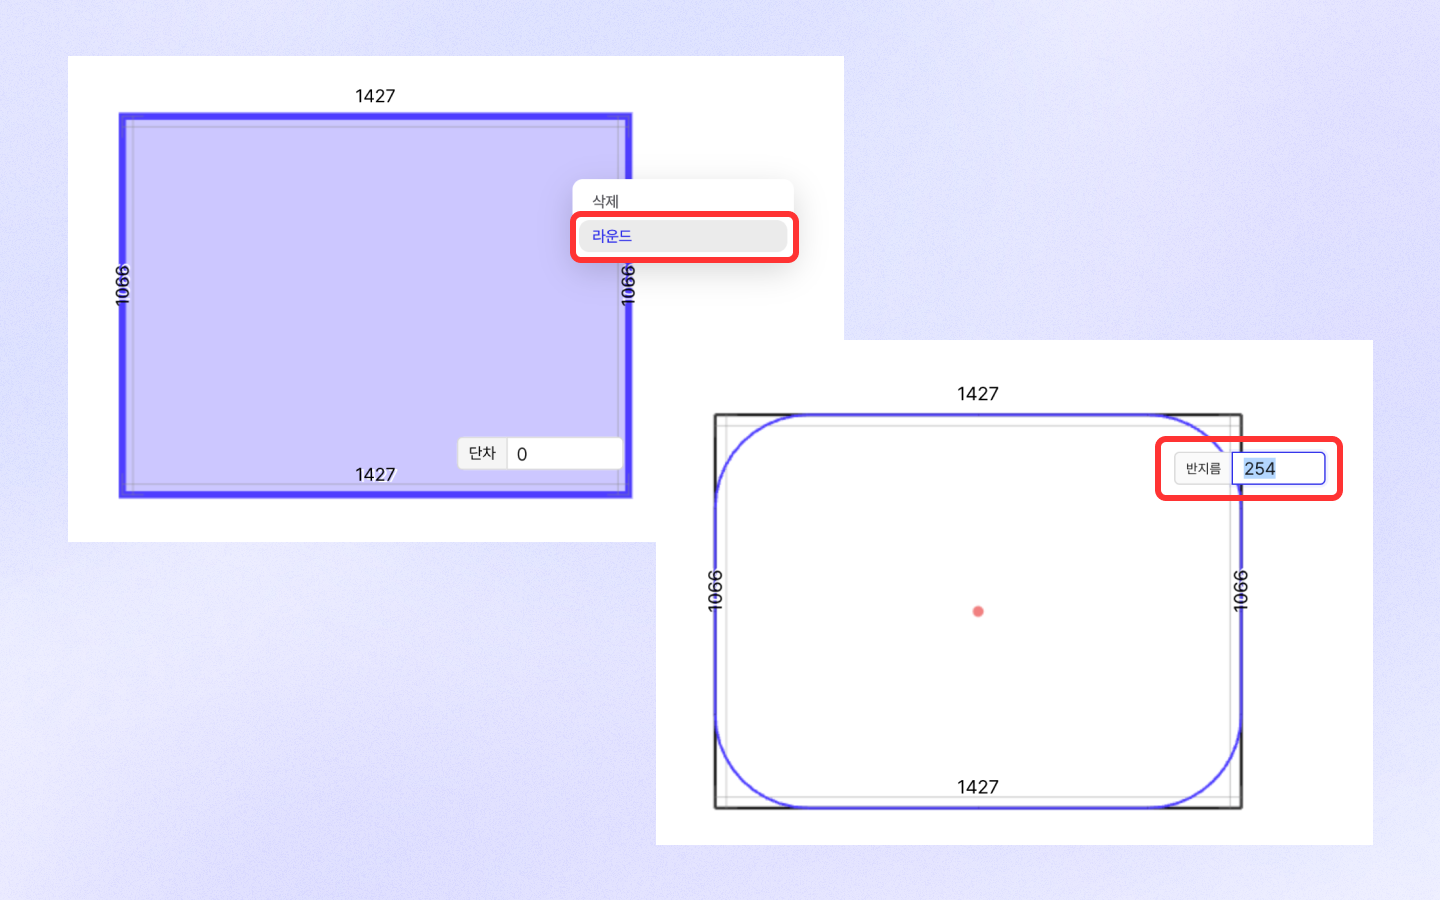
You can add smooth curves to corners or angular parts.
**Apply to all corners at once**
* Click the center of the area, then right-click.
* Click the Round button, then set the radius value or move the mouse to adjust the curvature.
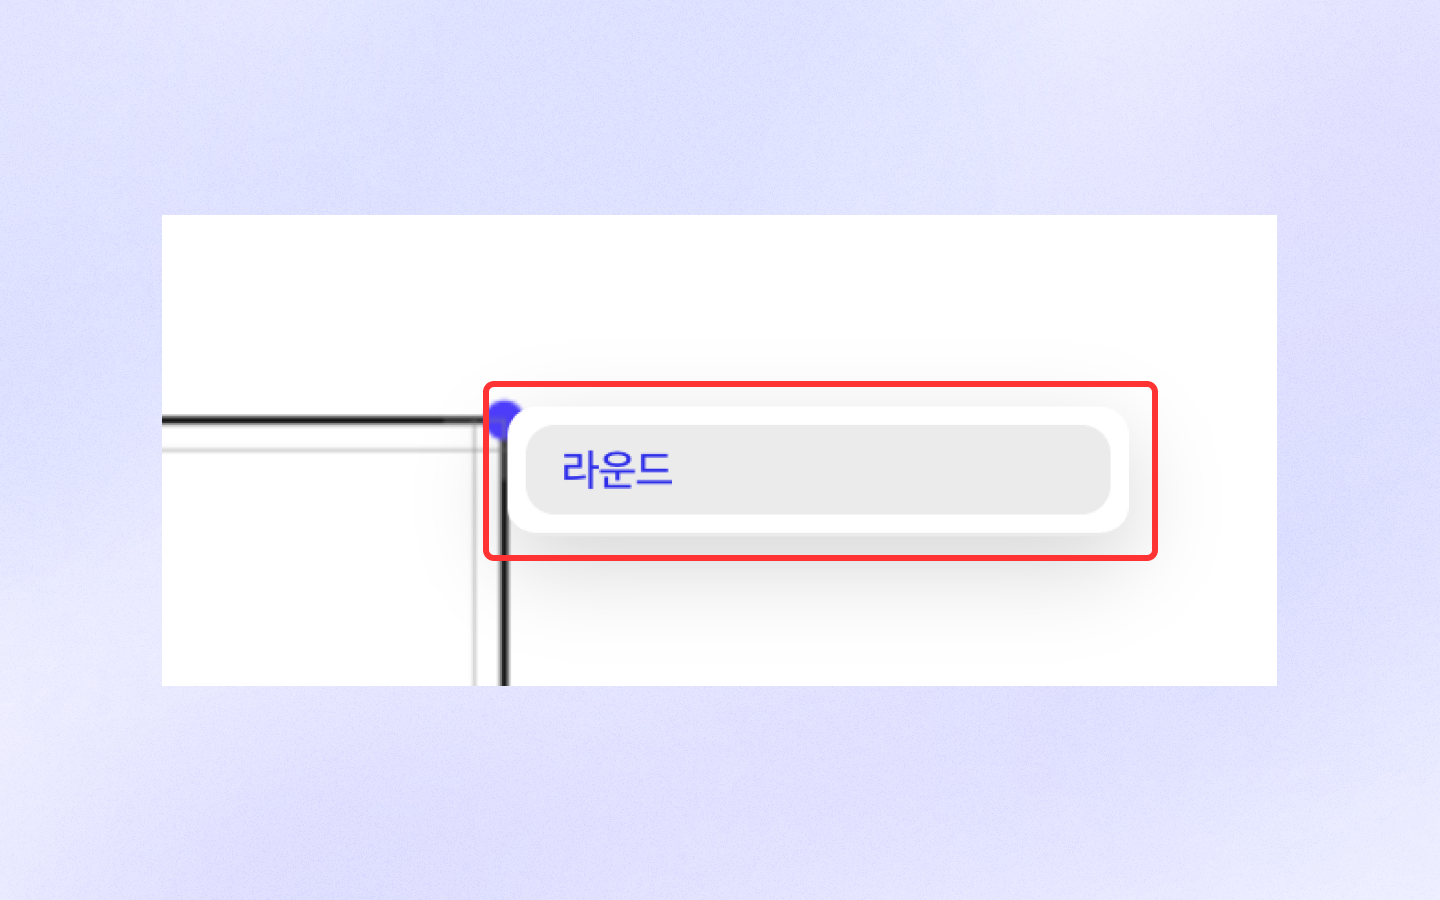
**Apply only to specific corners**
* Click the corner you want to round, then right-click.
* Click the Round button, then adjust the radius.
#### Step 4. Apply a level change
Level changes can be adjusted with +/- values.
* To raise the area: enter a + number
* To lower the area: enter a - number
*
```
```
{% hint style="info" %}
The default ceiling thickness is set to 300 mm. If you want to raise it higher, just modify the ceiling thickness.
{% endhint %}
#### Step 5. Install indirect lighting
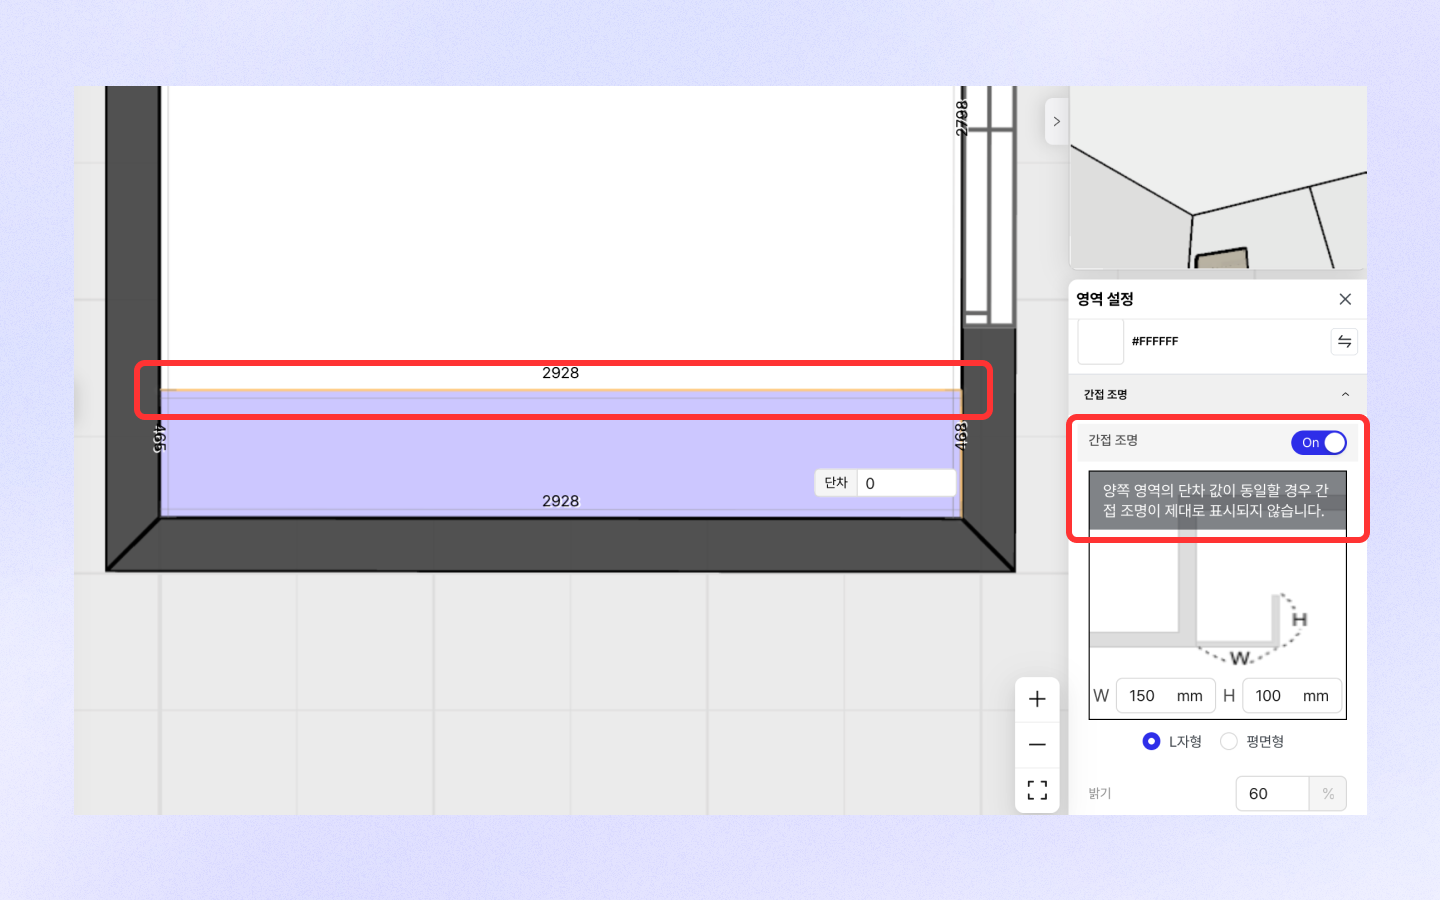
When you switch indirect lighting from \[Off → On], the settings below become active.
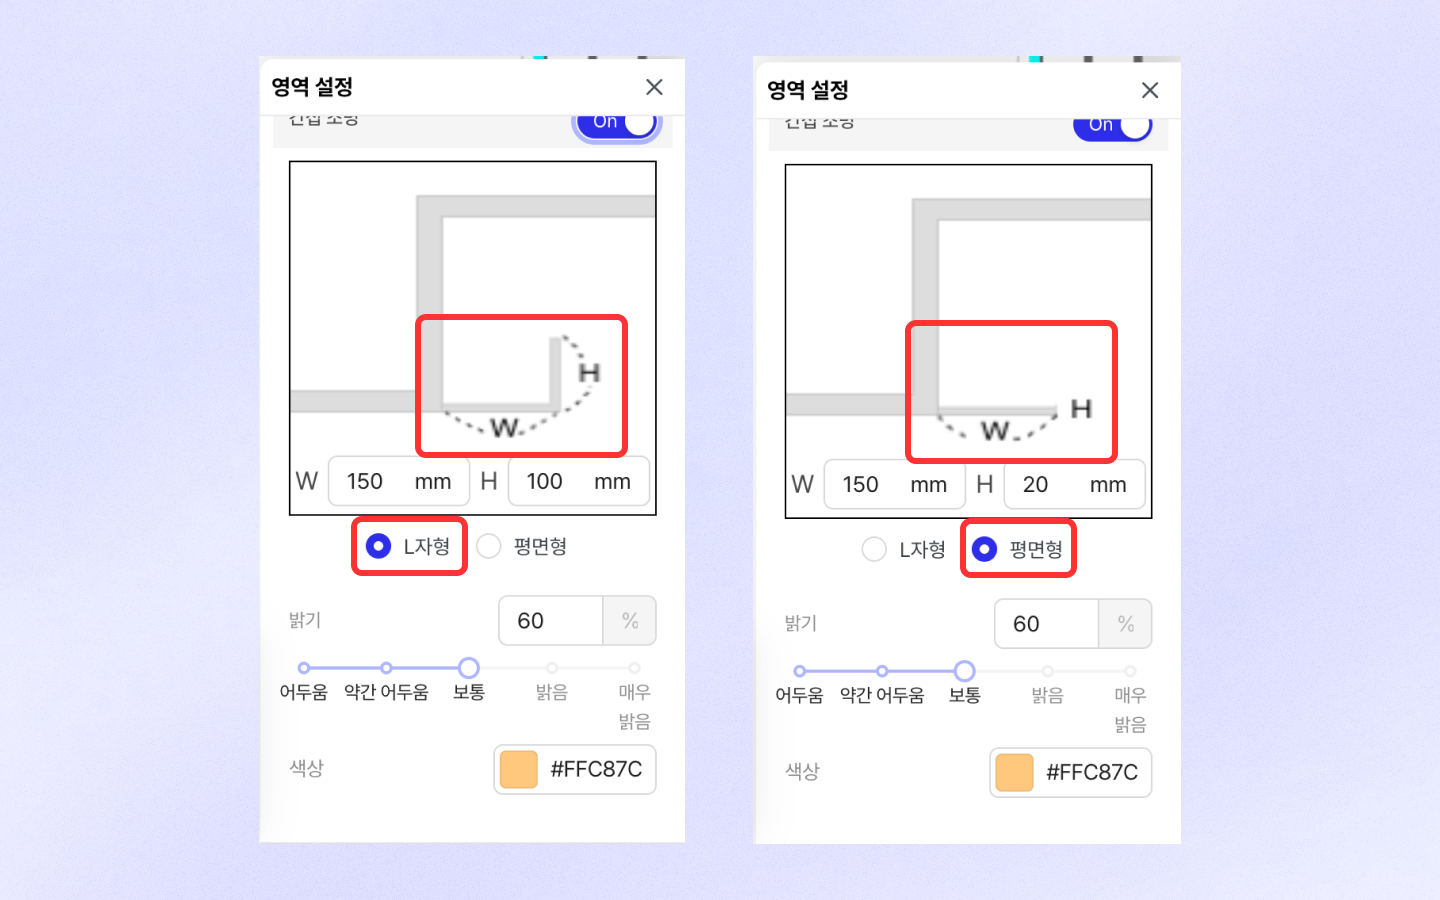
* **Indirect light box size**
* You can set the light box size. Enter the desired numbers in the W/H fields.
* **Indirect light box shape**
* Indirect lighting can be installed in two shapes:
* L-shape: a form that wraps around the indirect light once more, providing softer and more subtle lighting.
* Flat type: a form where indirect lighting is installed and the wing wall is slightly extended, allowing for a cleaner look.
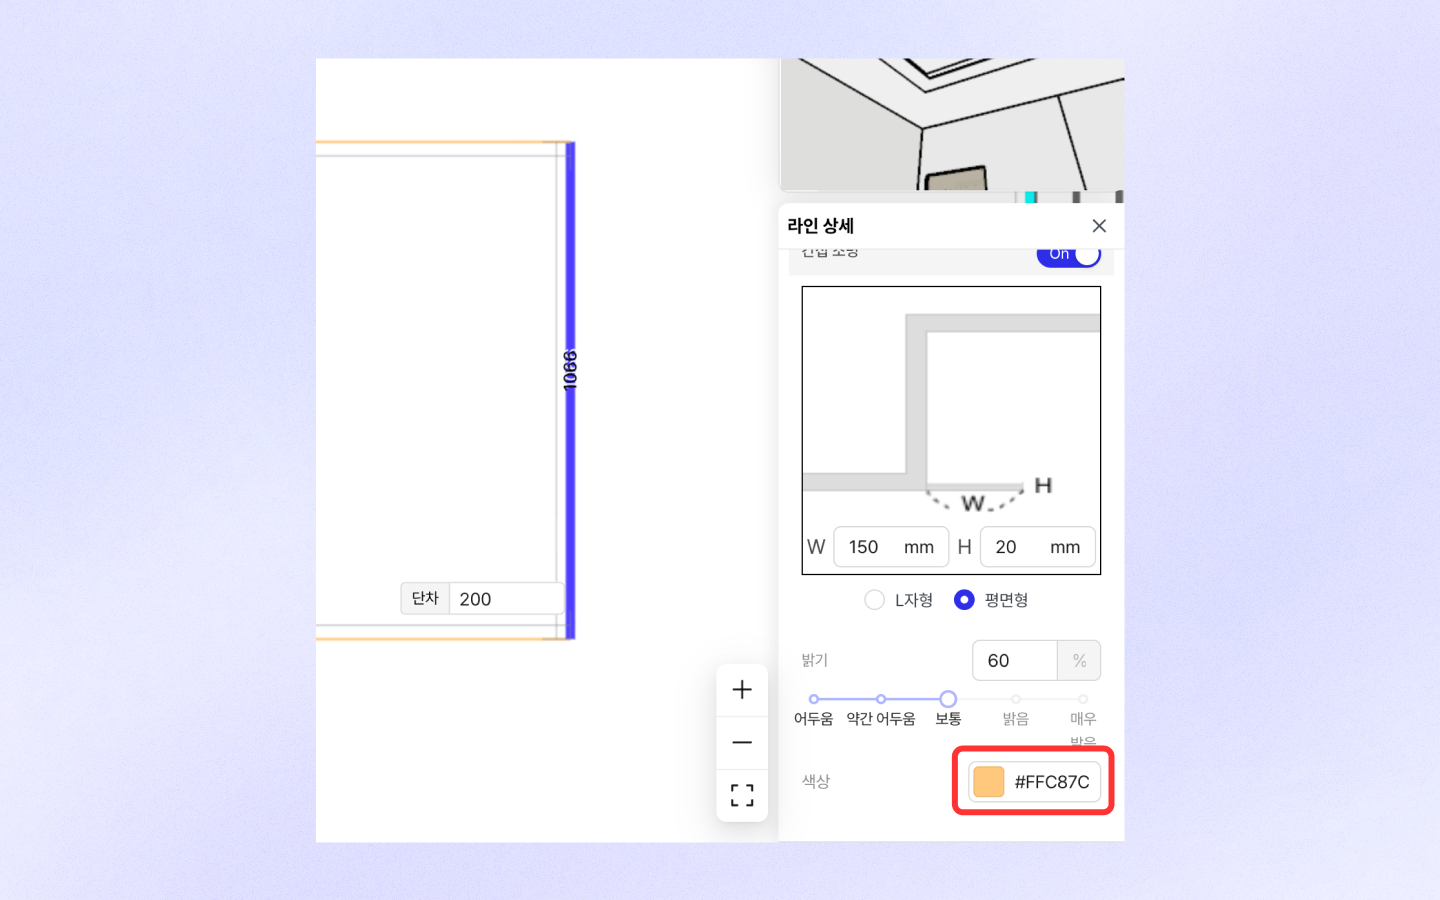
* **Indirect lighting brightness**
* You can adjust the brightness of indirect lighting as it appears in the rendering.\
Use it by adjusting appropriately according to ambient light or the amount of light coming in from outside.
* **Indirect lighting color**
* You can change the color of the indirect lighting to the color you want.
{% hint style="warning" %}
When indirect lighting is installed, the previously set area expands by the W size.\
Therefore, before installation, please set the area with the width in mind.
{% endhint %}
**Individual indirect lighting settings**
Indirect lighting can be configured individually by clicking each line.
* If you click inside an area, all lines included in that area will be selected.
* If you click an individual line, only the selected line will be activated.
In this way, selecting lines individually also allows for color changes and individual settings.
## Creating a Curtain Box
* Specify the curtain box area.
* Set the level change by entering numbers as much as you want for the area.
{% hint style="info" %}
**Want to add indirect lighting to a curtain box?**
Just like with a tray ceiling, set \[Area Settings → Level Change Settings] and then turn on indirect lighting.\
However, please note that lighting will not be installed in areas that touch the wall.
{% endhint %}
## Applying finishing materials
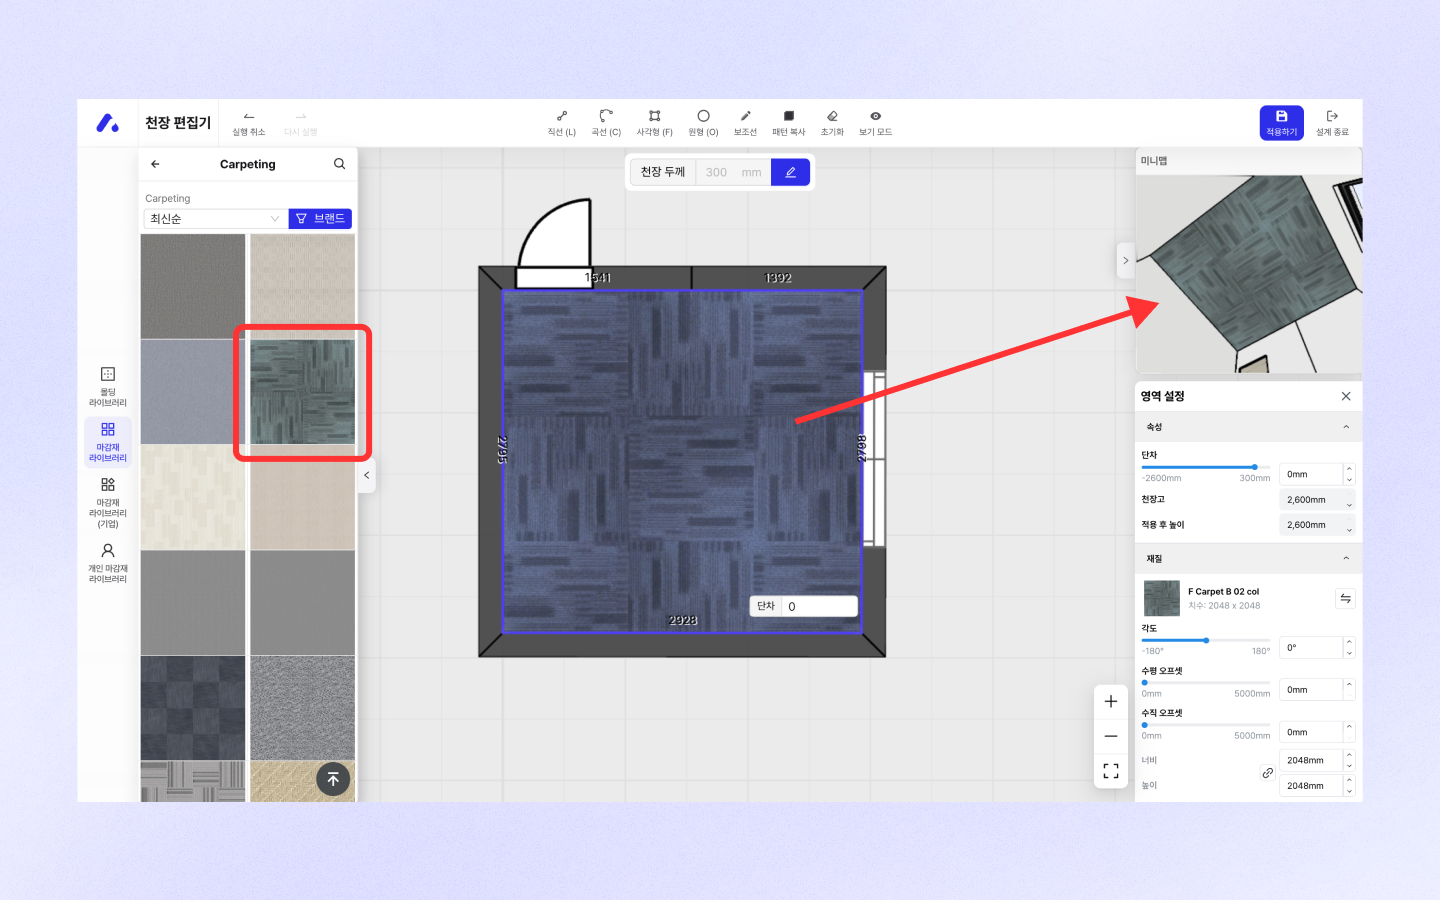
You can separate ceiling surfaces and apply different finishing materials to each one.
* Use the area drawing tool to divide the areas you want to apply.
* Select the desired material from the finishing material library in the left panel and apply it.
Try making your space more unique with a variety of finishing materials!
## Molding Library
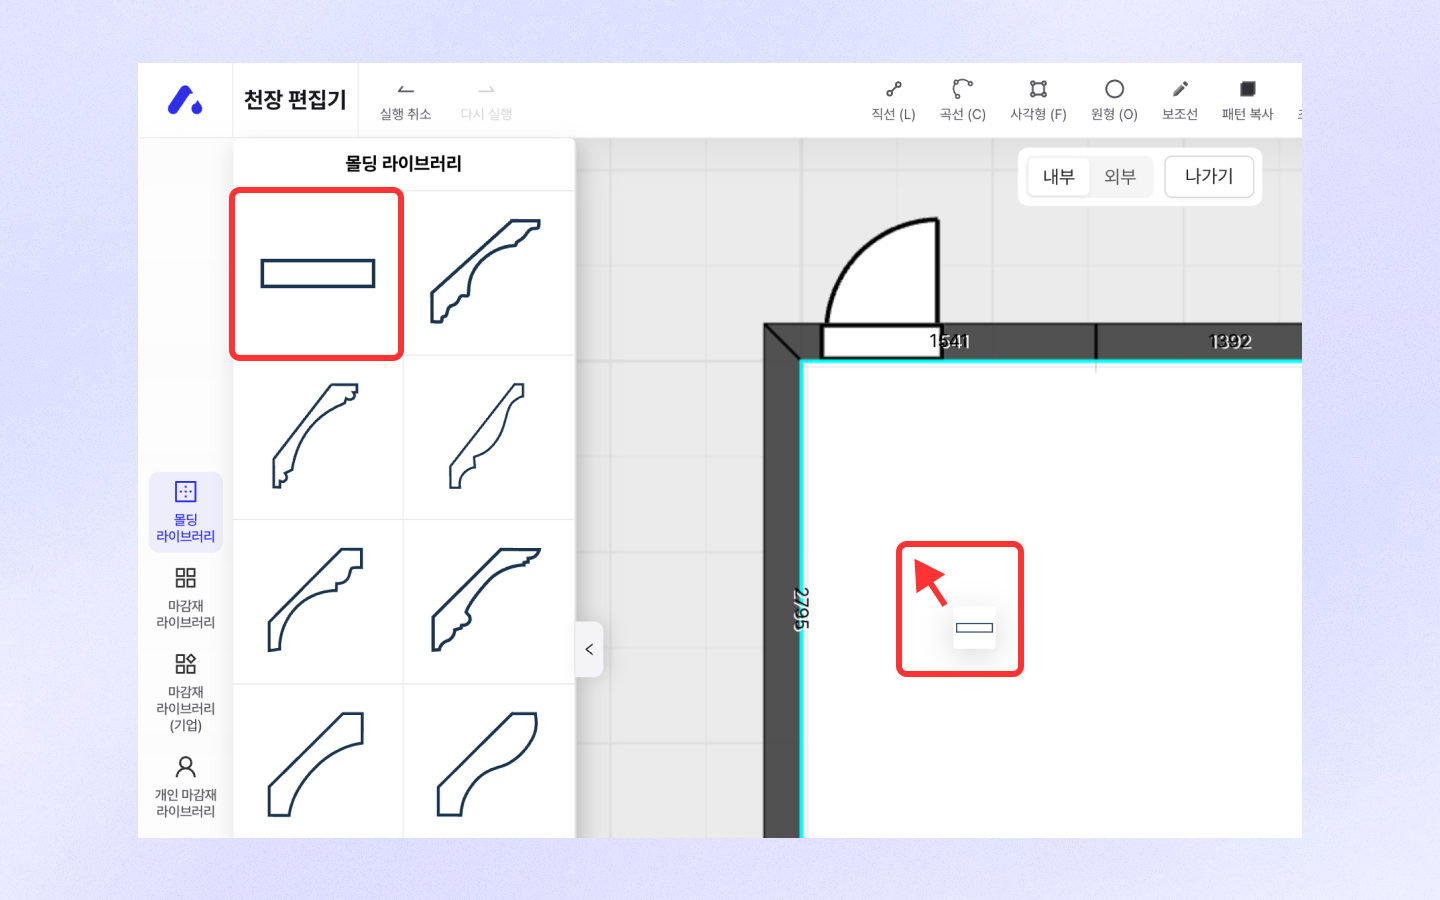
You can add stylish accents to your ceiling using the molding library.
* Click the molding shape you want in the molding library.
* If you click the wall to apply molding in the floor plan, the molding will be applied in bulk along the selected wall.
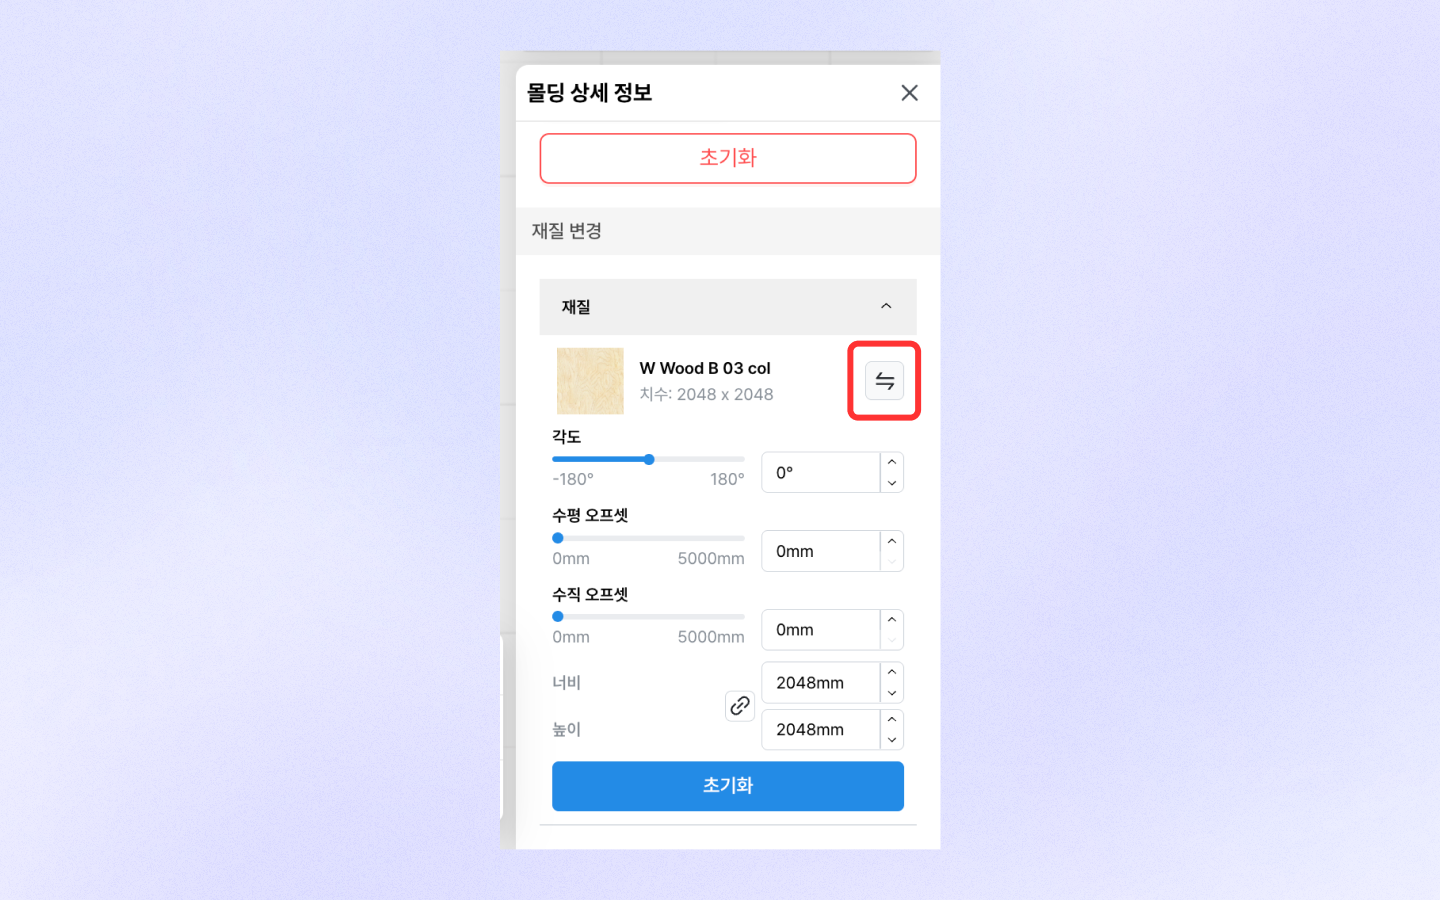
**Changing molding material**
By default, the molding finishing material is wood.
* Click the material change icon.
* You can change it by selecting the desired material from the library on the left.
Try changing the atmosphere of the space by combining different molding shapes and materials!
## Frequently Asked Questions
#### Can I move the position of an area drawn on the ceiling?
Changing the position is currently difficult. Please make sure to set the area accurately when drawing it the first time!
#### Is there no floor baseboard feature?
It's still in preparation.\
We're working hard to make it possible to apply level changes and baseboards to floors, just like in the Ceiling Editor.\
Please look forward to Archisketch's continued improvements!
---
# Agent Instructions
This documentation is published with GitBook. GitBook is the documentation platform designed so that both humans and AI agents can read, navigate, and reason over technical content effectively. Learn more at gitbook.com.
## Querying This Documentation
If you need additional information that is not directly available in this page, you can query the documentation by asking a question.
Perform an HTTP GET request on the following URL with the `ask` and `goal` query parameters:
```
GET https://docs.archisketch.com/guide/user-en/advanced-design-features/ceiling-editor.md?ask=&goal=
```
`ask` is the immediate question: it should be specific, self-contained, and written in natural language.
`goal` is what the user is ultimately trying to achieve, the reason they need the answer. Sharing it helps GitBook give you a better, more relevant answer. A goal is most helpful when it describes the outcome the user wants rather than restating the question. For example, with `ask=how do I create an API token`, a goal like `automate deployments from our CI pipeline` lets GitBook tailor the answer to that use case.
The response will contain a direct answer to the question and relevant excerpts and sources from the documentation.
Use this mechanism when the answer is not explicitly present in the current page, you need clarification or additional context, or you want to retrieve related documentation sections.