> For the complete documentation index, see [llms.txt](https://docs.archisketch.com/llms.txt). Markdown versions of documentation pages are available by appending `.md` to page URLs; this page is available as [Markdown](https://docs.archisketch.com/guide/user-en/advanced-design-features/architecture-editor.md).
# Architecture/material editor
What is the Architecture/Materials Editor?
## What is the Architecture/Materials Editor?
The Architecture/Materials Editor is a space where you can model simple structures in 3D.\
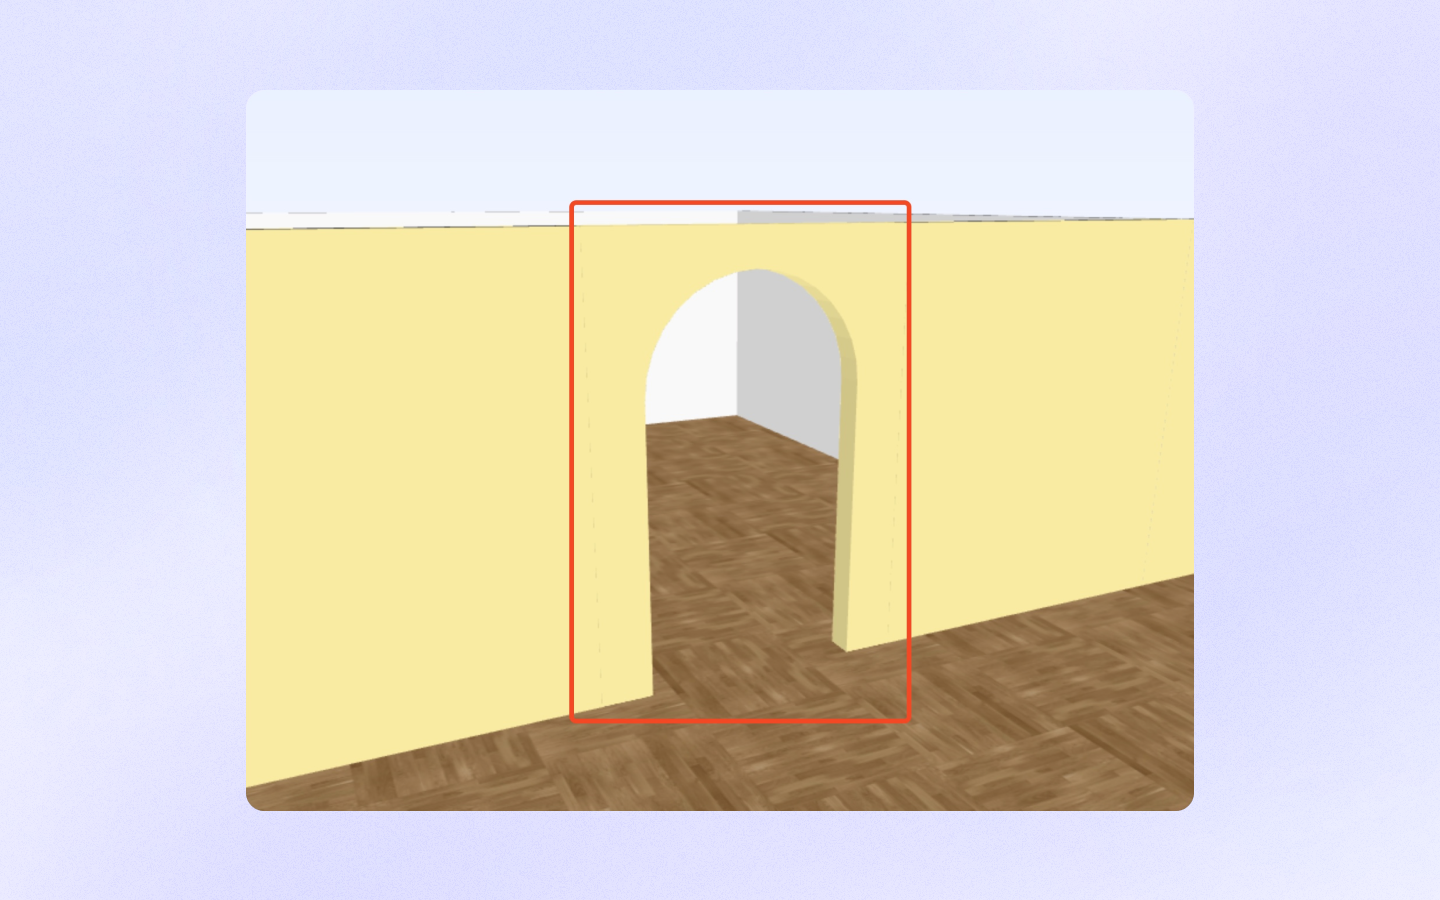
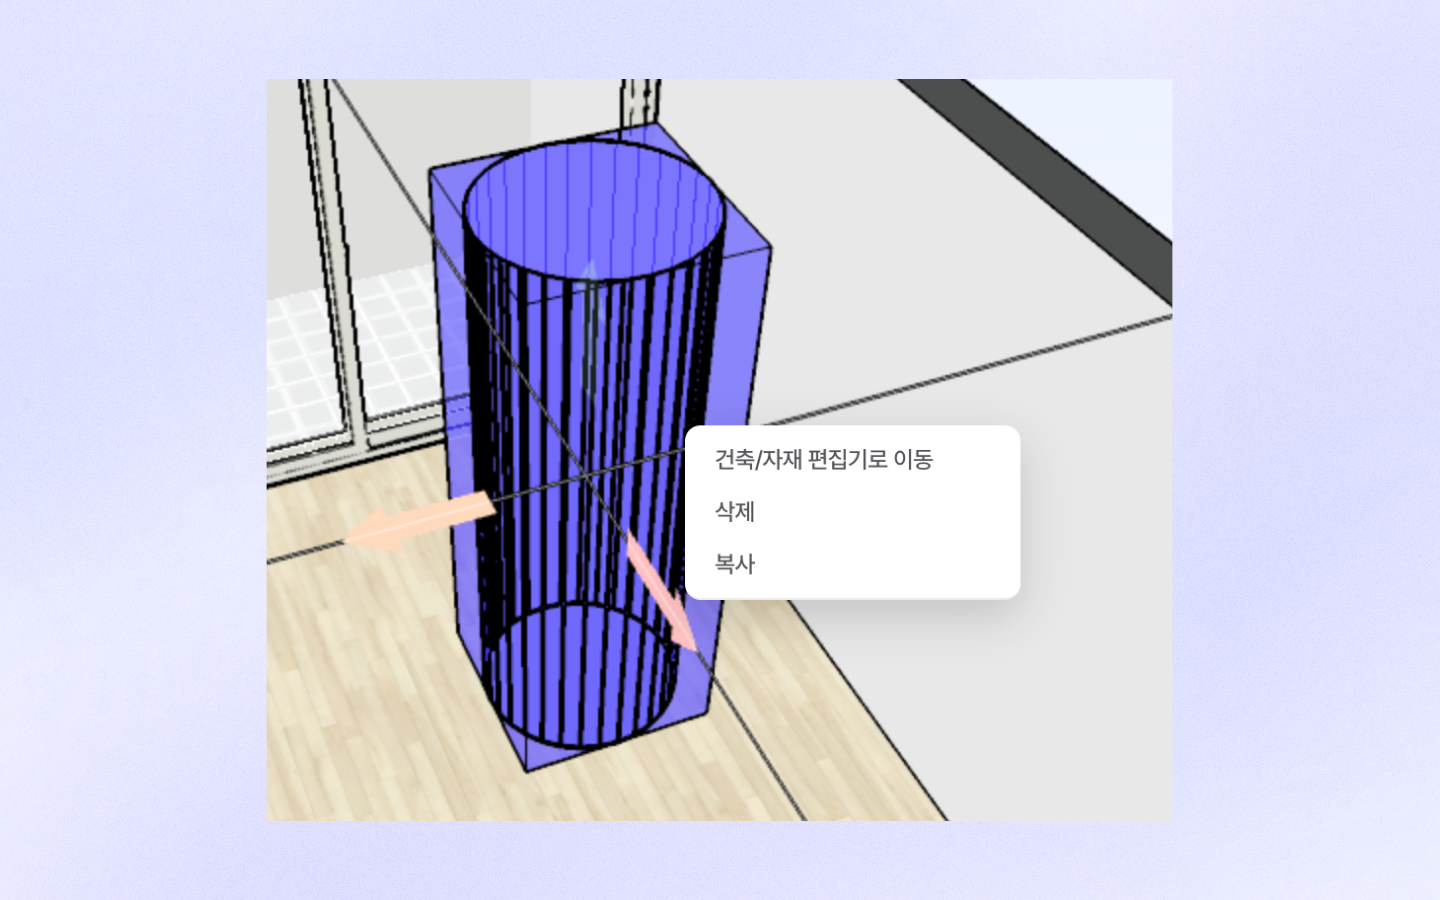
You can create box-shaped forms, cylindrical pillars, tables, arched walls, and more. Rather than using only furniture library products, you can directly create the shapes you want and freely design the space.
This feature is available in Beta, and more improvements are planned in the future.

## Enter the Architecture/Materials Editor
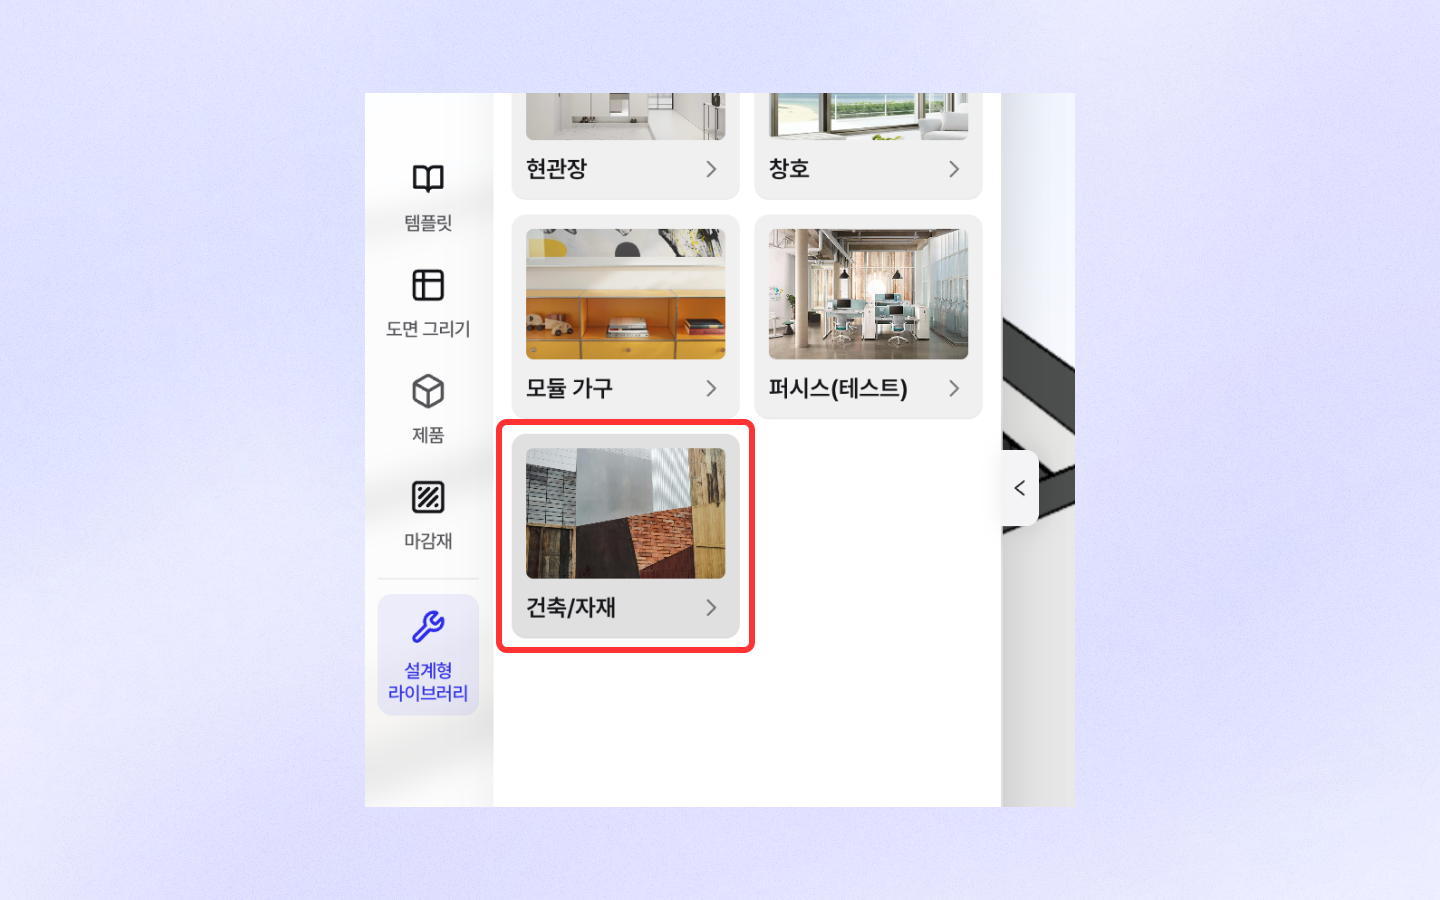
Please enter via \[Design Library → Architecture/Materials Editor] in the left panel.
## Draw Area
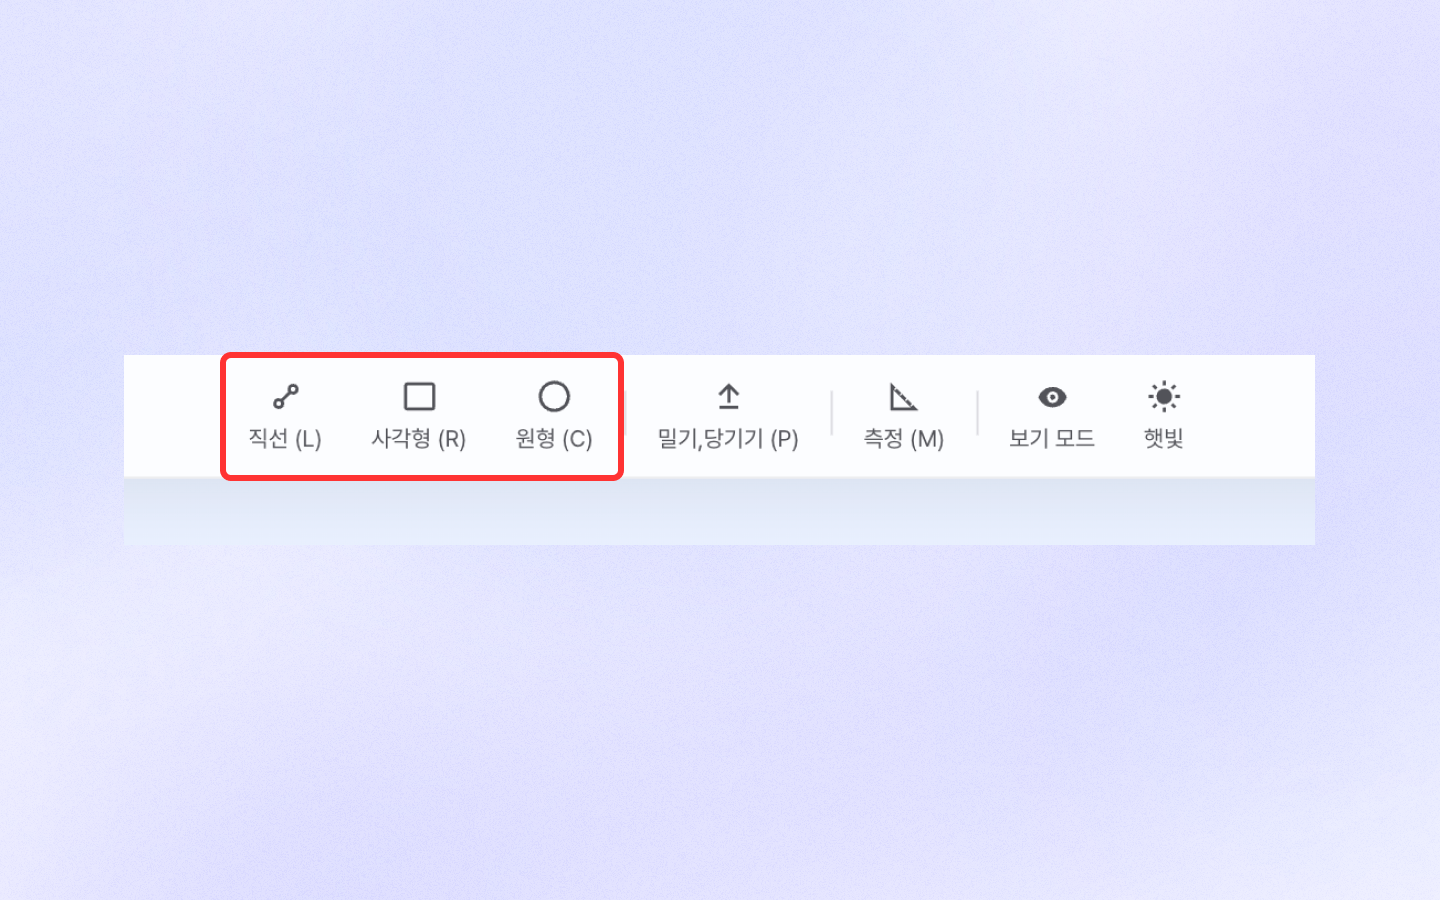
You can use the Draw Area tool to draw basic shapes. The supported shapes are as follows.
* Line (L)
* Rectangle (R)
* Circle (C)
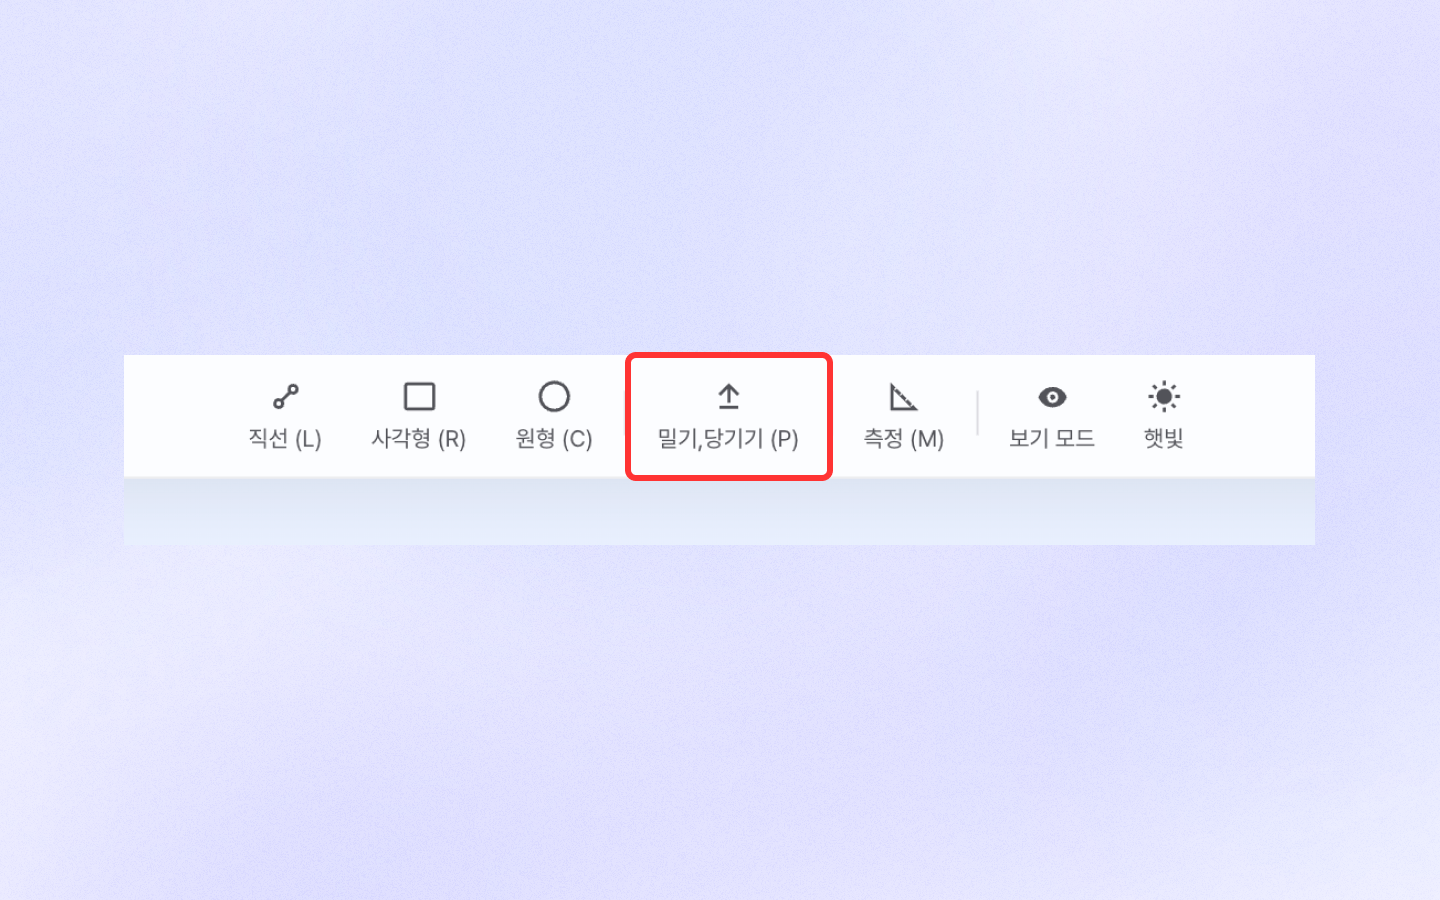
## Push/Pull (P)
You can use the Push/Pull function to turn a face drawn with the Draw Area tool from a flat shape into a 3D shape.
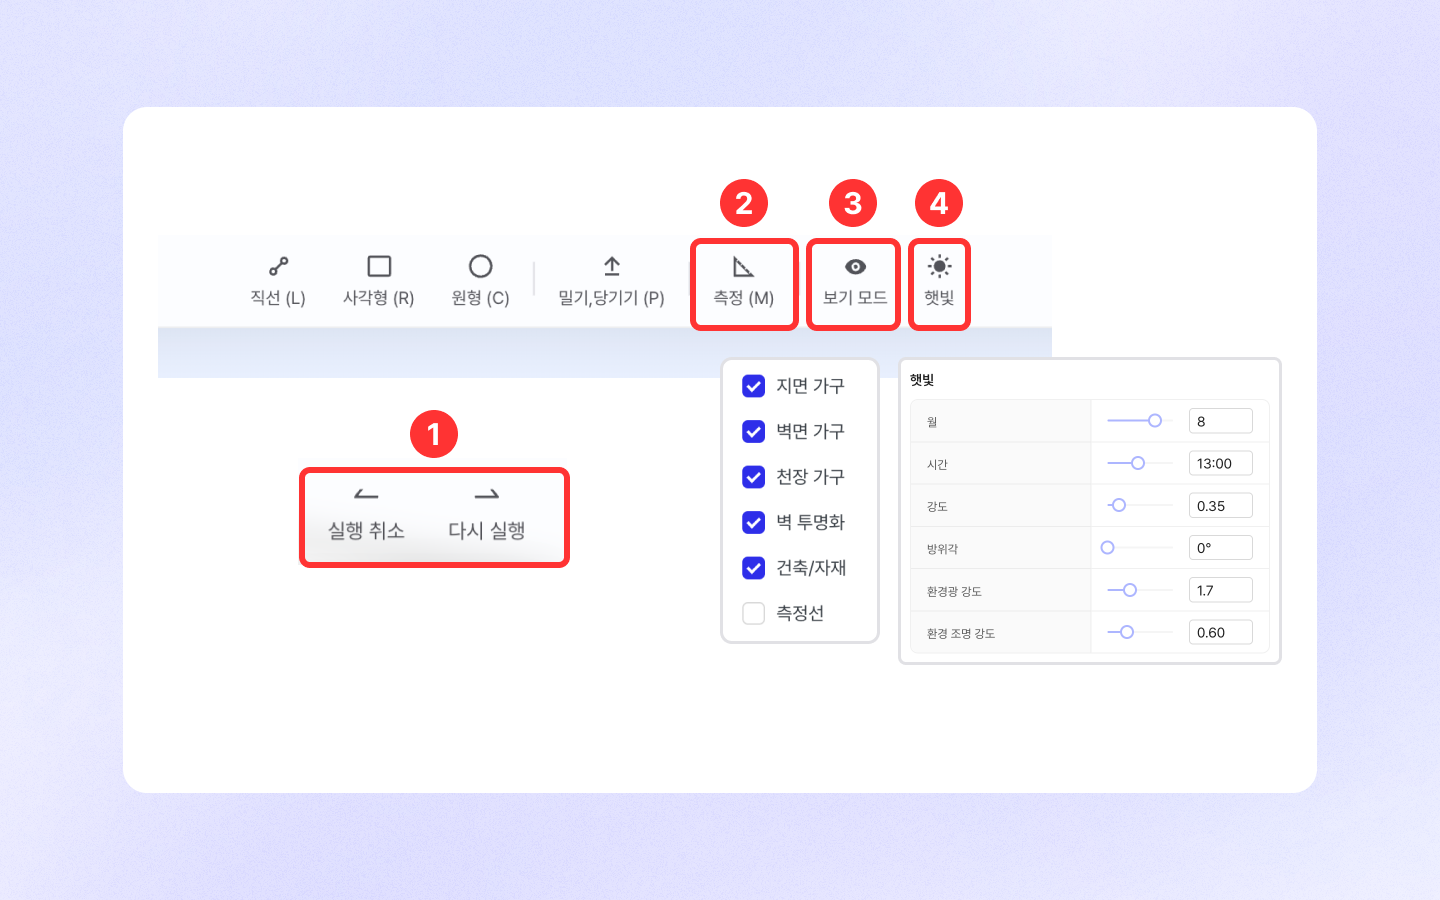
## Other Features
* Undo / Redo: You can undo or redo your work history.
* Measure: You can measure dimensions between structures and furniture in 3D mode.
* View Mode: You can turn furniture, walls, and measurement lines on/off.
* Sunlight: When you turn on the sunlight feature, you can see the space more realistically.
## Edit Structure
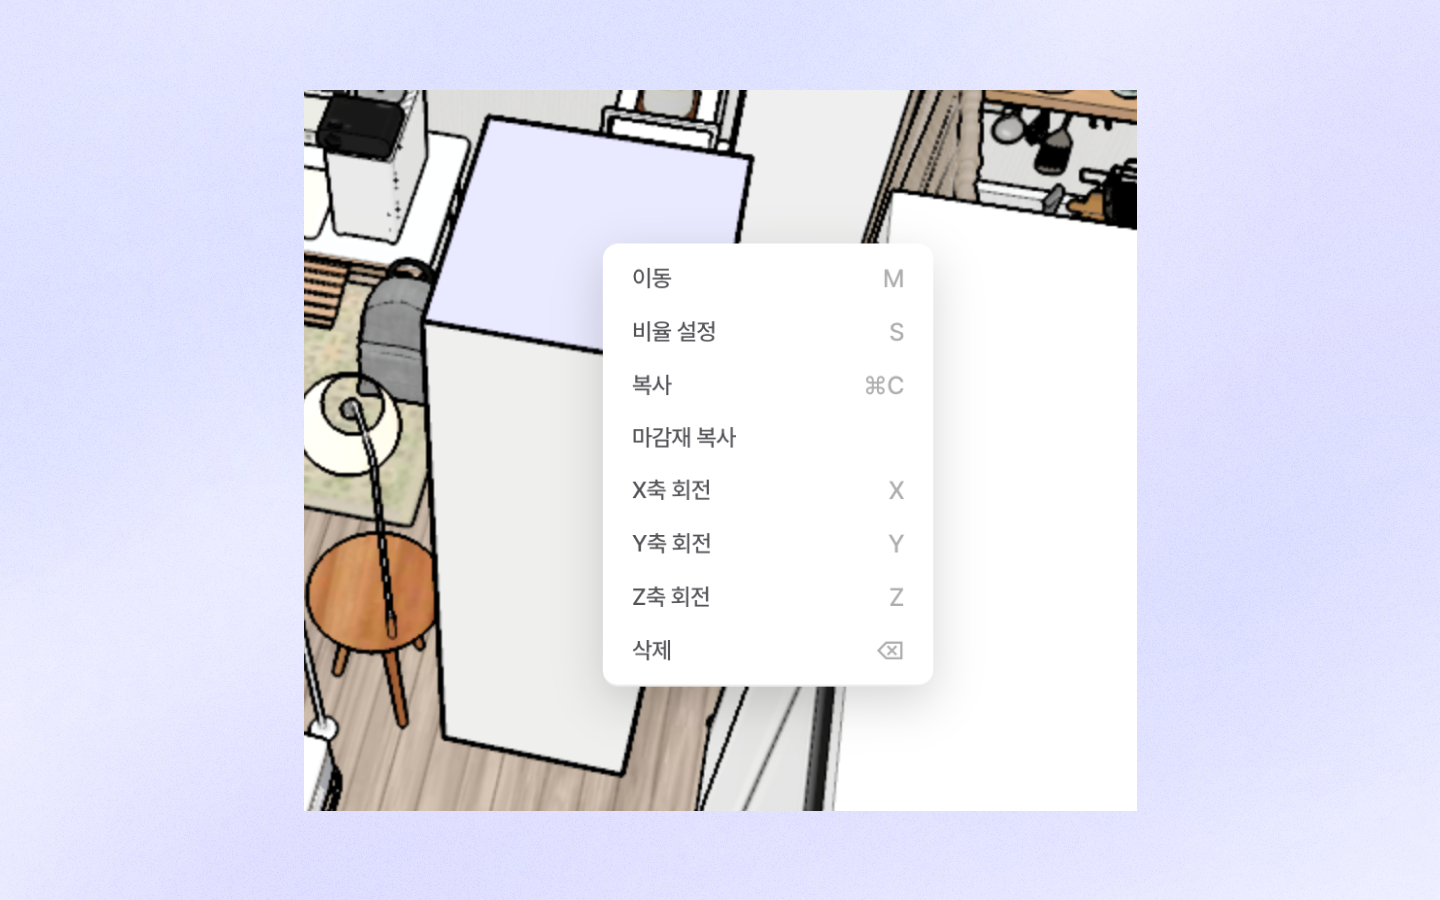
Double-click the structure you created to display the toolbar.
* Move: When Move mode is activated, a three-color axis is displayed, allowing you to move the structure along the arrows or freely.
* Scale Setting: While Scale Setting mode is selected, moving the mouse closer to the structure decreases the scale, and moving it farther away increases the scale.
* Copy: You can copy the selected structure.
* Rotate: You can rotate the structure based on the X, Y, and Z axes.
* Paving All: When this mode is active and you click a finishing material, it will be applied to all surfaces of the structure at once.
* Delete: You can delete the selected structure.
## Applying finishing materials
There are three ways to apply finishing materials to a structure:
* **Apply from the left library**
* Select the finishing material you want from the left finishing-material library panel, then drag and drop it onto the desired face.
* **Copy Finishing Material**
* Click the face with the applied finishing material, then select the \[Copy Finishing Material] icon in the toolbar. After that, you can paste it onto the face you want to copy it to.
* **Use the Paving All feature**
* After double-clicking the structure, activate the \[Paving All] feature in the toolbar to apply finishing materials to all faces of the structure at once.
## Save and Exit
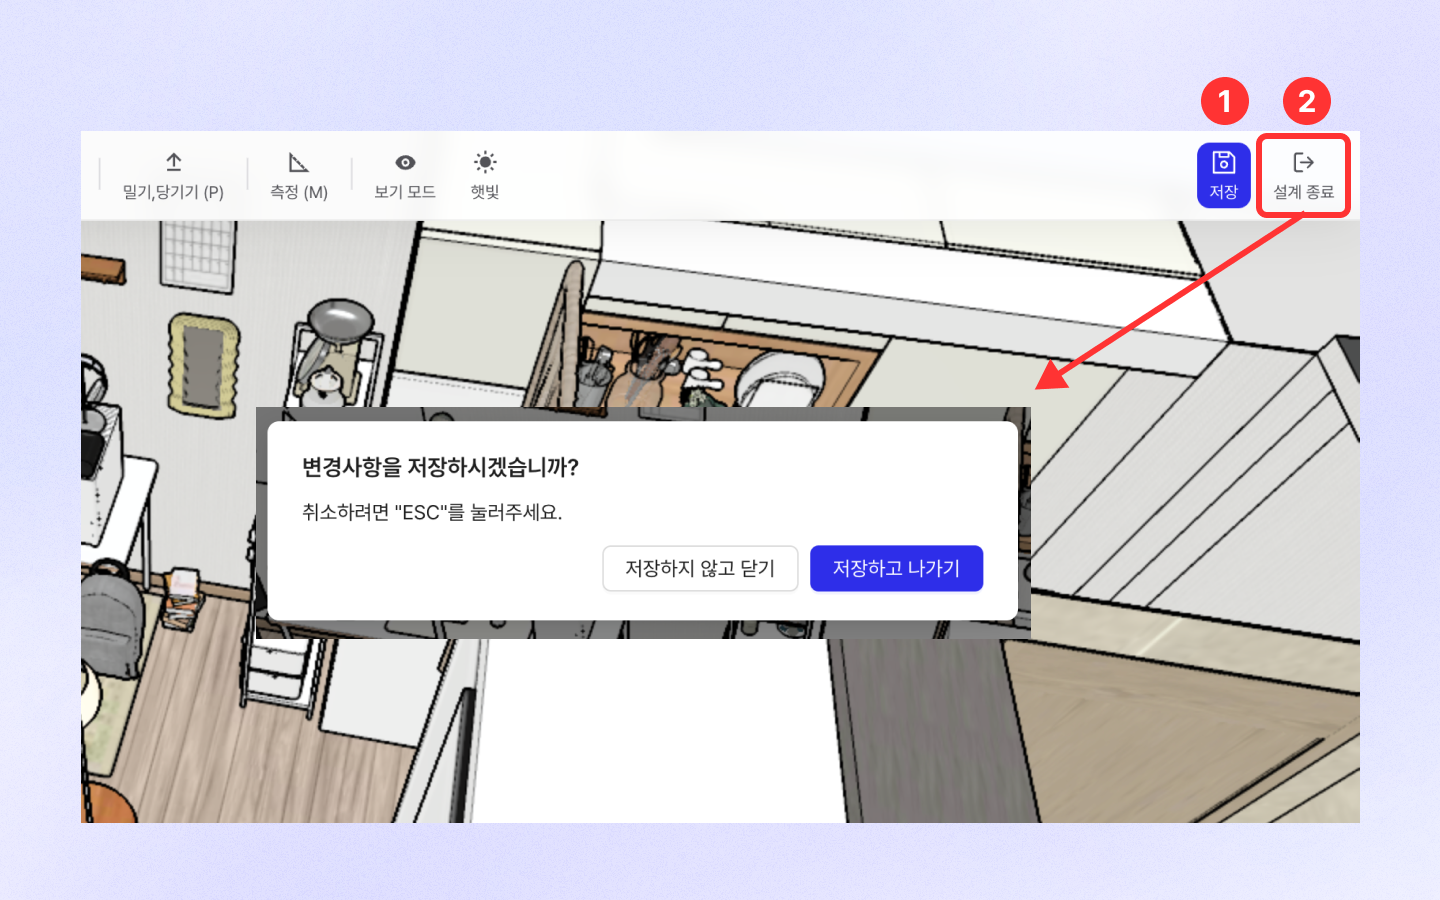
When you are done working in the Architecture/Materials Editor, save your work and return to the editor.
* **Save**
* You can save your work temporarily.
* **Exit**
* Two options are provided: \[Close Without Saving] or \[Save and Exit].
{% hint style="warning" %}
You must save for it to be reflected in the editor, so be sure to save!
{% endhint %}
## Usage Example
### Drawing an Arched Wall
* Use the Rectangle (F) tool to draw walls large enough to fill the broken wall area.
* Create the desired opening shape by combining a rectangle and a circle.
* Click the face you want to delete with the selection tool, then press the Backspace or Delete key to remove the face.
* Use the Push/Pull (P) tool to set the wall thickness.
* You can set the exact thickness by entering a number and pressing Enter.
* Insert the same finishing material so that the materials connect naturally.
* Using the Paving All feature makes it easy to apply finishing materials all at once.
* Double-click the structure.
* Click \[Paving All] in the toolbar.
* When you select a finishing material, it will be applied to the entire structure at once.
* After saving and exiting, you can check the completed arched wall in the Architecture/Materials Editor.
## Edit in the Editor
Structures created in the Architecture/Materials Editor cannot be edited directly in the editor.
* Features supported in the editor: Move, Copy, Delete
* Tasks such as rotating or changing finishing materials are not supported in the editor.
To edit the structure, click the \[Architecture/Materials Editor] button again and make your changes in the editor.
## Frequently Asked Questions
#### Can’t I make holes?
It is not possible to make holes with the Push/Pull tool when the object has thickness.\
Instead, create a face with a hole from the start, then use Push/Pull (P) to give it thickness.
#### Can’t I adjust the number of segments in a circle?
Currently, the feature to adjust the number of circle segments is not supported.
#### Errors happen often.
The Architecture/Materials Editor is currently provided as a Beta version.\
Therefore, if you create many structures or large-sized ones, the system may become heavy and errors may occur.\
Please keep this in mind and we recommend using it for simple modeling tasks.\
It will be improved through future updates 🙏
---
# Agent Instructions
This documentation is published with GitBook. GitBook is the documentation platform designed so that both humans and AI agents can read, navigate, and reason over technical content effectively. Learn more at gitbook.com.
## Querying This Documentation
If you need additional information that is not directly available in this page, you can query the documentation by asking a question.
Perform an HTTP GET request on the following URL with the `ask` and `goal` query parameters:
```
GET https://docs.archisketch.com/guide/user-en/advanced-design-features/architecture-editor.md?ask=&goal=
```
`ask` is the immediate question: it should be specific, self-contained, and written in natural language.
`goal` is what the user is ultimately trying to achieve, the reason they need the answer. Sharing it helps GitBook give you a better, more relevant answer. A goal is most helpful when it describes the outcome the user wants rather than restating the question. For example, with `ask=how do I create an API token`, a goal like `automate deployments from our CI pipeline` lets GitBook tailor the answer to that use case.
The response will contain a direct answer to the question and relevant excerpts and sources from the documentation.
Use this mechanism when the answer is not explicitly present in the current page, you need clarification or additional context, or you want to retrieve related documentation sections.